Additional Use Cases for Tables
Table Search
The Table component comes with a Search field enabled by default. Your search query is evaluated across all columns to see if we can find a value that contains the searched text.
You can change the following configurations of the search bar:
- Enable / Disable by default
- Set a default search text
NOTE: The Table search function will only search through the current page's results when using server side pagination.
Conditonally format cells
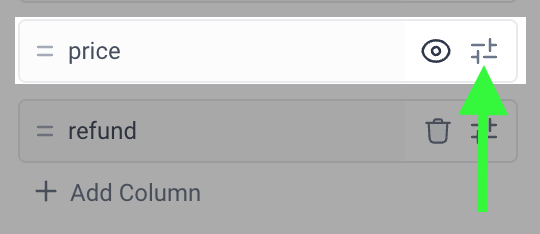
In the Properties panel, navigate to the column you'd like to format and click the edit icon.
Scroll down to the Cell Background property and click the <> Code icon.
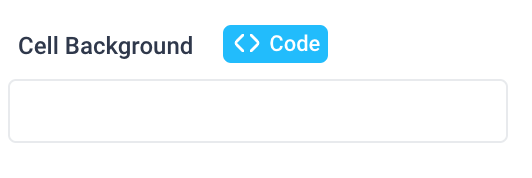
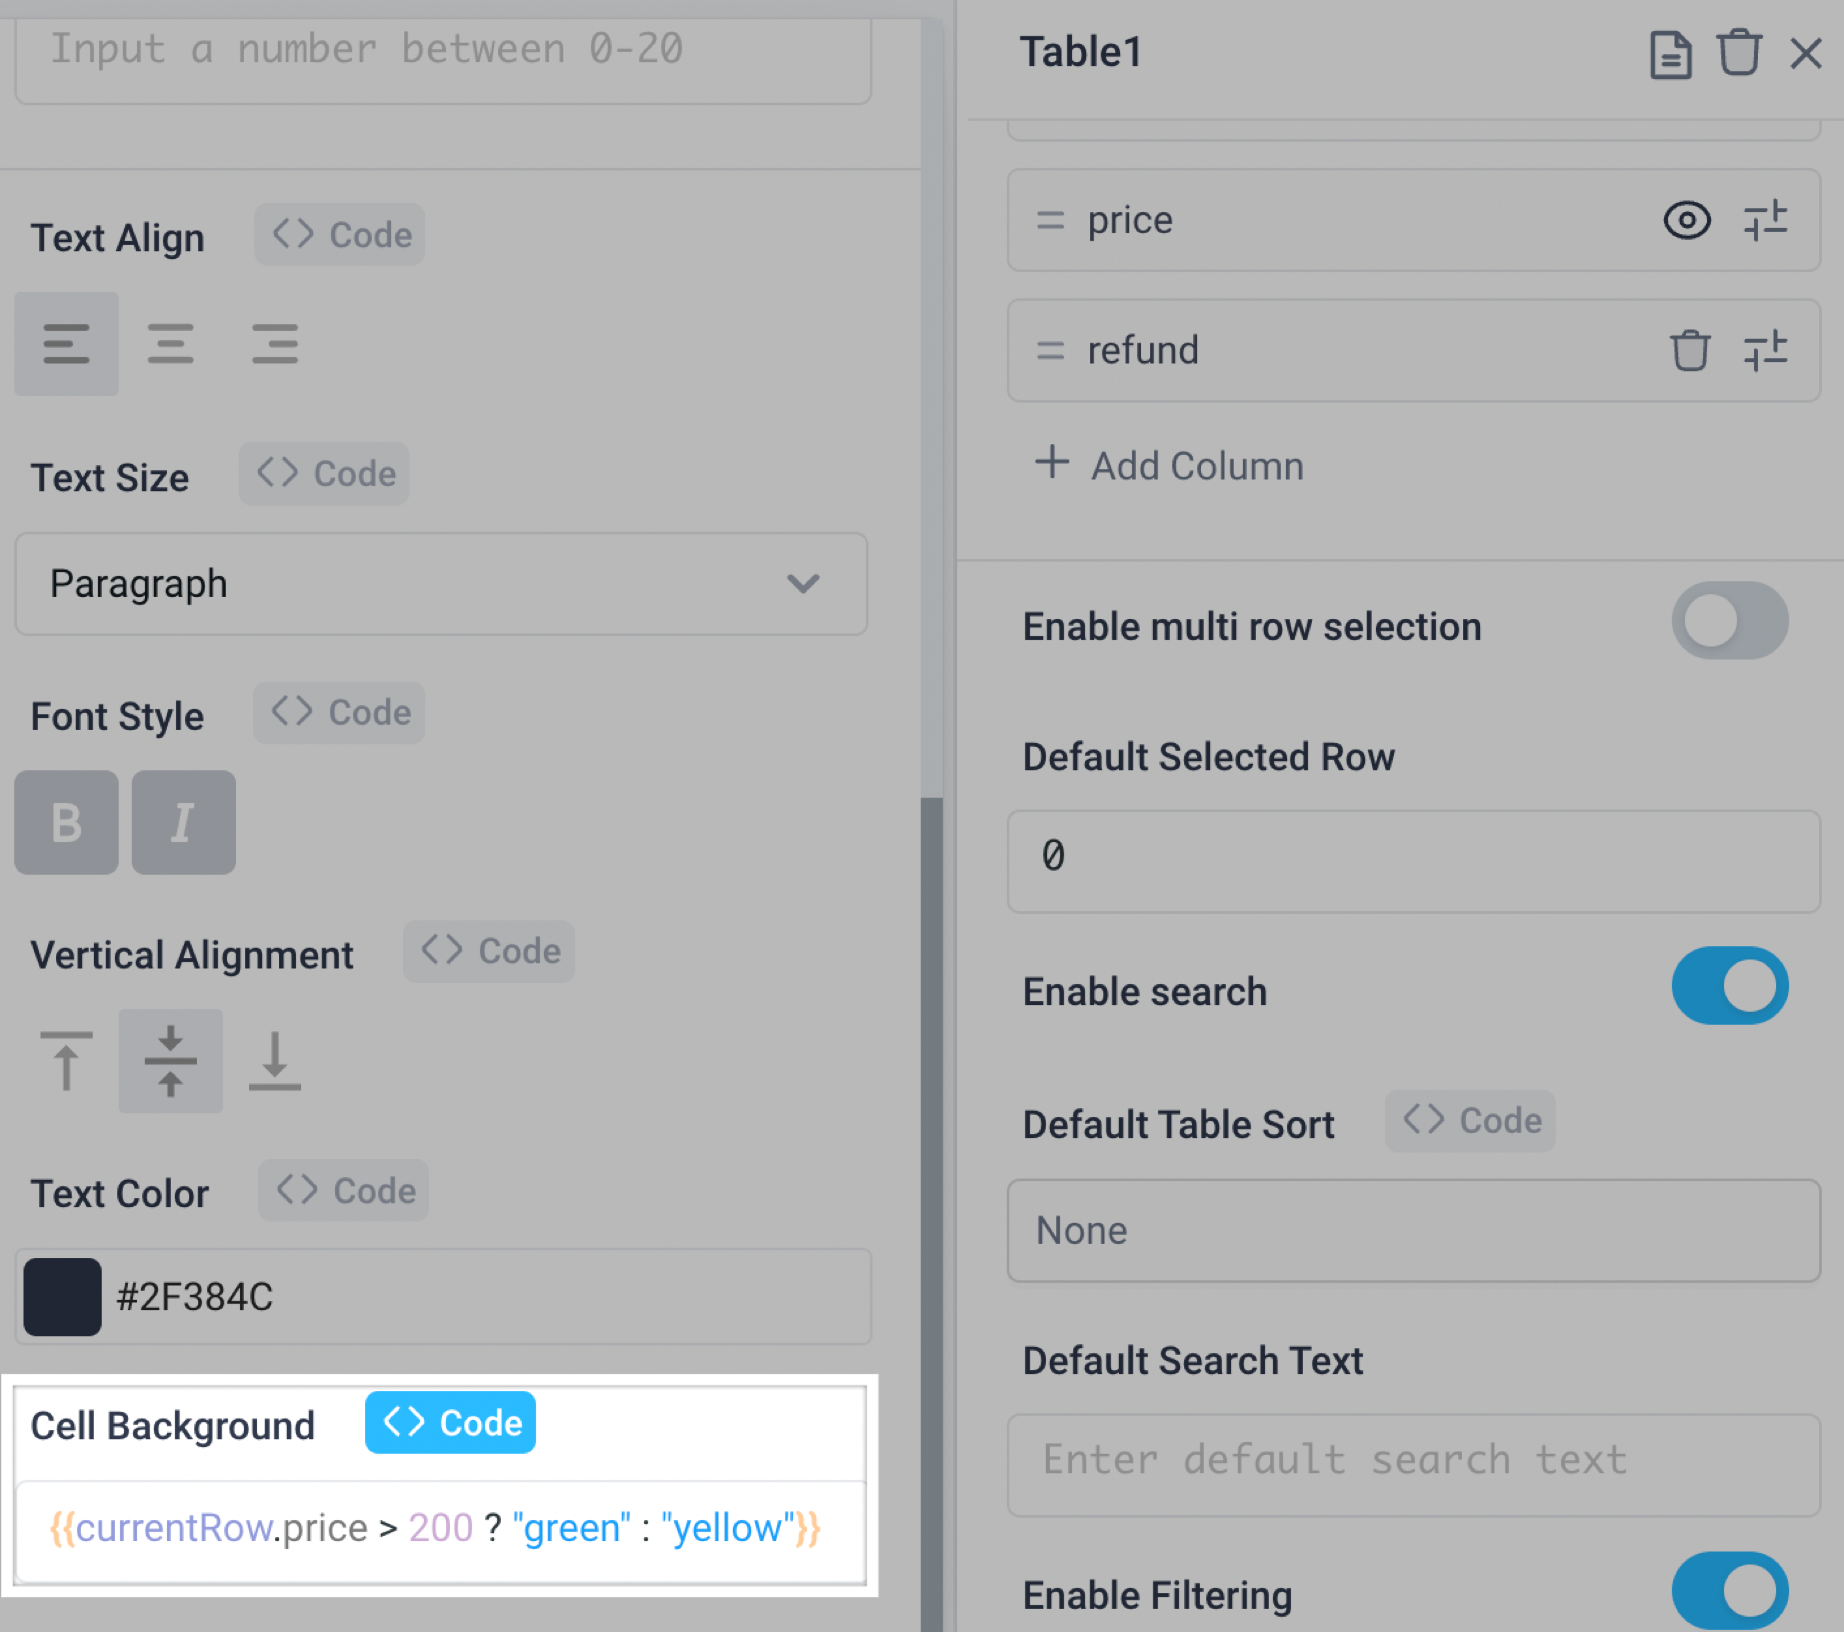
In Cell Background reference the Computed Value in a JavaScript conditional operator to format the background color based on the value of the cell. For example, {{currentRow.price > 200 ? "green" : "yellow"}}
Filter Columns
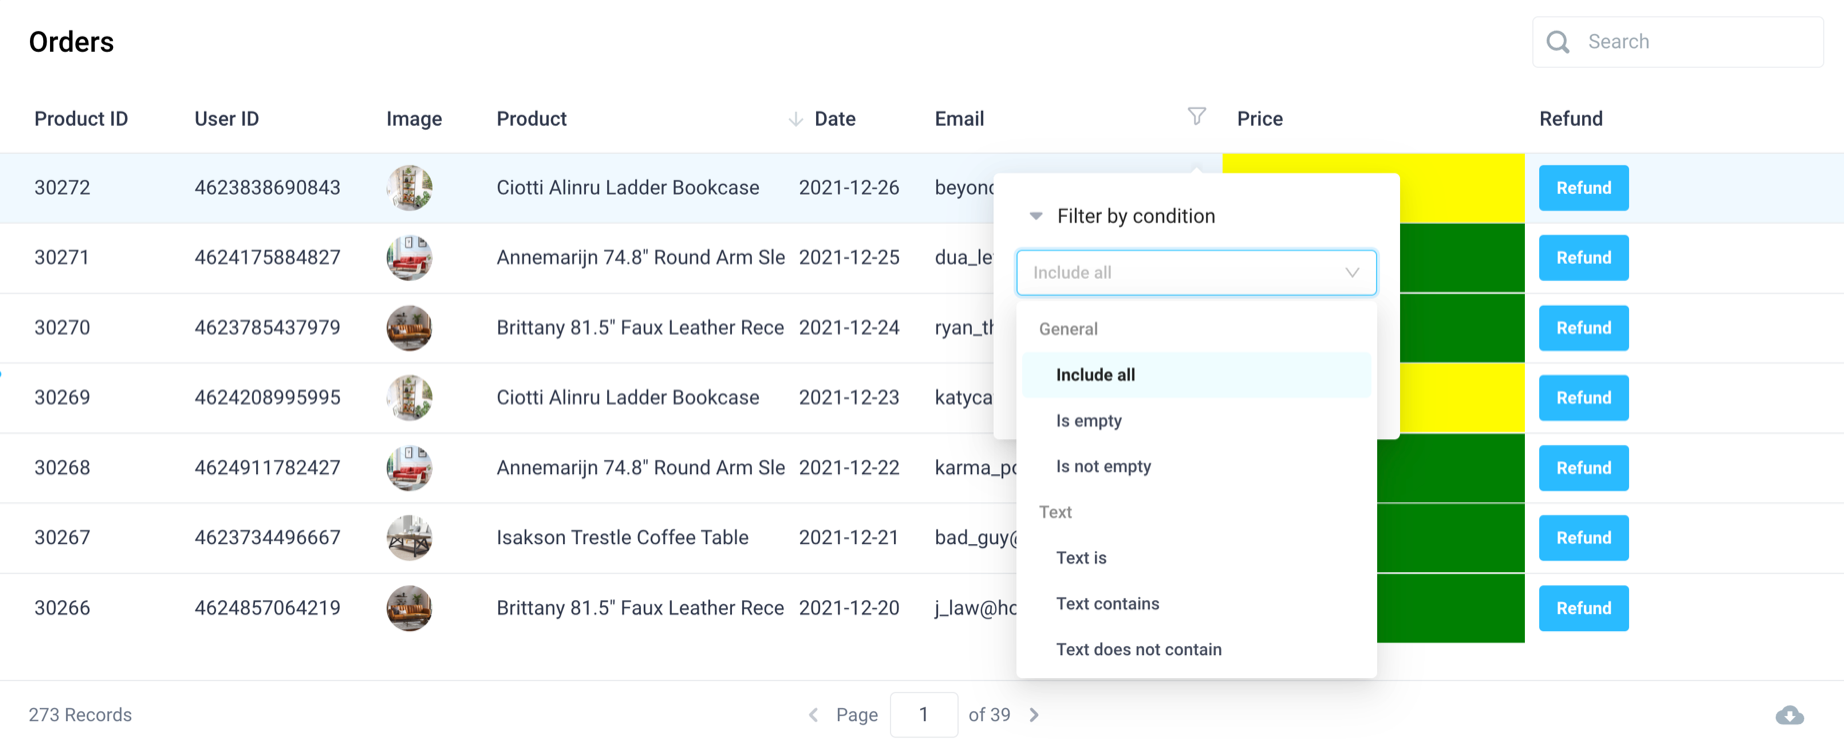
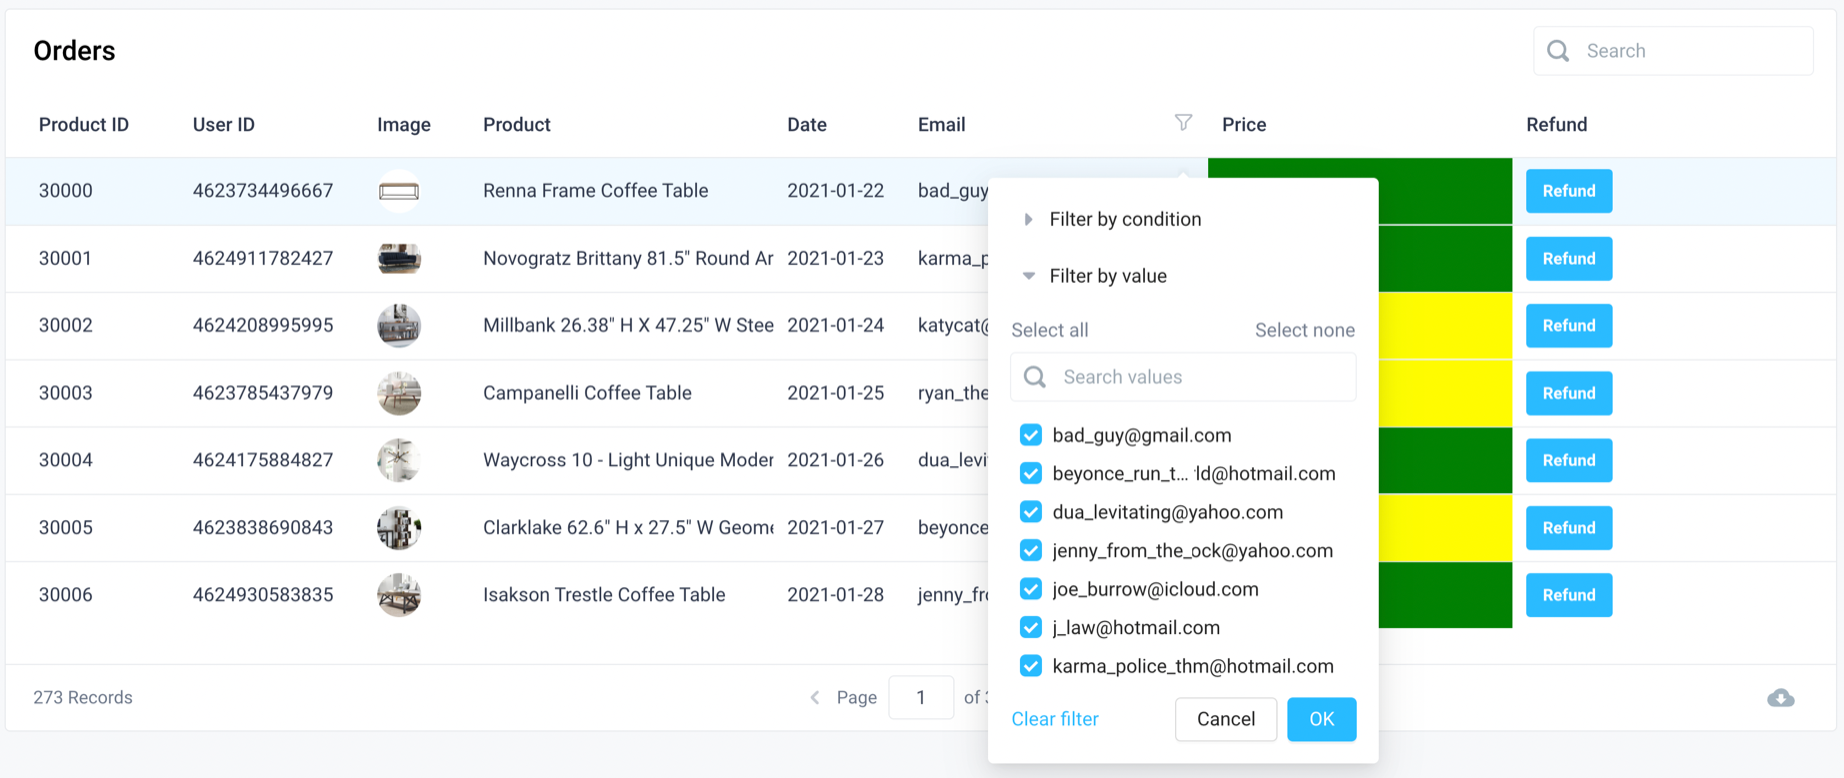
On any Table, you can click on the filter icon to open up the filter dropdown. There are two options, "Filter by condition" or "Filter by value".
Table filters are not available if using server side pagination.
Filter by condition:
Filter by value:
Default Table Sort
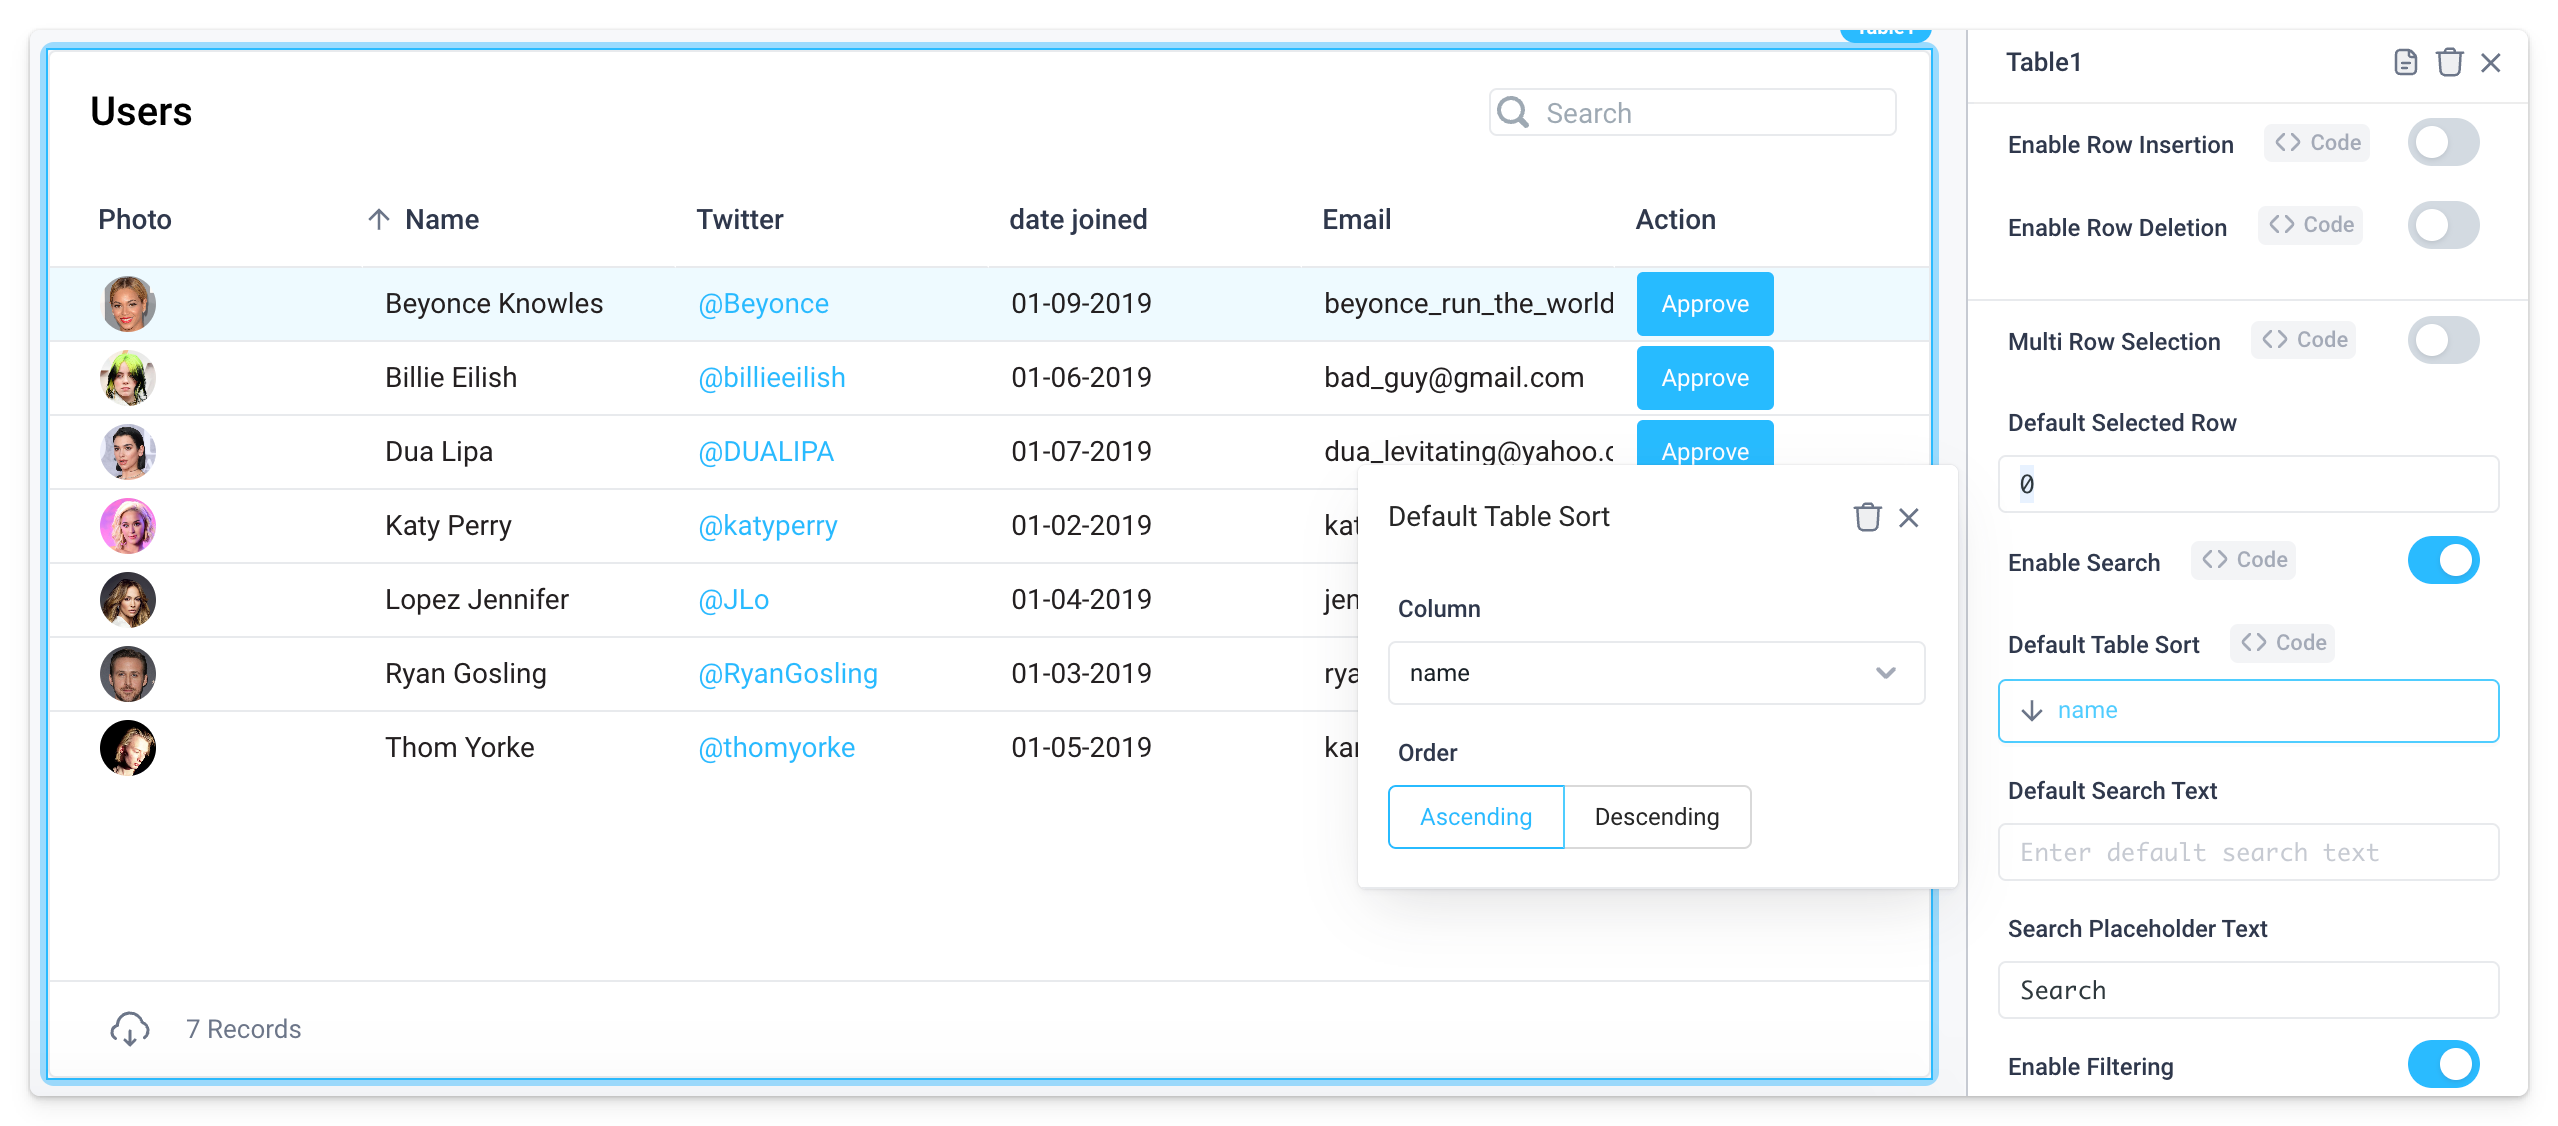
On any Table, you can configure the default sorting using the Default Table Sort property.
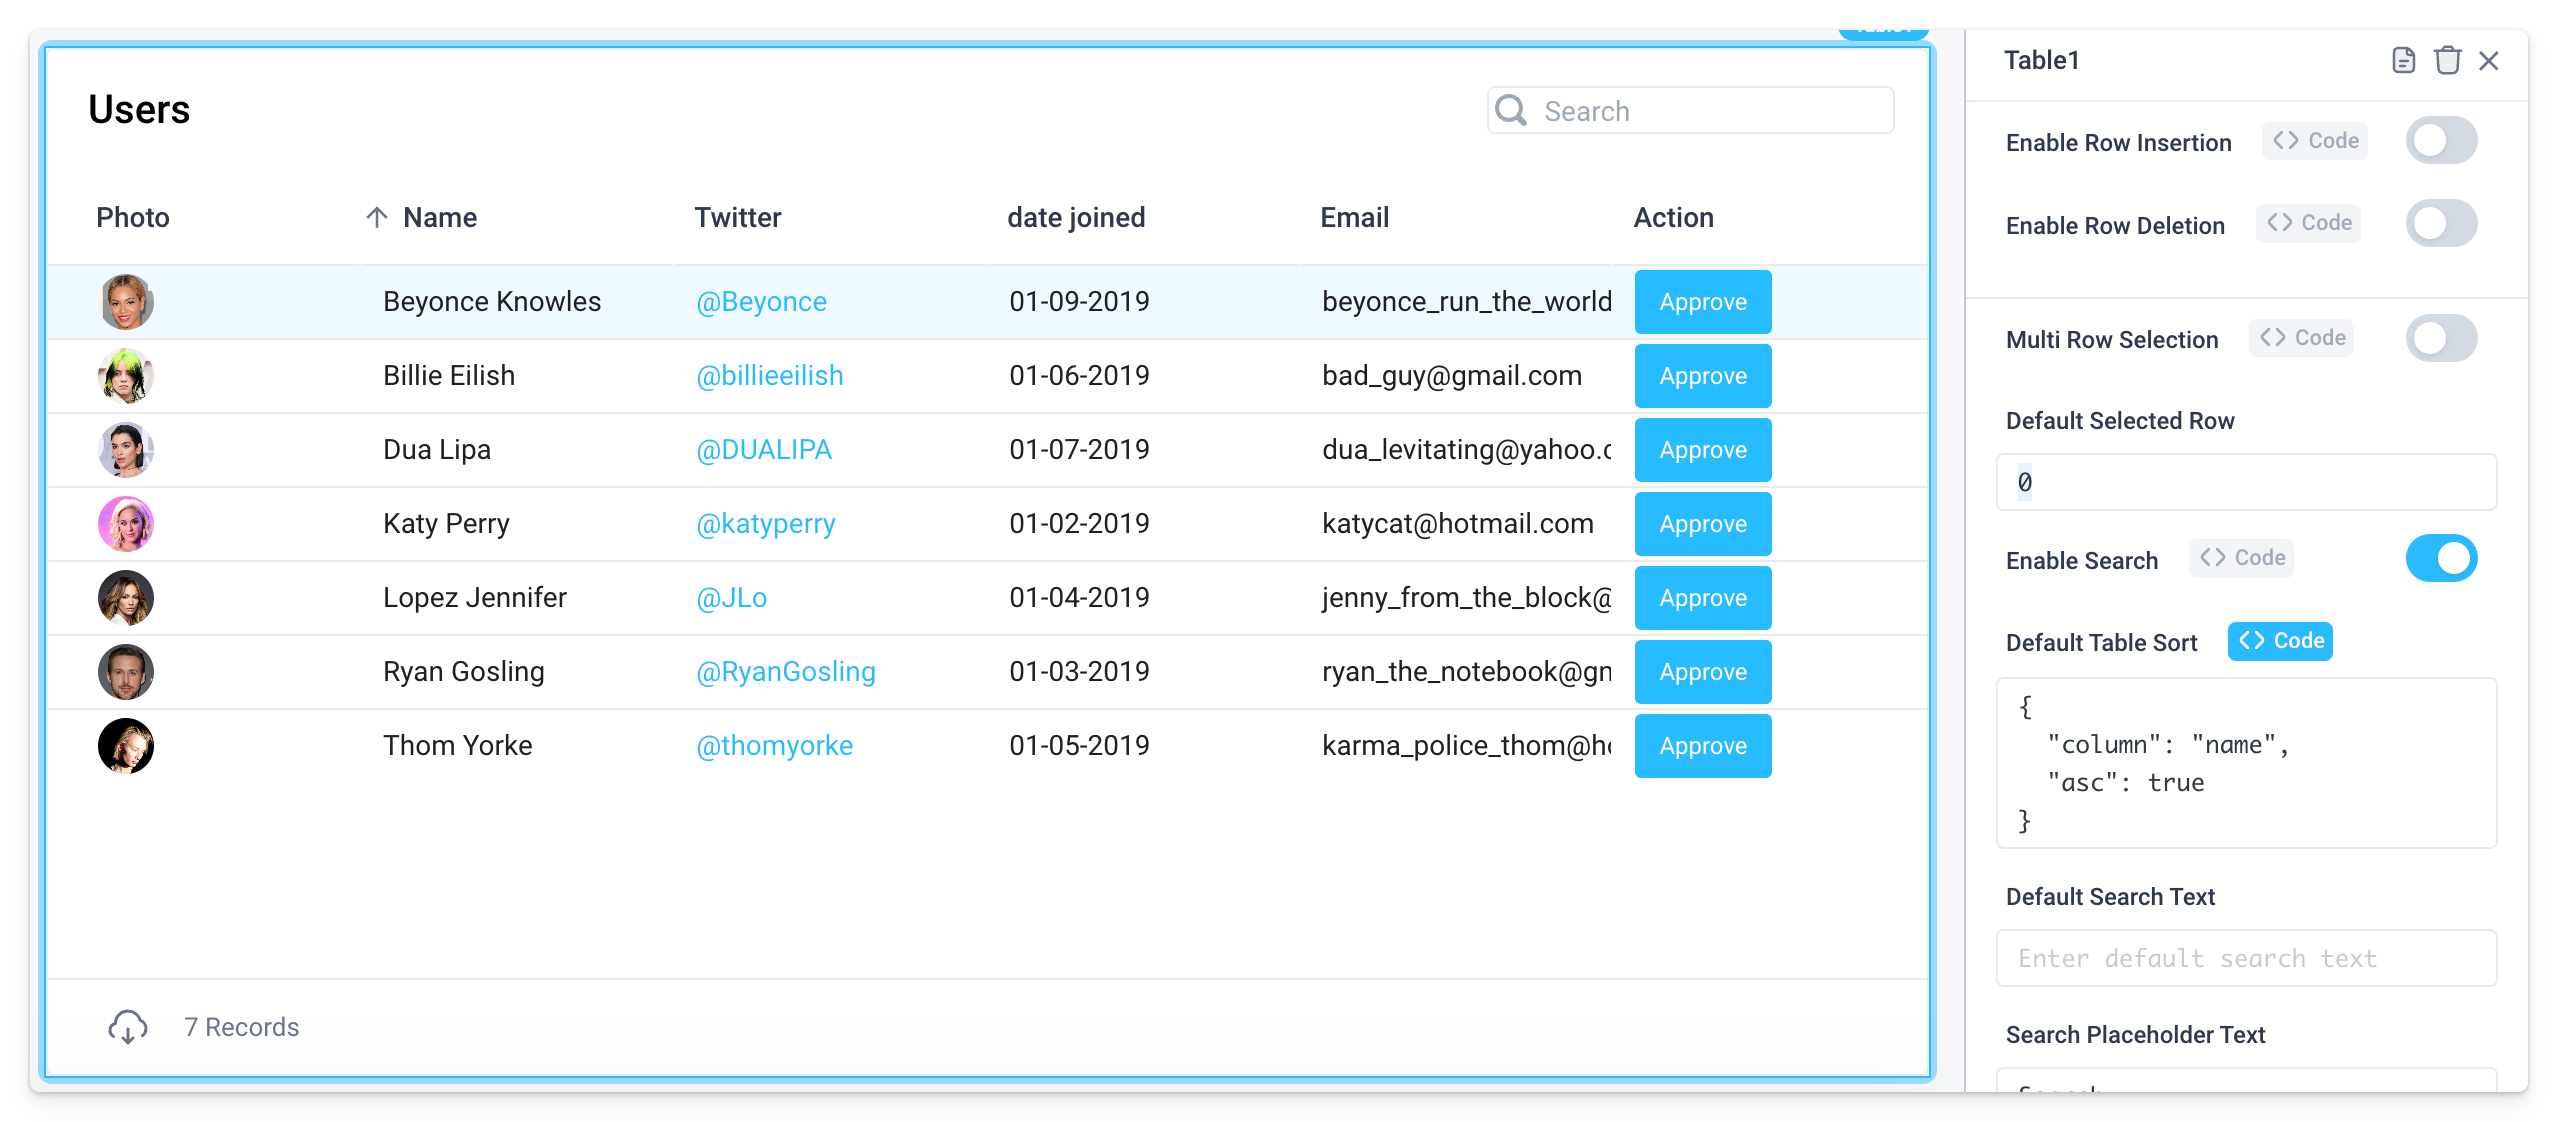
Example for setting it via code:
{
"column": "<COLUMN_NAME>",
"asc": true
}
Storing Persistent Filters using S3
In order to follow this guide, you'll need to have set up an integration with S3.
In order to store persistent filters, leverage the onFiltersChanged trigger.
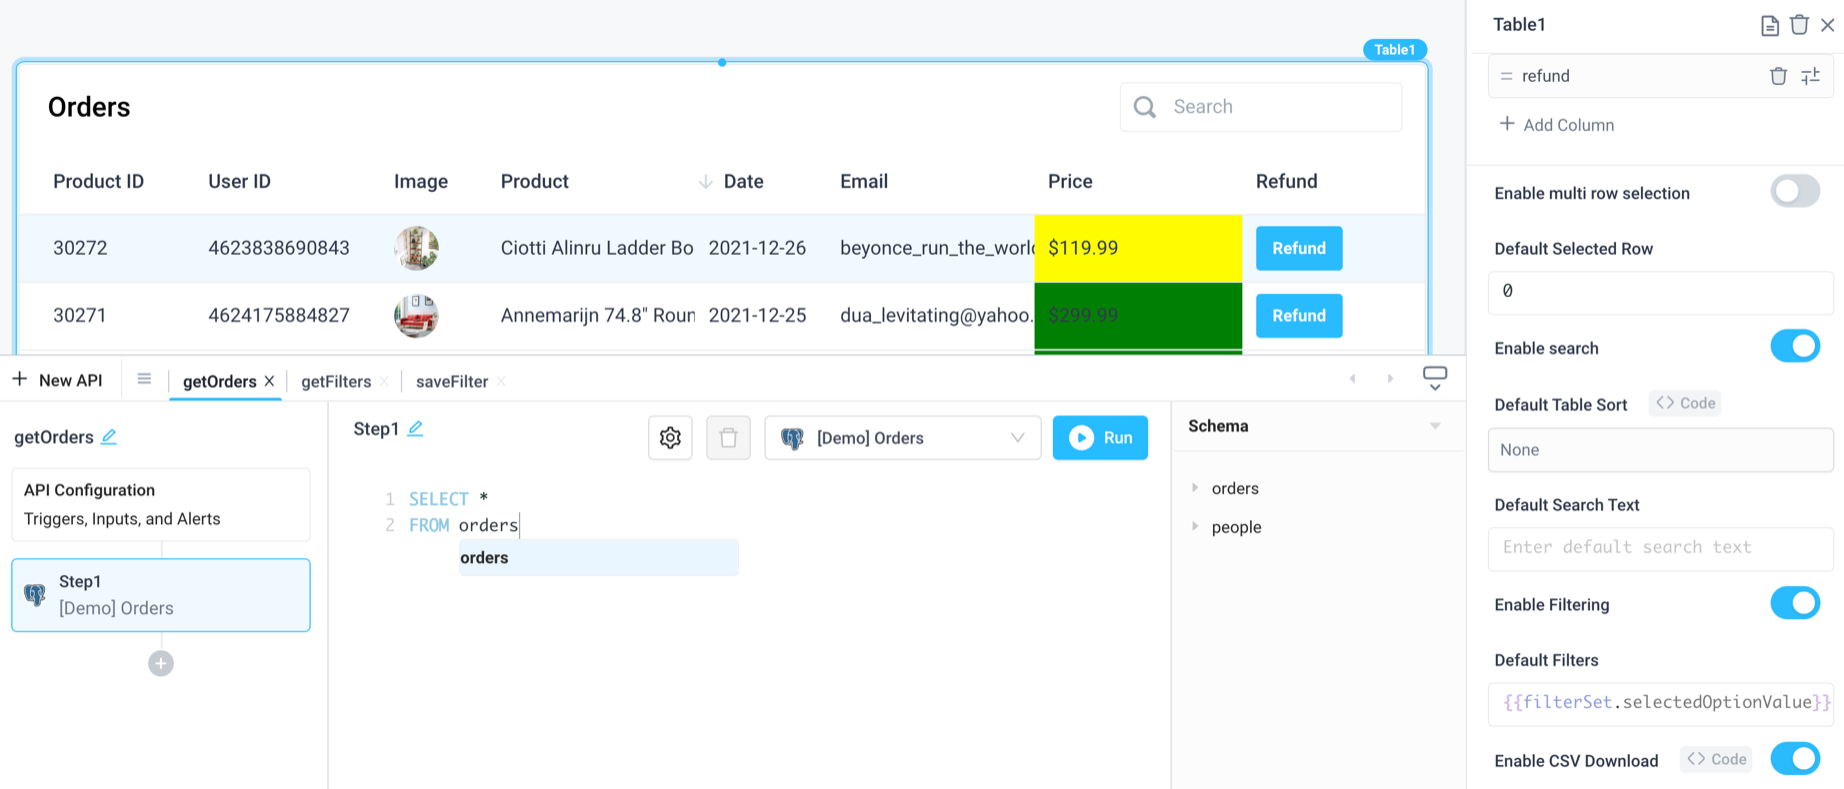
Start off by populating a table with the demo Postgres data
- Drag a Table component on to the canvas.
- Add a new API for the
[Demo] OrdersPostgres database in "Table Data" and rename itgetOrders. - Update the default filters to
{{filterSet.selectedOptionValue}}. - Use the following code snippet to query all orders from the table:
SELECT *
FROM orders
Create the getFilters API
-
Create a new API called
getFiltersthat reads a json file from your S3 bucket.- Action: Read File
- Bucket Name: Your bucket name
- File Name:
filters.json
-
Create a python step with the following code to serialize the json from S3:
import json
return json.loads(Step1.output) -
Create a new file in the S3 bucket called
filters.jsonwith the following body:{ "options": [] }

Create the saveFilter API
-
Create a new API called
saveFilterthat uses python for the first step and the following code:import json
filterList = getFilters.response #pull in the existing filters from the getFilters API
filterListOptions = json.dumps(filterList.options) #cast to a string for concatenation
filterListOptions = filterListOptions[1:-1] #strip the leading and trailing []
nextFilter = str({"id":str(len(filterList.options)+1),"name":filterName.value,"filters":Table1.filters}).replace("'", '"') #build the filter object
if len(filterListOptions):
filterListOptions = "[" + filterListOptions +","+ nextFilter + "]" #concatenate new filters in the list
else:
filterListOptions = "["+ nextFilter + "]" #add the first filter
filterListOptions = json.loads(filterListOptions) #cast to a json object
filterList = {"options":filterListOptions}
return filterList -
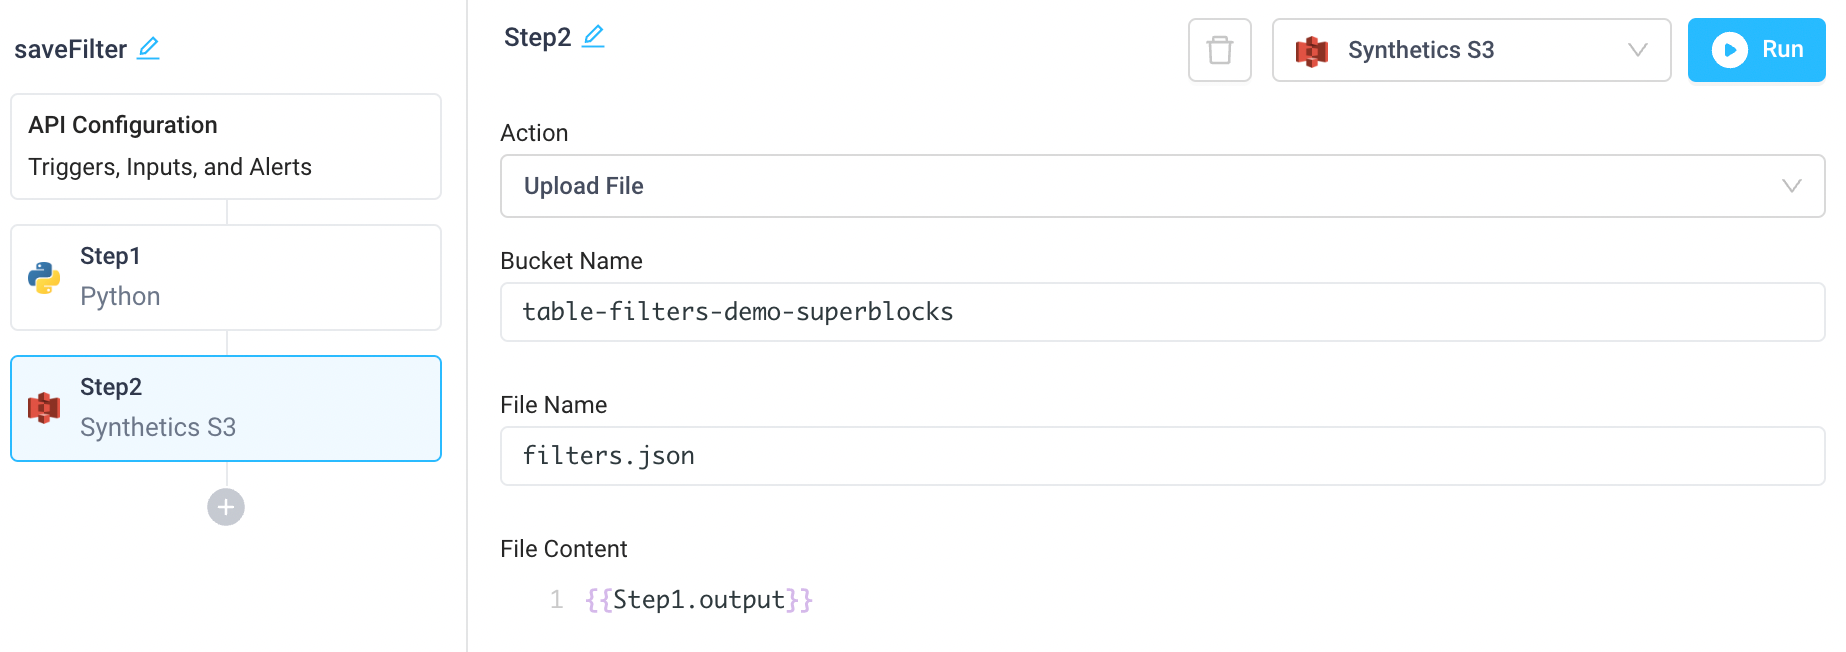
Create another step that uploads the file to S3.
- Action: Upload File
- Bucket Name: Your bucket name
- File Name:
filters.json - File Content:
{{Step1.output}}
Add filter dropdown components
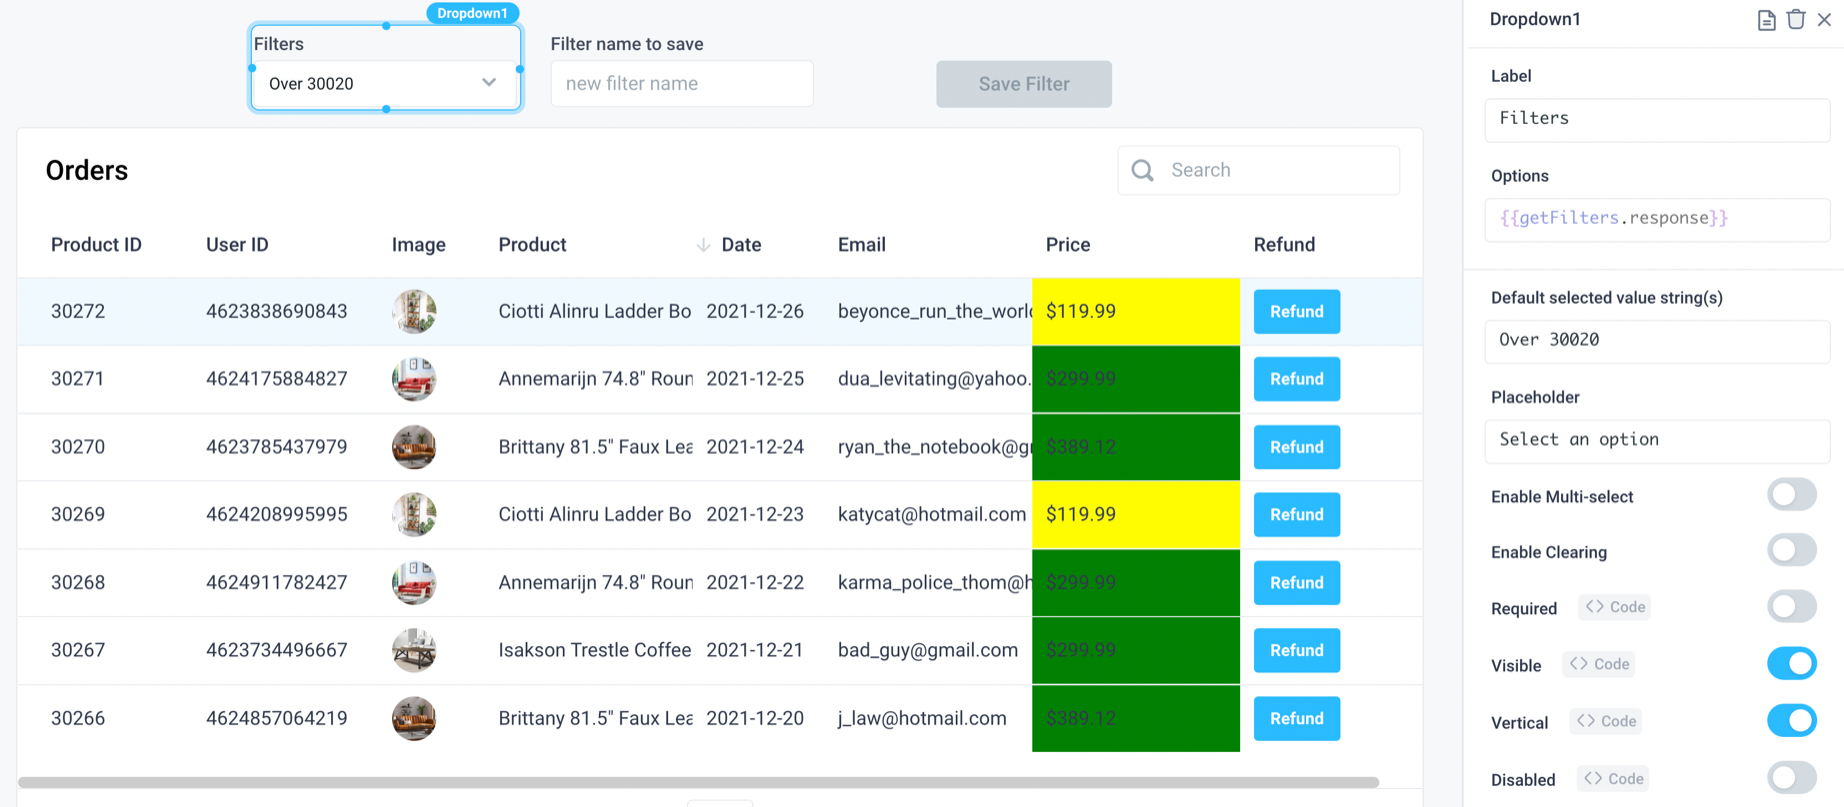
- Add a dropdown component and rename it
filterSet. - Update the Label to "Filters".
- Update the Options to
{{getFilters.response.options}}. - Add an input component and rename it
filterName. - Update the Label to "Filter name to save".
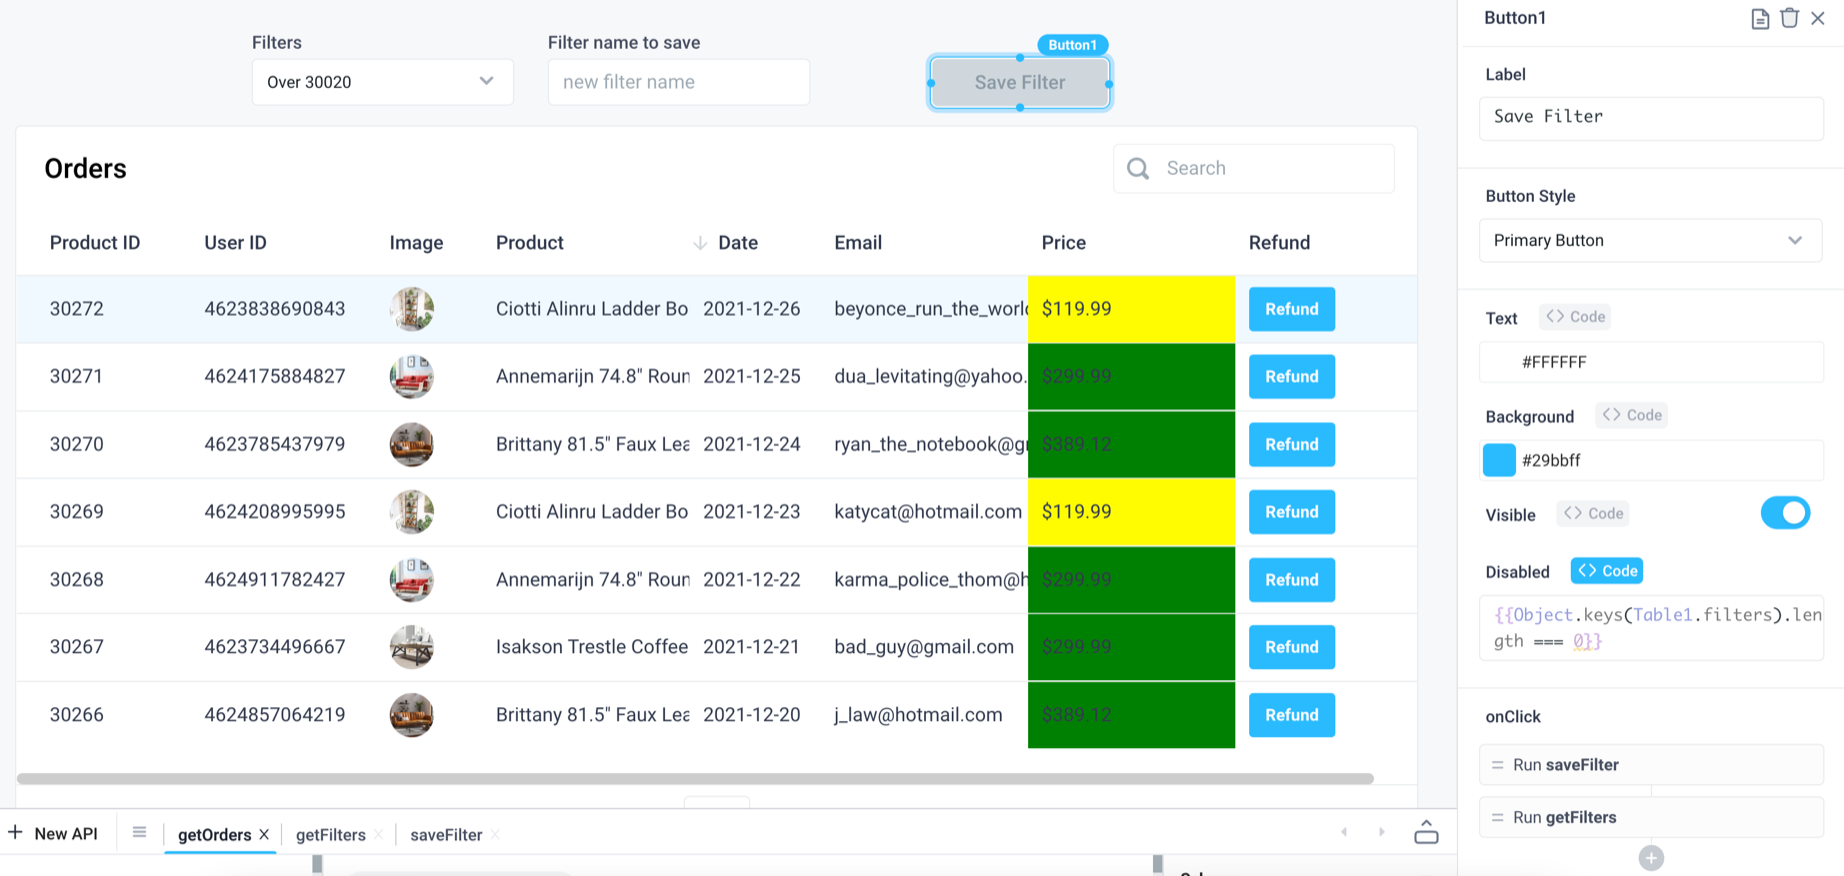
- Add a button component.
- Update the Label to "Save Filter".
- Update the Disabled field of the button by clicking "Code" and pasting:
{{Object.keys(Table1.filters).length === 0}}.- This will disable the Save Filter button when no filters are applied to the table.
- Add Run API as an Action Type to the
onClicktrigger and select thesaveFilterAPI to run. - Add a second Action Type and select the
getFiltersAPI to have it run after thesaveFiltersAPI runs.
Add a filter to the list
- Add filters to the table.
- Add your first filter name into the input text box.
- Click the "Save Filters" button to save the filter.
- Click the dropdown
filterSetand update the Value Field to "filters" and the Label Field to "name".
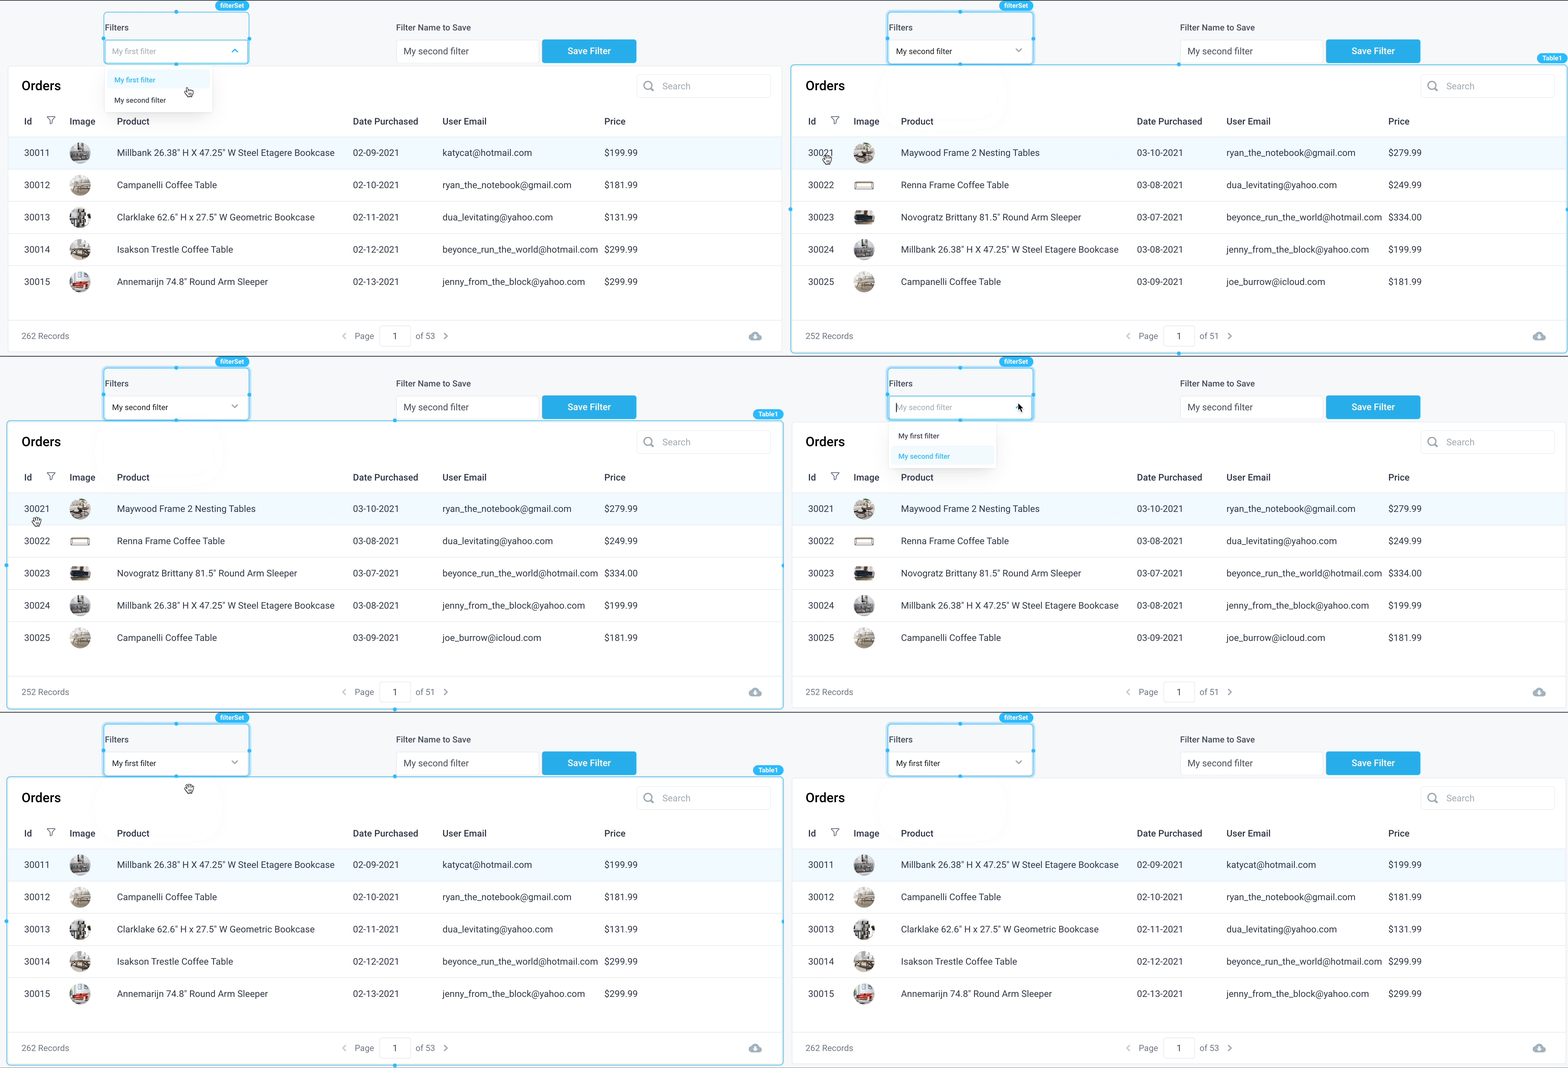
Now when you click the dropdown, you'll see the list of filters you have saved!
Download Table data as CSV
End users can download the content of a table as a CSV file. CSV downloads are enabled by default and can be toggled on or off in the Table's Properties panel.
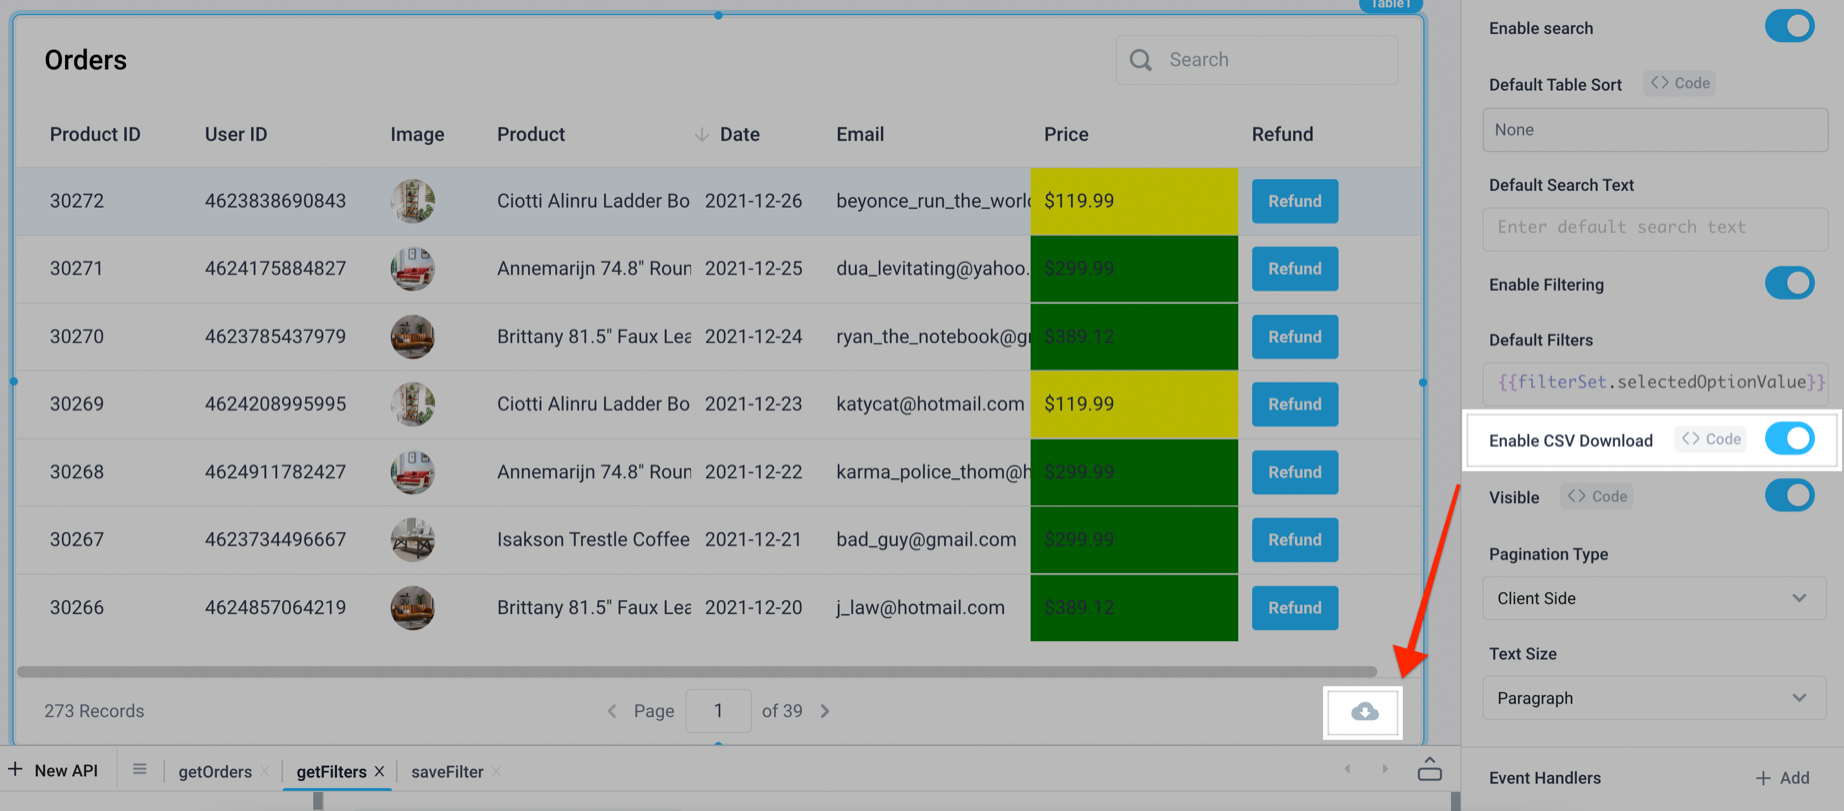
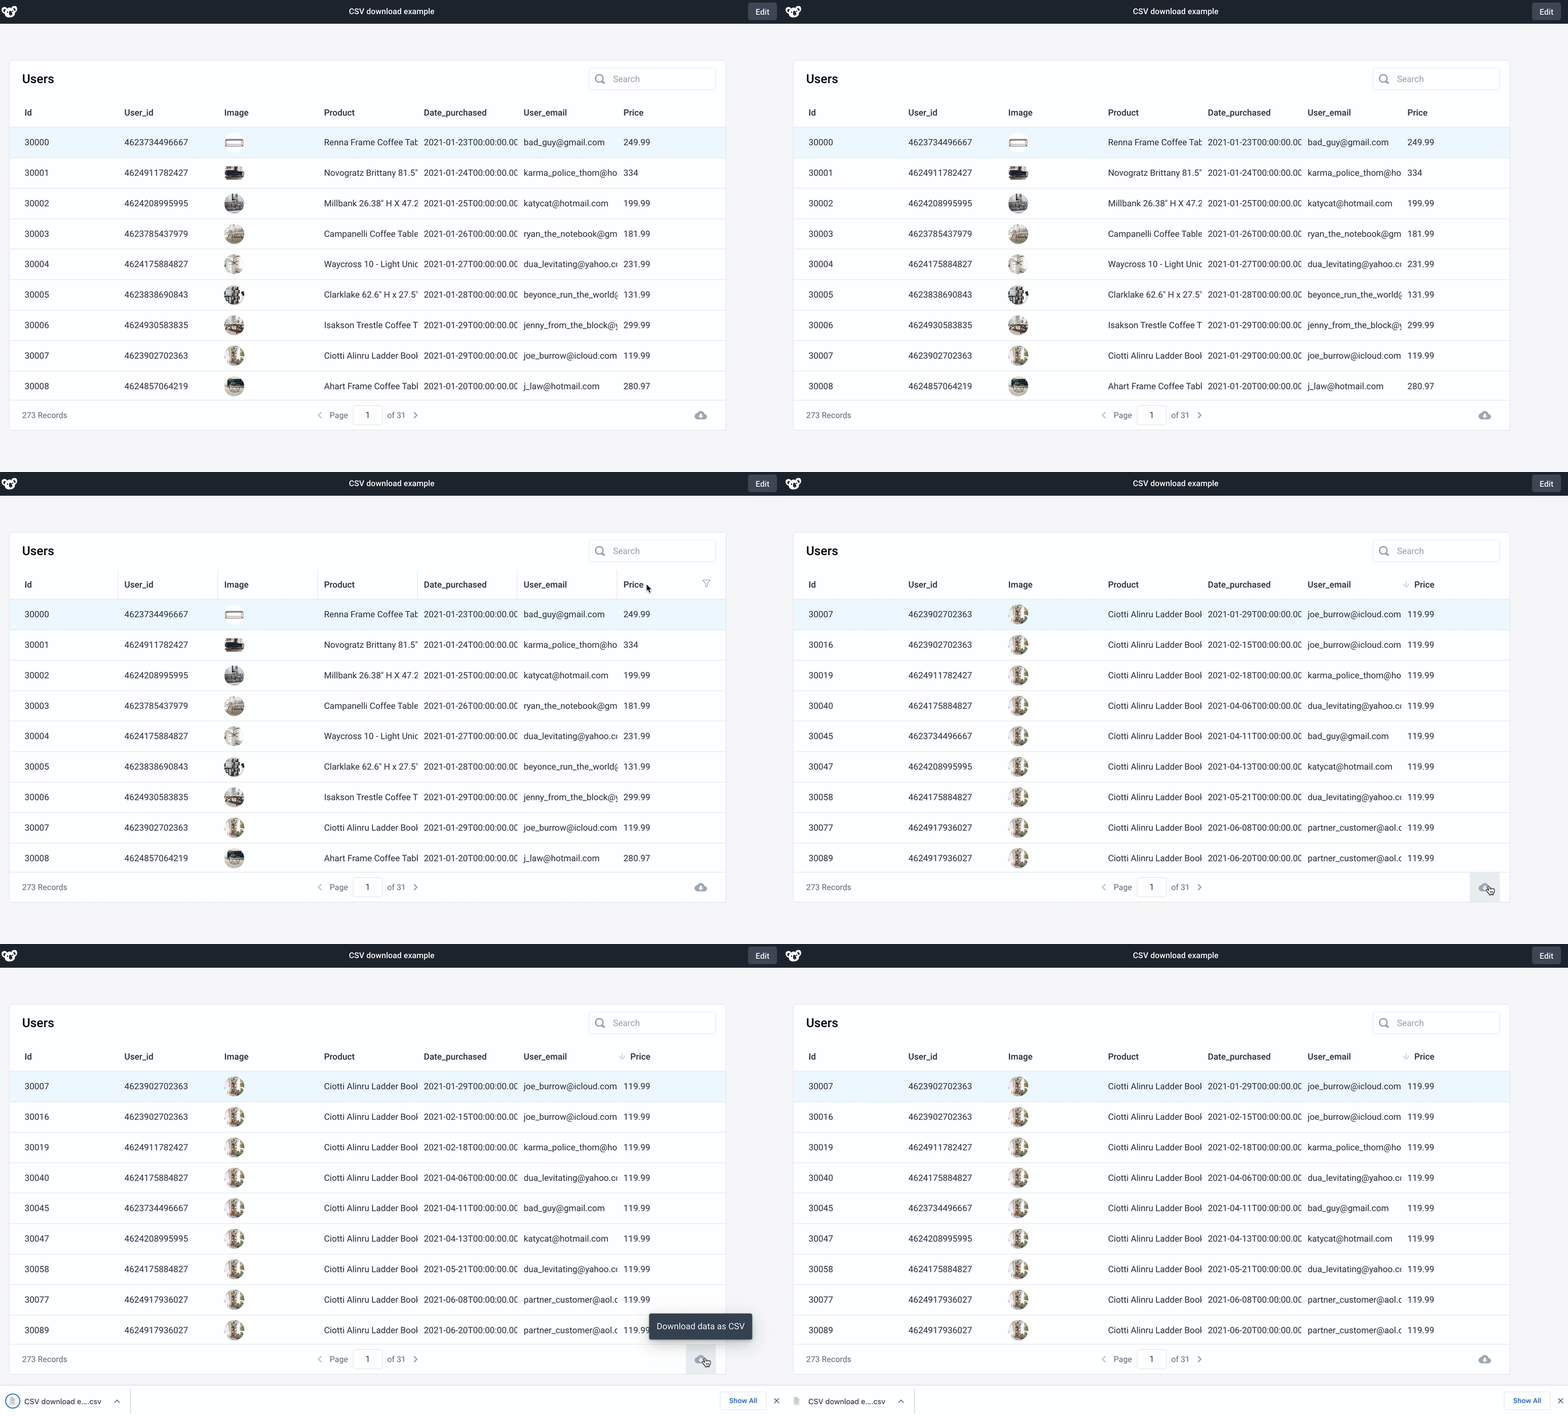
To download the CSV, users can click the icon in the bottom right of the Table.
All filters, data formatting, and sorting on the table will apply to the CSV download. The CSV file will be named <Application Name>-<Table Header Name>.csv
Using Server Side Pagination
You can leverage Server Side pagination in order to control the returned data from your API calls or database queries. Below we walk through how to do this in a SQL query using the provided demo data in the Snowflake [Demo] Shipping database.
NOTE: The Table search function will only search through the current page's results when using server side pagination.
- Drag a Table component onto the canvas.
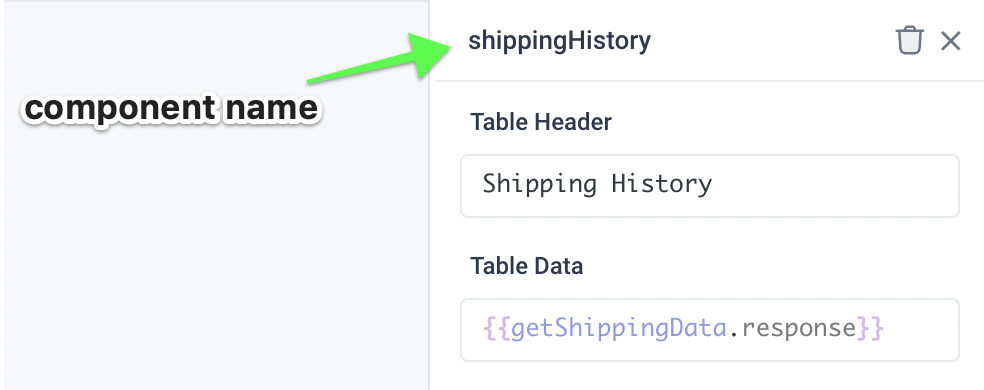
- Update the component name to
shippingHistoryand the Table Header to "Shipping History". - Update the Pagination Type to "Server Side".
- Clear the sample data from Table Data and create a new API that leverages a Python step.
- Update the API name to be
getShippingDataand the Python step to becreateLimitOffset. - Use the following code snippet to calculate the limit and offset we'll use in the following SQL query:
return {"limit":shippingHistory.pageSize, "offset":shippingHistory.pageSize * (shippingHistory.pageNo - 1)}
- Create a new Snowflake step from
[Demo] Shipping. - Use the following code snippet to query the data from Snowflake:
SELECT * FROM SHIPPING_HISTORY LIMIT {{createLimitOffset.output.limit}} OFFSET {{createLimitOffset.output.offset}};
- Click "Run" to populate data into the Table.
- Update onPageChange to
{{getShippingData.run()}}.
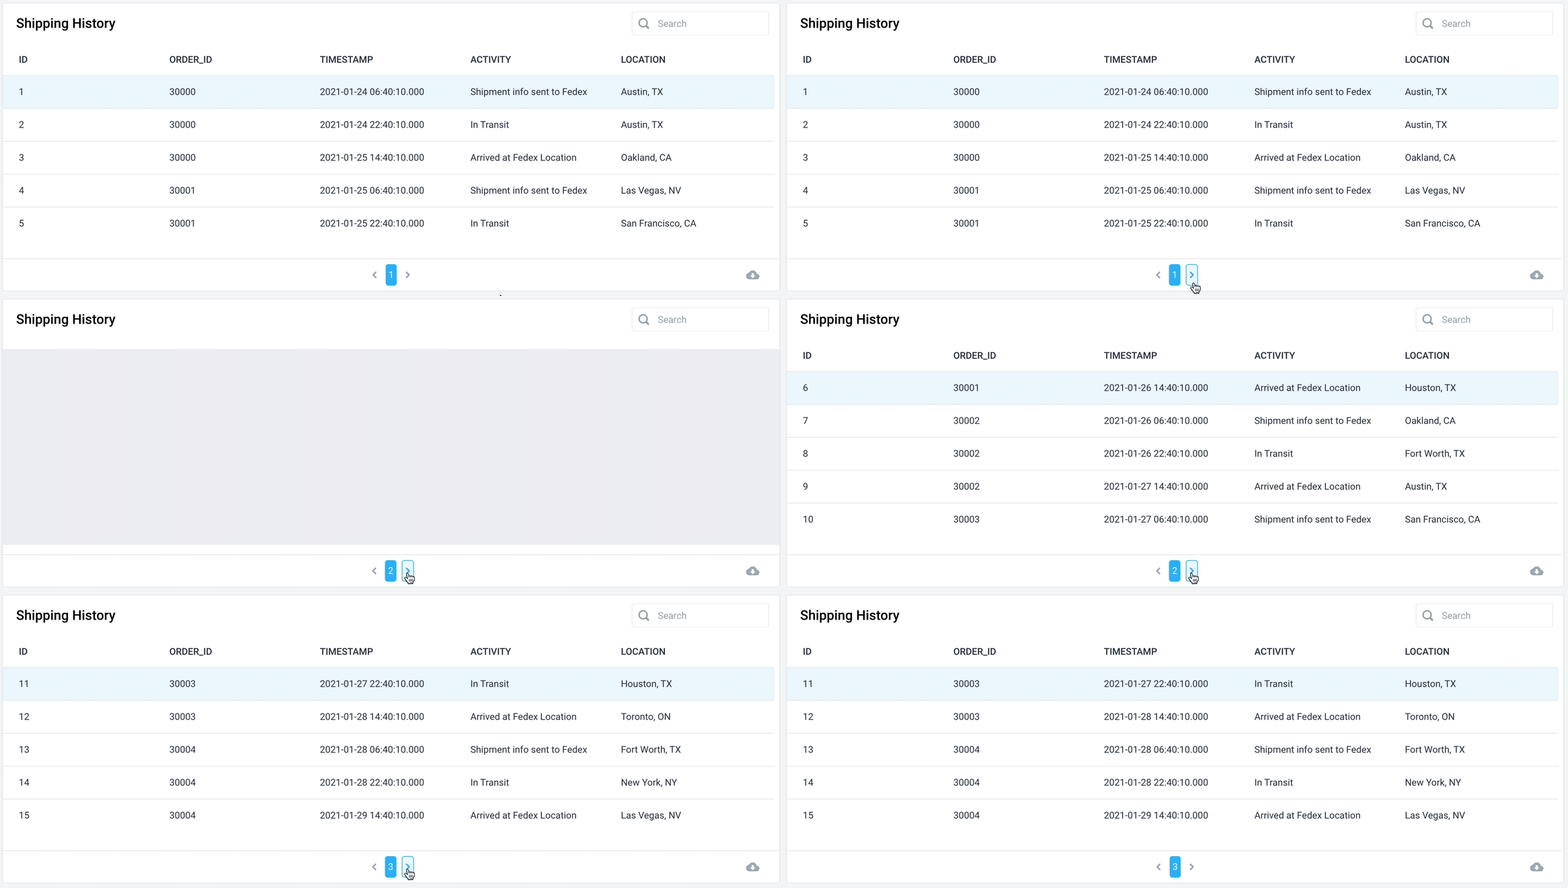
Now when you click through the table, it will load the number of rows based on the size of the table and populate the next n rows as you switch pages.
Bulk edits with multi row selection
To make updates to multiple table rows at once, toggle Enable multi row selection in the table's properties panel.

Next, create an API to handle the bulk update. The API consists of a code step (JavaScript) to create a string out of the selected values, and a SQL step (Postgres) to update a table in the database based on the selected rows. In this example, our table is named Table1, and the column name on which we're basing the update is customer_id. Adjust this as needed for your use case.
Step 1 - JavaScript
return (
  "(" + Table1.selectedRows.map((row) => `'${row.customer_id}'`).join(",") + ")"
);
Step 2 - SQL
Referencing SQL generated from JavaScript requires disabling Parameterized SQL.
UPDATE <TABLE_NAME>
SET <COLUMN_NAME> = 'example_value'
WHERE customer_id IN {{Step1.output}}
In Superblocks, here are the steps put together in an API called bulkUpdateStatus that updates the status column of a table named credit_cards_se.


Next, configure the bulk update to run and refresh the table based on clicking a button. To do so, attach sequential triggers to the button's onClick property to run the bulkUpdateStatus API followed by the main table query, getApplicants in our example.

The end result allows us to select multiple rows, click a button to update the selected rows in the database, and refresh the table to reflect the changes.

Select all/no Table rows by default
In order to select all rows by default in a Table component, use the following code snippet in the Default Selected Row field (the code snippet below assumes that your Table data is being loaded from a Backend API called API1):
{{ [...Array(API1.response.length).keys()] }}
In order to select no rows by default in a Table component, leave the Default Selected Row field blank.