Create a real-time chatbot with streaming and OpenAI
info
For general concepts around streaming in Superblocks, see Streaming Applications.
This guide explains how to create a chatbot in Superblocks that streams messages back from OpenAI as they're received in real time.
- Create a temporary frontend variable called
ChatHistorywith a default value of an empty array.

- Add a Chat component and set its Message History Data property to the value of the frontend variable,
{{ChatHistory.value}}.
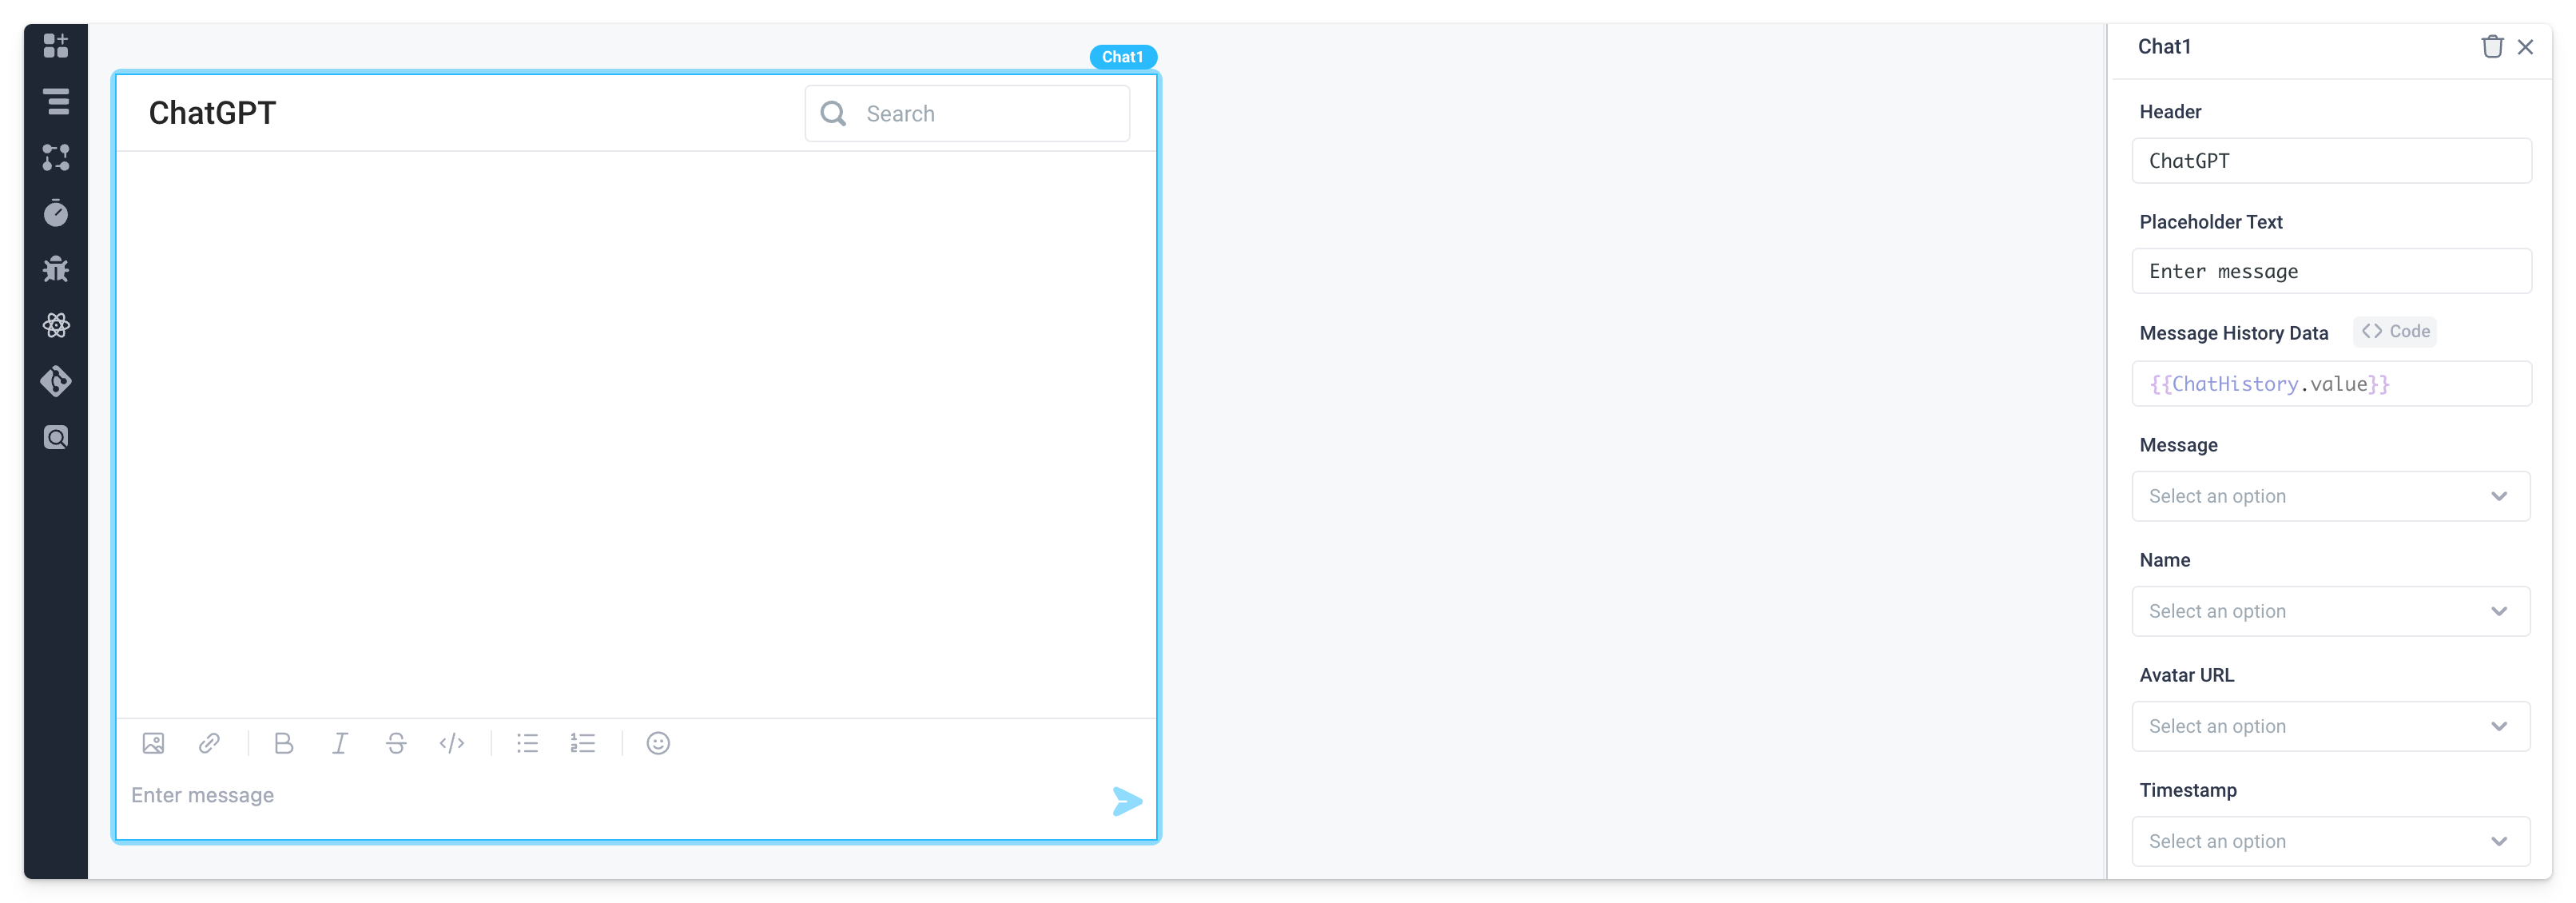
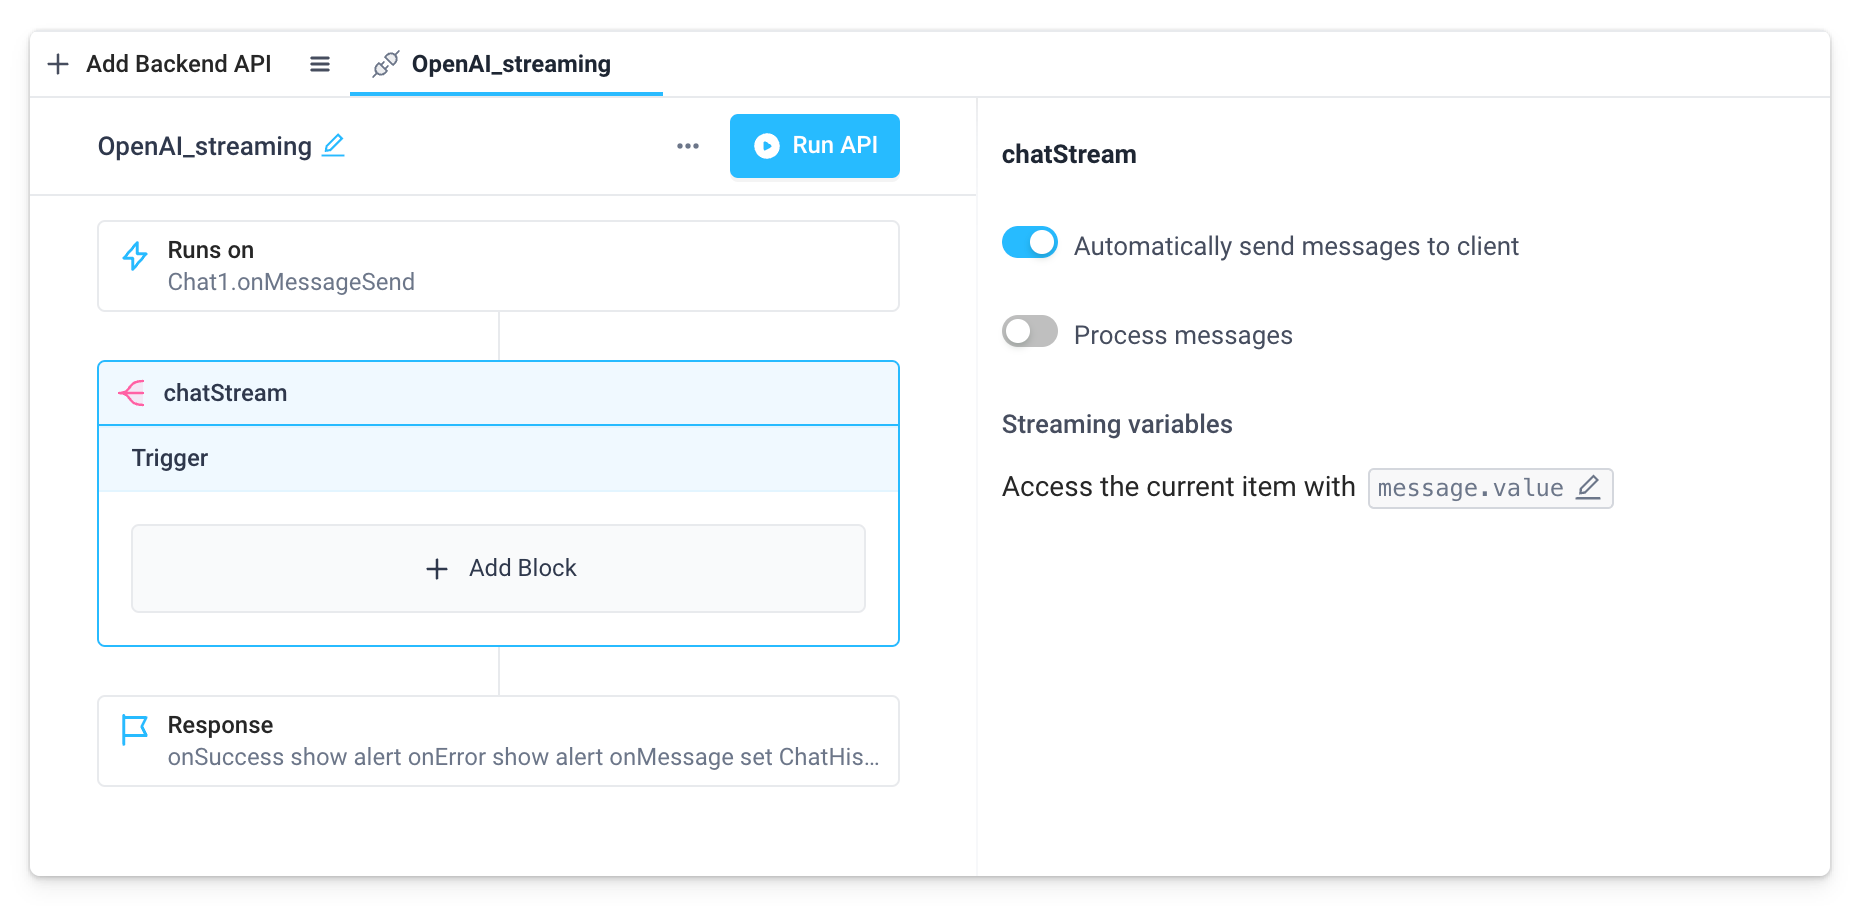
- Create a backend API with a single Stream block. Here we've named the API
OpenAI_streamingand the Stream blockchatStream. Since no custom processing will be needed, disable Process messages. For more details on when and how to add custom processing, see the Stream block docs.
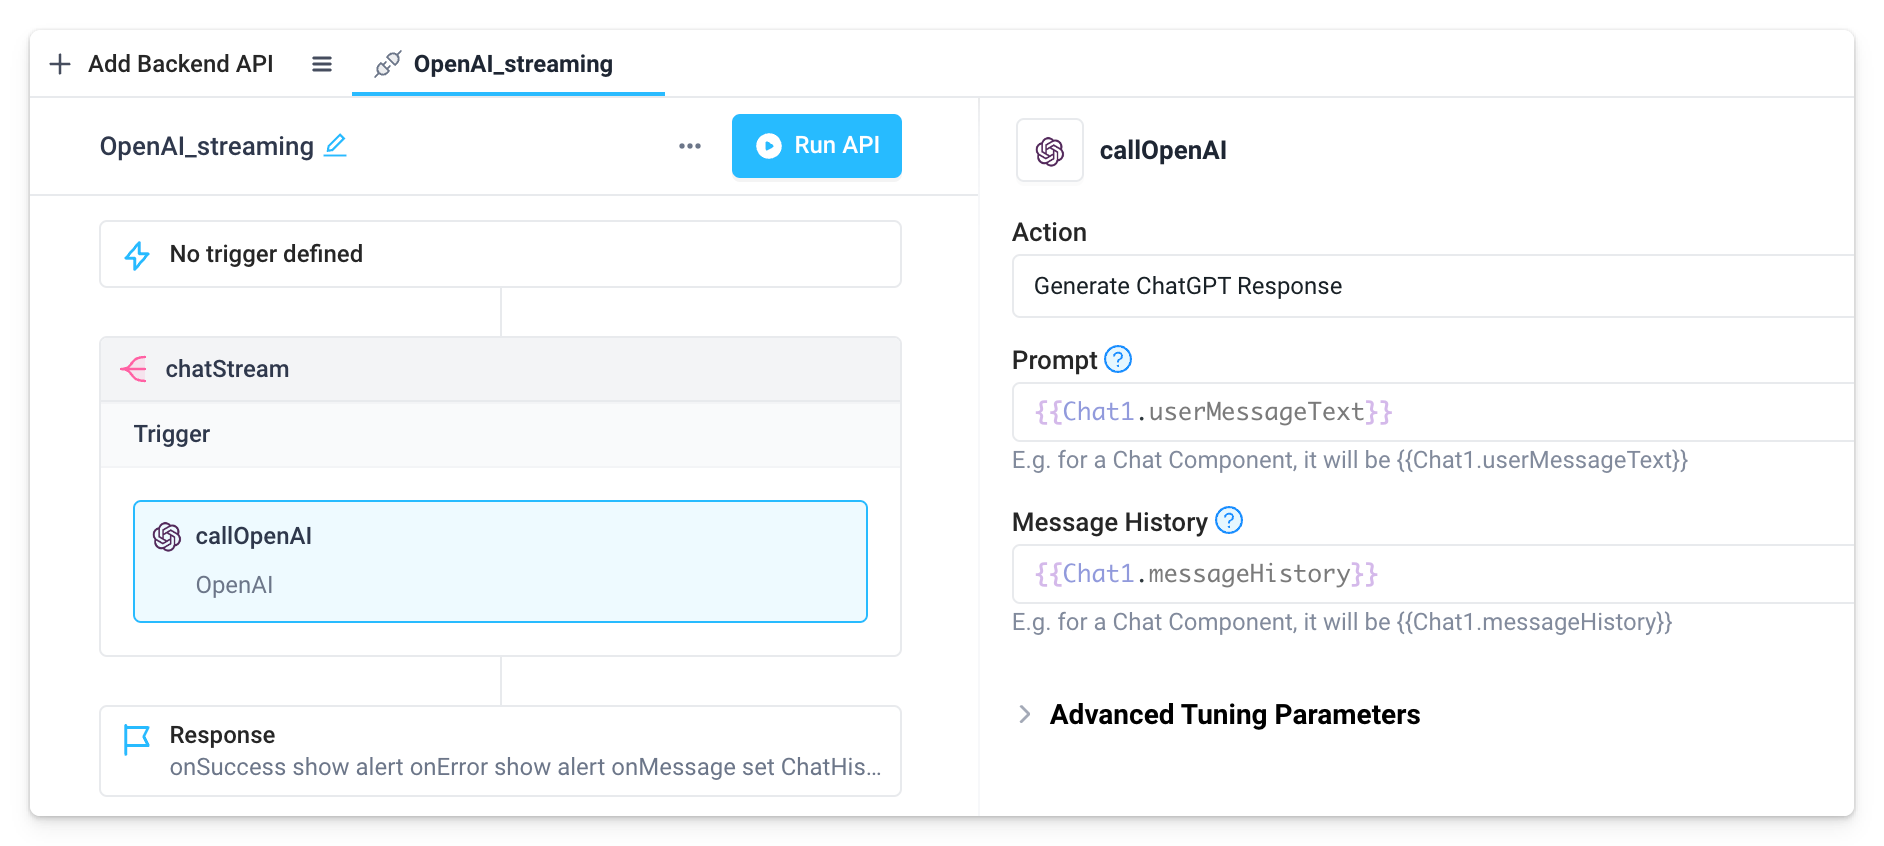
- Add an OpenAI step to the Trigger section of the Stream block. Here we've named the step
callOpenAI. Configure the OpenAI step as follows:- Set Action to "Generate ChatGPT Response"
- Set Prompt to
{{Chat1.userMessageText}} - Set Message History to
{{Chat1.messageHistory}}
- Configure the response block of the API.
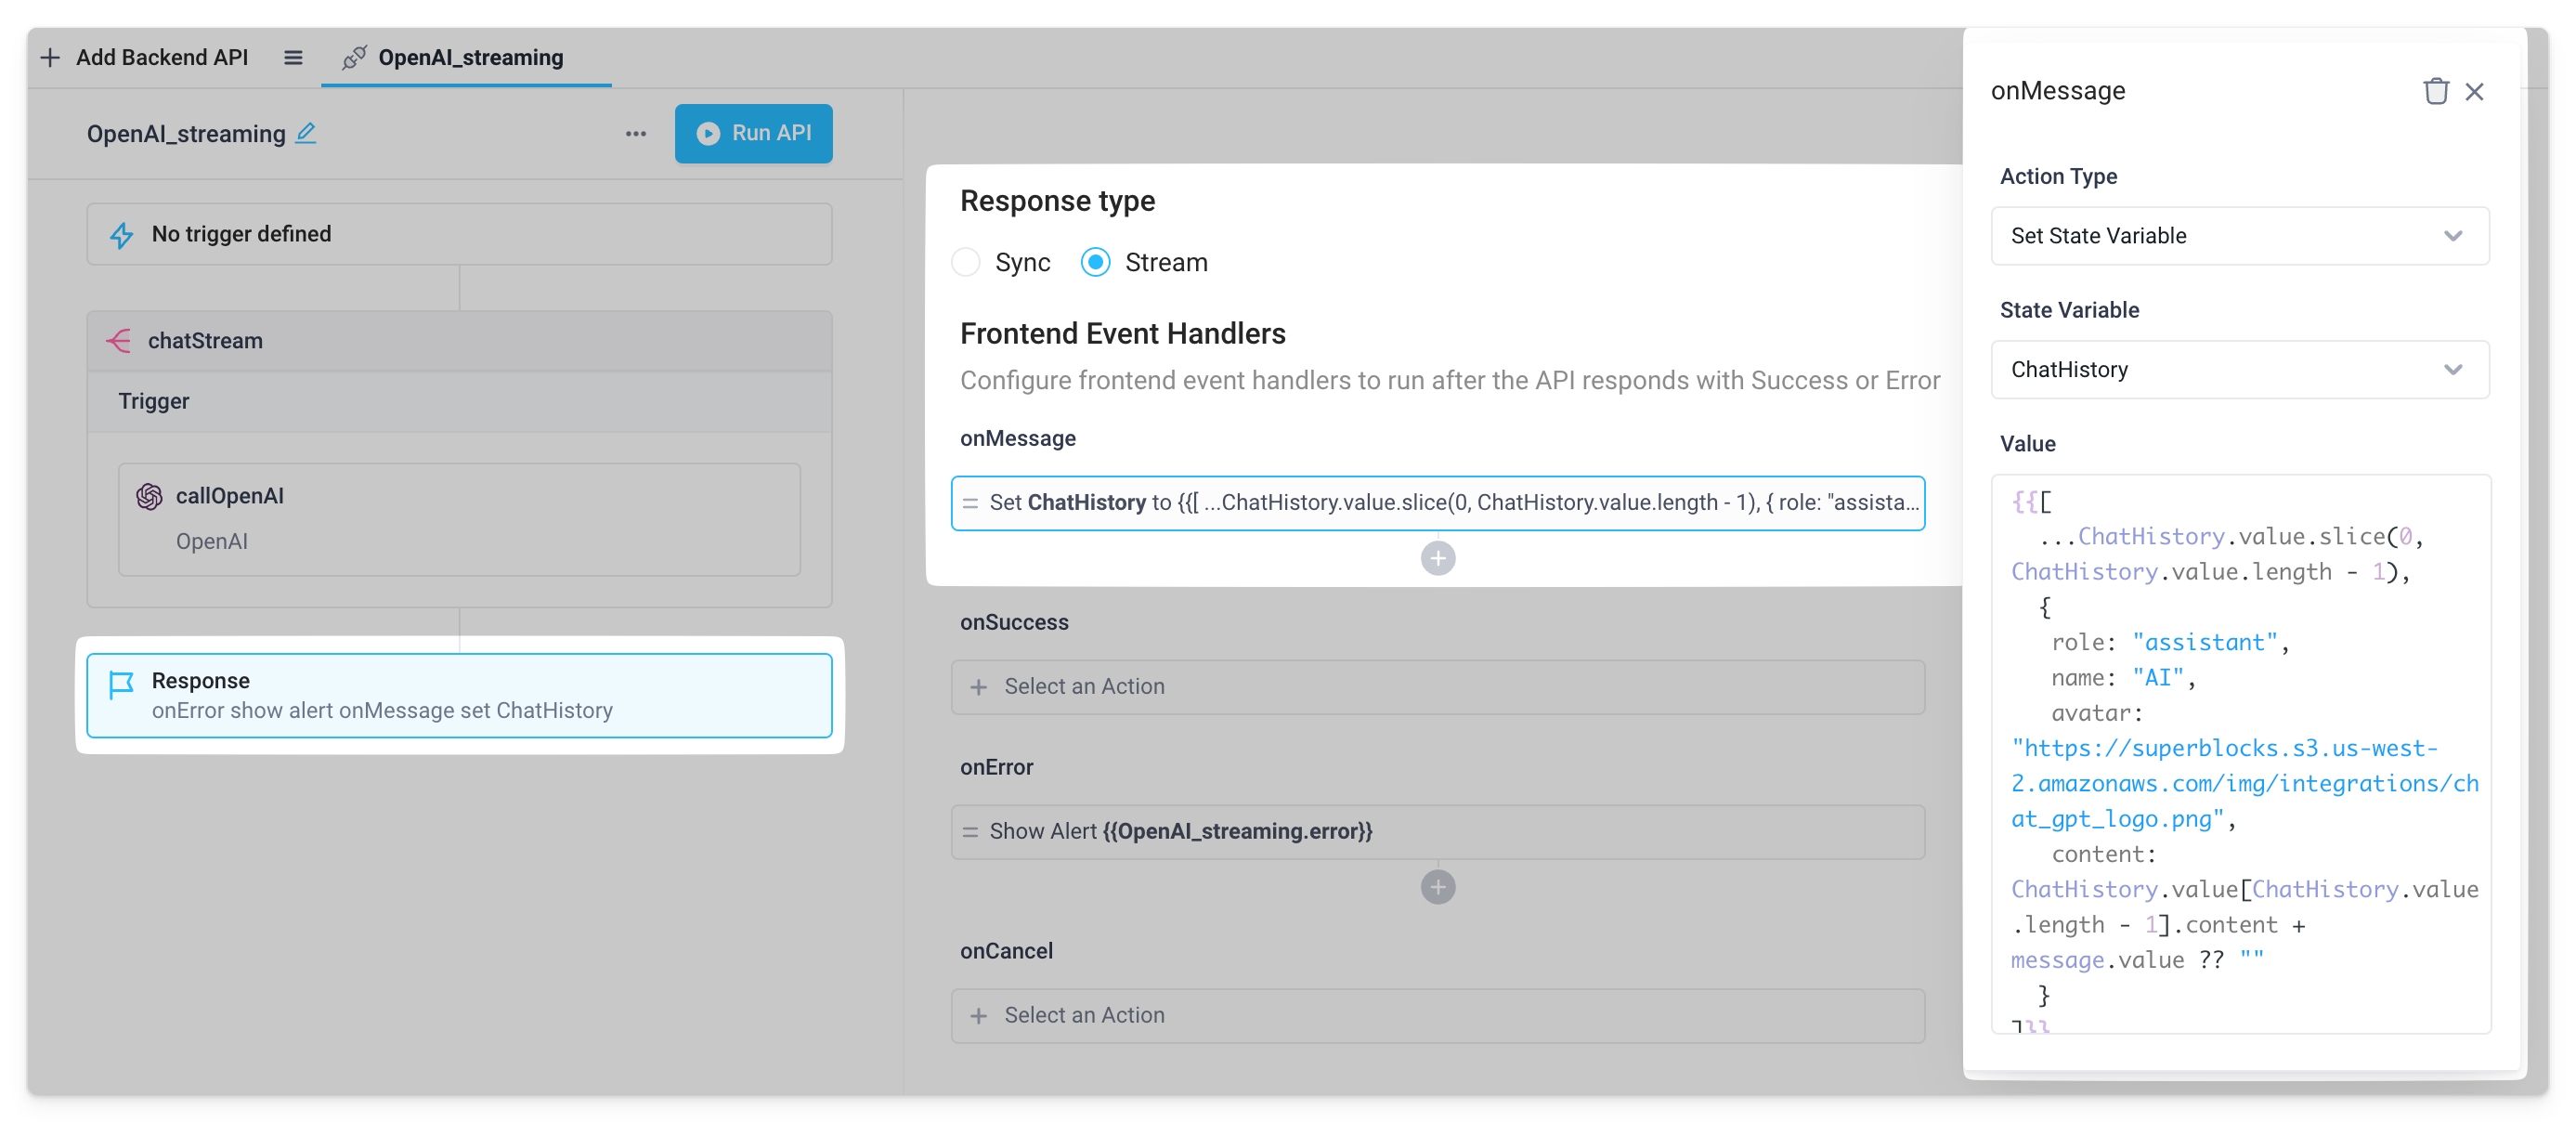
- Set Response type to "Stream"
- Under Frontend Event Handlers, add an
onMessageevent handler that sets the previously createdChatHistoryfrontend variable with the Set Frontend Variable action. Use the following JavaScript inside bindings as the Value of the frontend variable.
{{[
   ...ChatHistory.value.slice(0, ChatHistory.value.length - 1),
   {
	   role: "assistant",
	   name: "AI",
	   avatar: "https://superblocks.s3.us-west-2.amazonaws.com/img/integrations/chat_gpt_logo.png",
	   content: ChatHistory.value[ChatHistory.value.length - 1].content + message.value ?? ""
   }
]}}
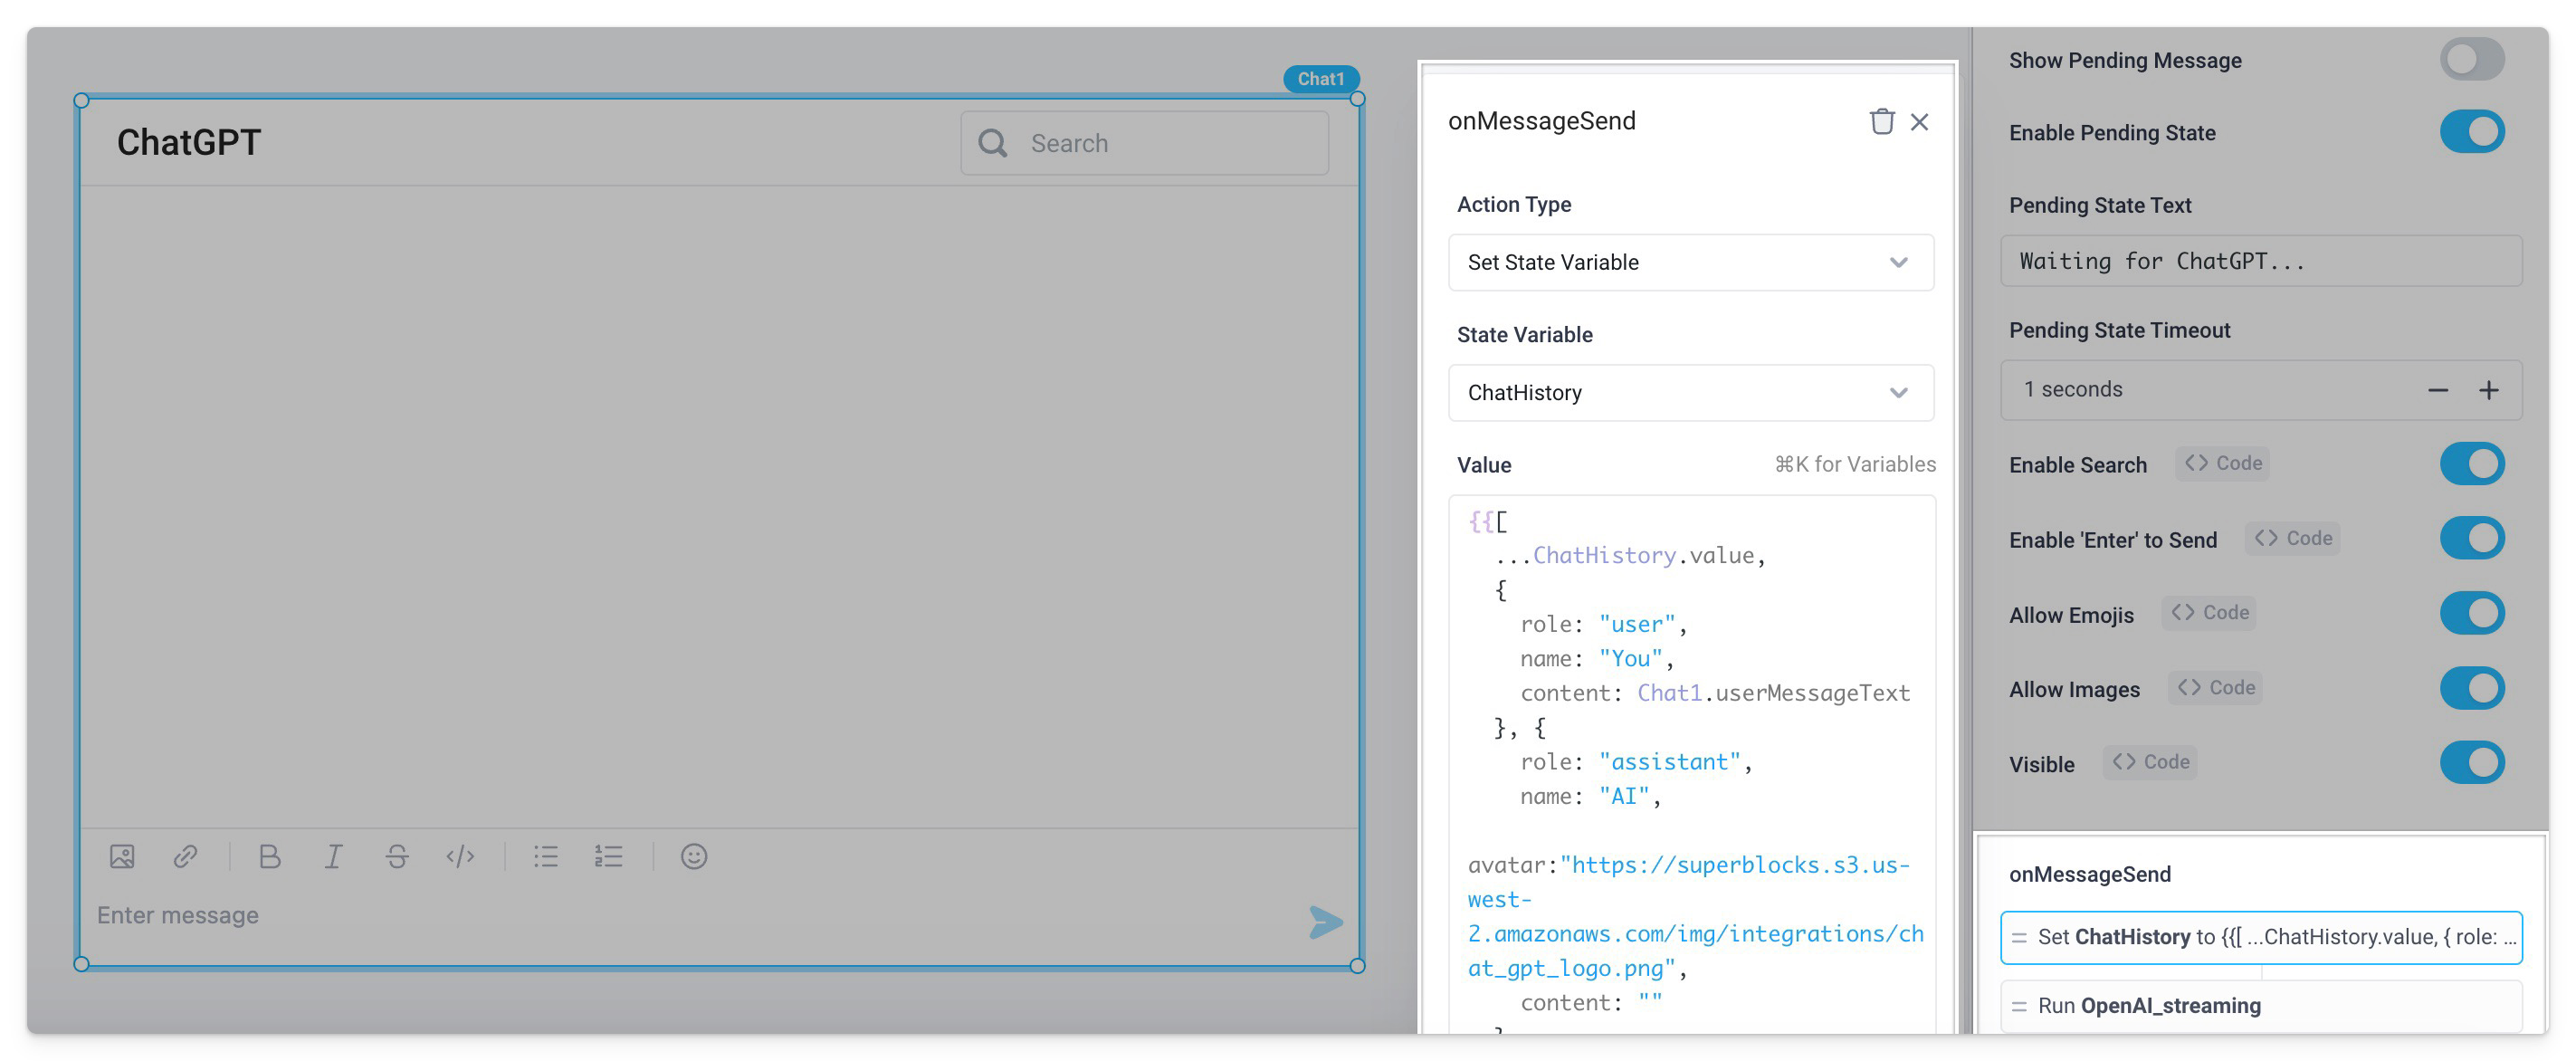
- Navigate back to the frontend and configure the Chat component's
onMessageSendevent handler.
- Set the
ChatHistoryfrontend variable to the following JavaScript inside bindings.
{{[
   ...ChatHistory.value,
   {
	   role: "user",
	   name: "You",
	   content: Chat1.userMessageText
   }, {
	   role: "assistant",
	   name: "AI",
	   avatar:"https://superblocks.s3.us-west-2.amazonaws.com/img/integrations/chat_gpt_logo.png",
	   content: ""
   }
]}}
- Set the
Show Pending Messagetoggle to false. - Run the previously created streaming backend API.
- Deploy the app and start chatting to see the Chat component stream each message back in real time!
