CRUD actions in a table
This guide walks you through the process of building a CRUD application on top of your databases in Superblocks.
Basic CRUD guide using SQL
info
Note: this guide was written with Postgres syntax in mind. It will work for other SQL databases, but there may need to be slight modifications to the SQL queries to match syntax for the specific database.
Preconfiguration: Create a table (optional)
This section is optional, but will allow those following along to have sample data to work with.
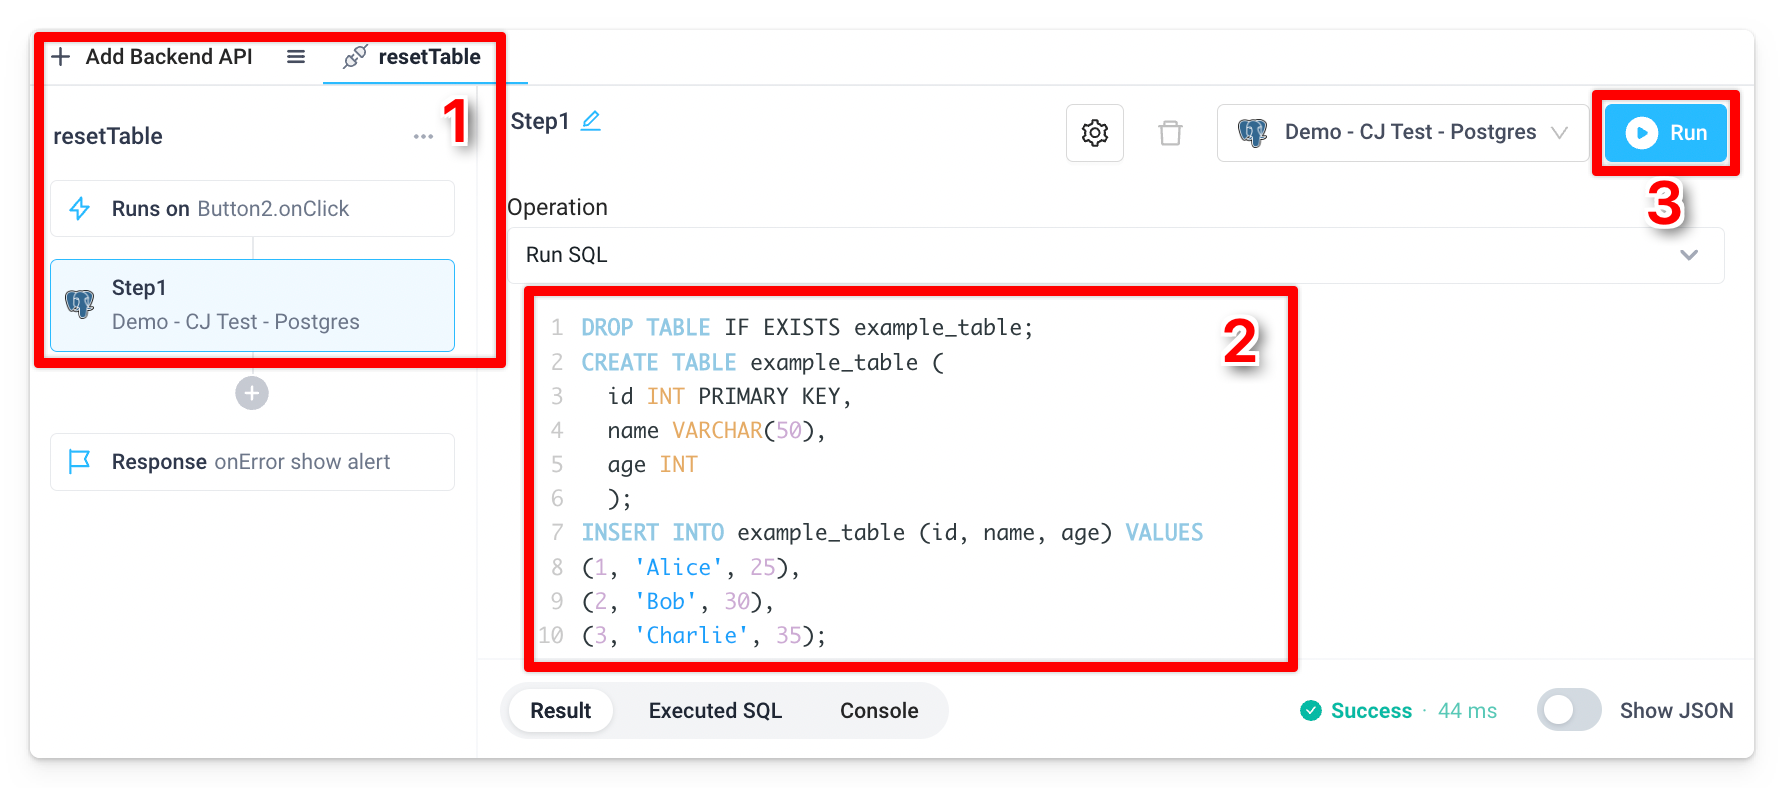
- Add a Backend API for your database integration and update the API name to
resetTable - Use the following SQL query and run the API to create a table called
example_tablewith sample data:
DROP TABLE IF EXISTS example_table;
CREATE TABLE example_table (
id INT PRIMARY KEY,
name VARCHAR(50),
age INT
);
INSERT INTO example_table (id, name, age) VALUES
(1, 'Alice', 25),
(2, 'Bob', 30),
(3, 'Charlie', 35);
- Click run to create the table, this API will be reused later in the guide
Read table data
- Add a Table component to the frontend of your application by dragging it to the canvas
- Update the Table Header

- Add a Backend API for your database integration and update the API name to
readTableData - Use the following SQL query and run the API:
SELECT * FROM example_table ORDER BY id asc
- Update the Table Data to
{{readTableData.response}}to make the Table read the data returned from the backend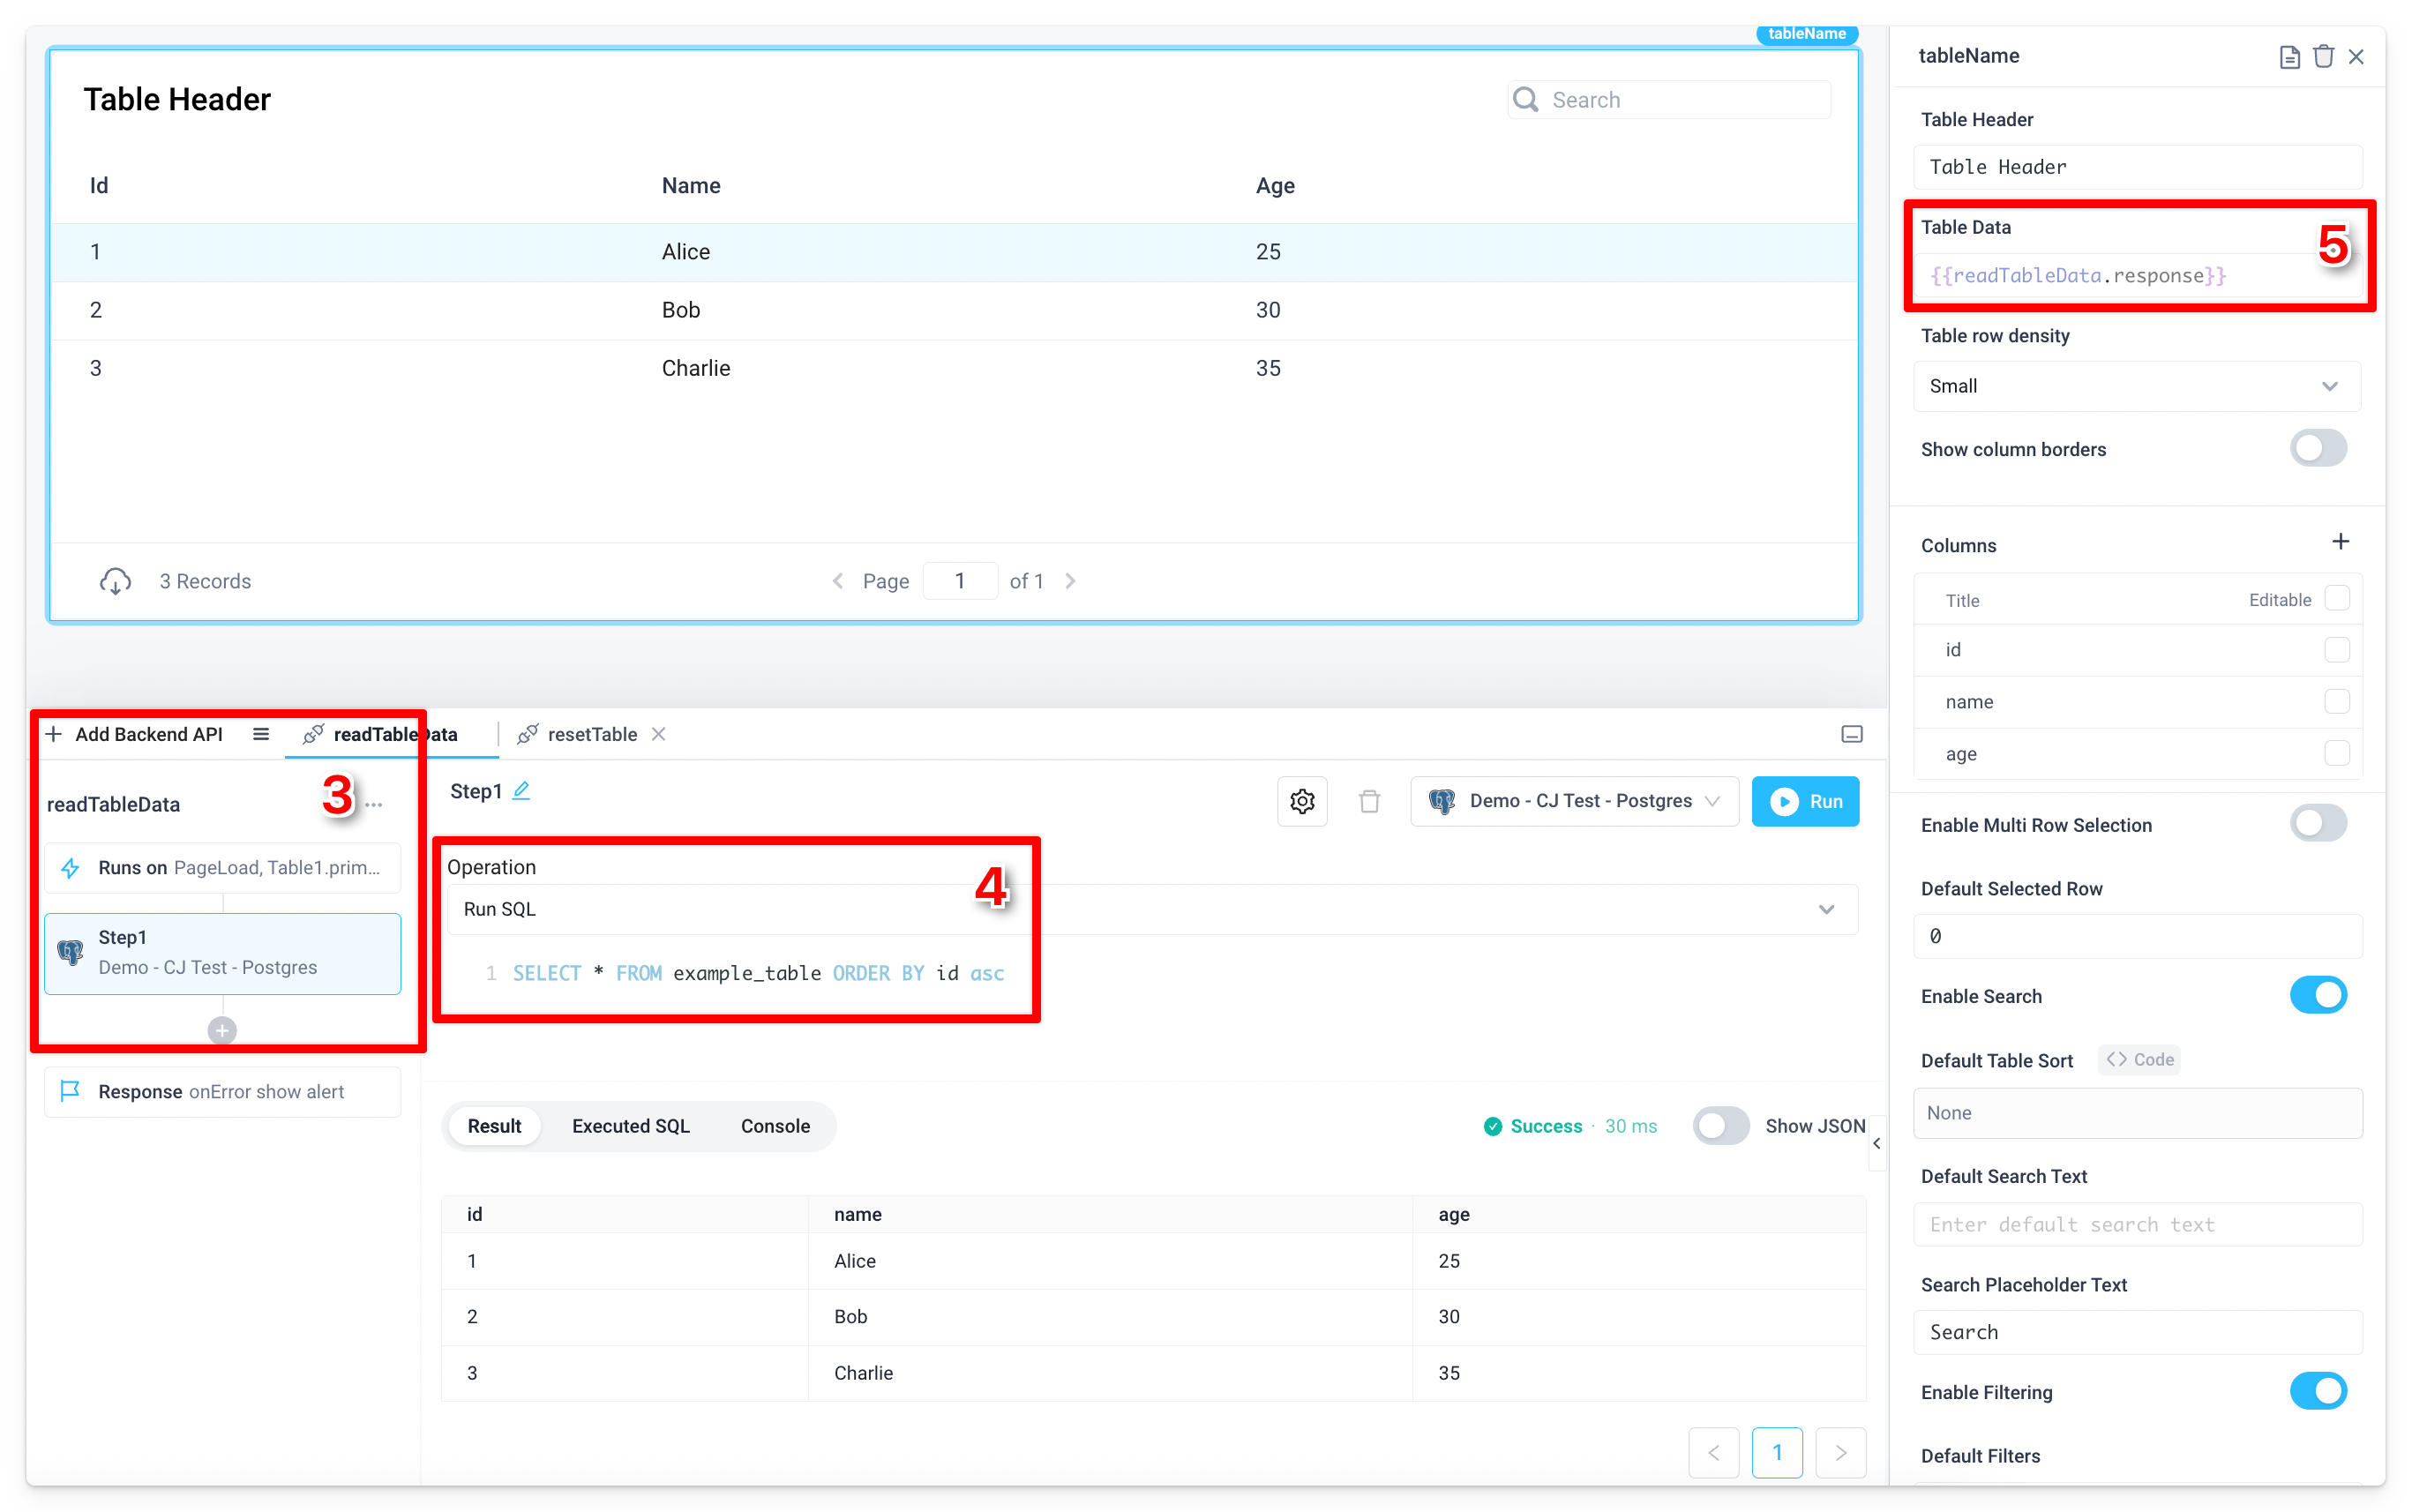
- Add a Button component to the canvas
- Update the Label to
Reset Data - Update the Background to red (hex:
#F45252) - Add two Run API actions to the
onClickEvent Handler and set them to run the backend APIsresetDataandreadTableDatain sequence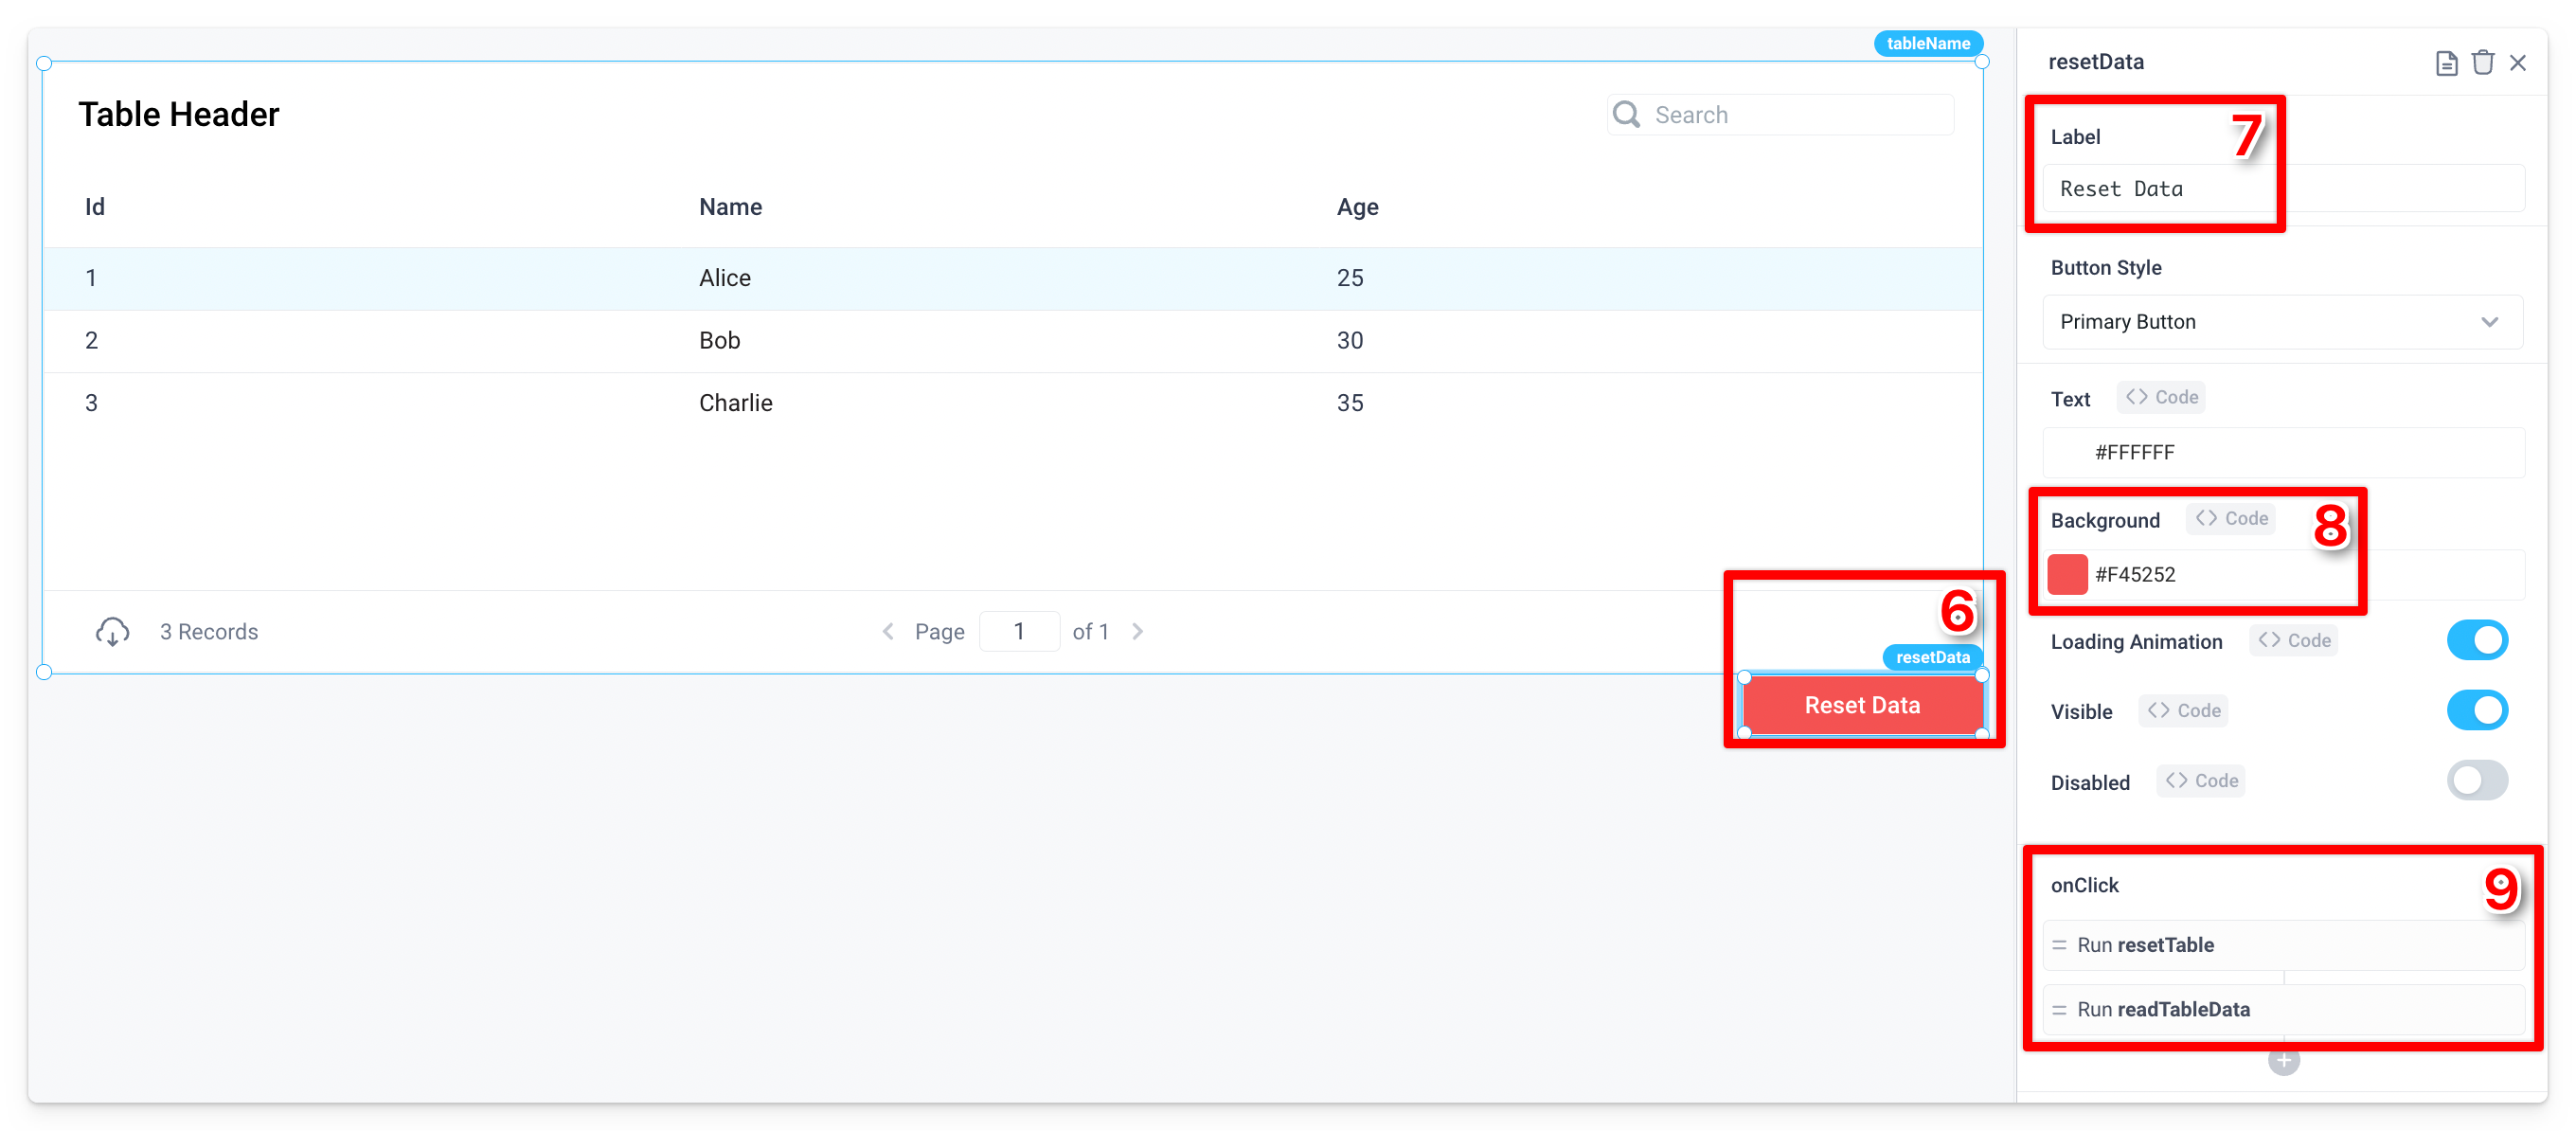
Add table data
- Add a Button component to the canvas
- Update the Label to
Add Data - Remove the Table's Default Selected Row (not shown)
- Add an
onClickEvent Handler for the Button added in Step 1 and set its action type to Reset Component to Default for the Table component for All Properties - Add another action to the same
onCLickevent handler and set its type to Set Frontend Variable in order to create a new Temporary Frontend Variable calledslideoutTitle, and set the Value toAdd data - Add a third action to the same
onClickevent handler and set its type to Open a New Slideout, rename this slideouteditData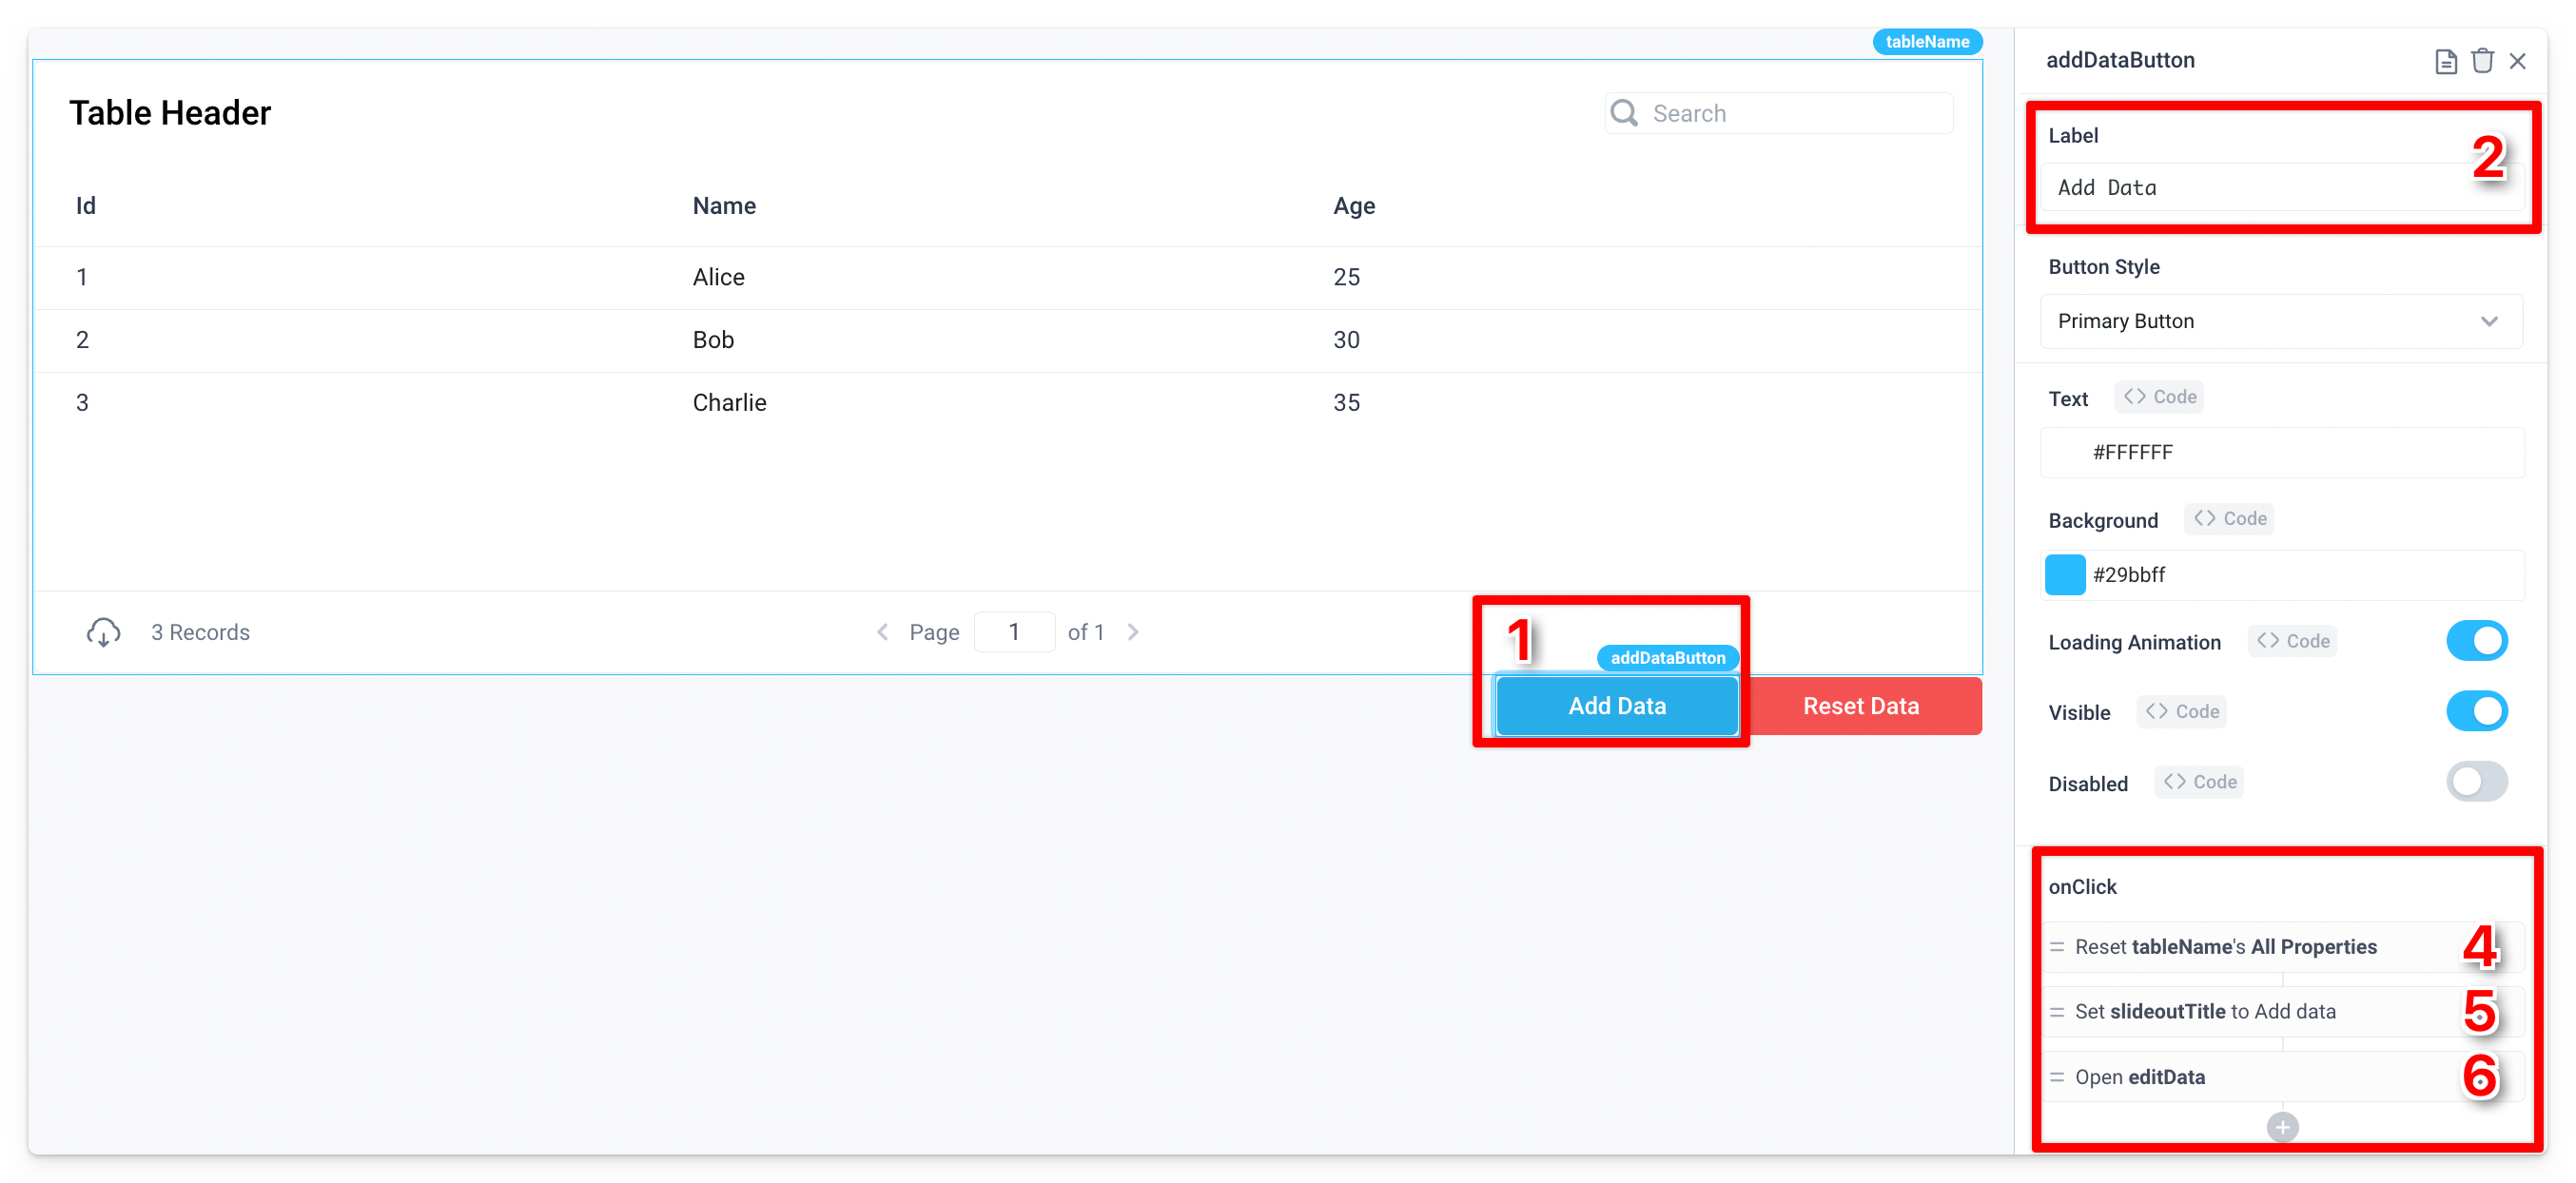
- On the slideout, delete the default Text component at the top and replace it with a Form component
- In the Form component, add a Text component and 3 Input components, one for each column in the table
- Update their Labels to
ID,Name, andAge, respectively - Update their Data Types to
Number,Text, andNumber, respectively - Update their Default Values to
{{Table1.selectedRow.id}},{{Table1.selectedRow.name}}, and{{Table1.selectedRow.age}}, respectively (read more about referencing Table properties)
- Update their Labels to
- Update the Text component to
{{slideoutTitle.value}}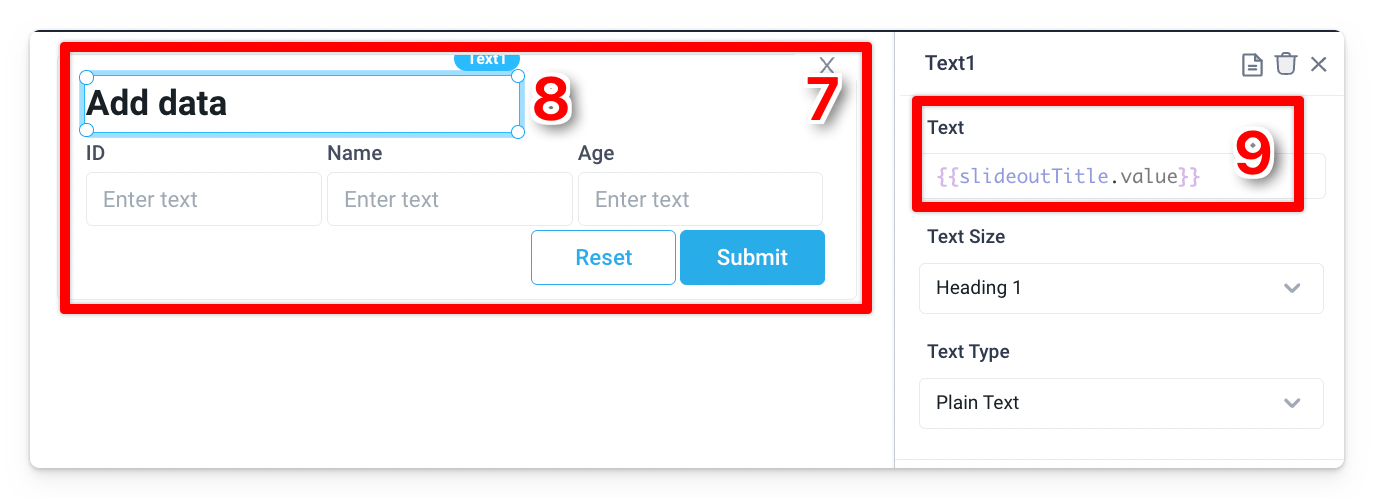
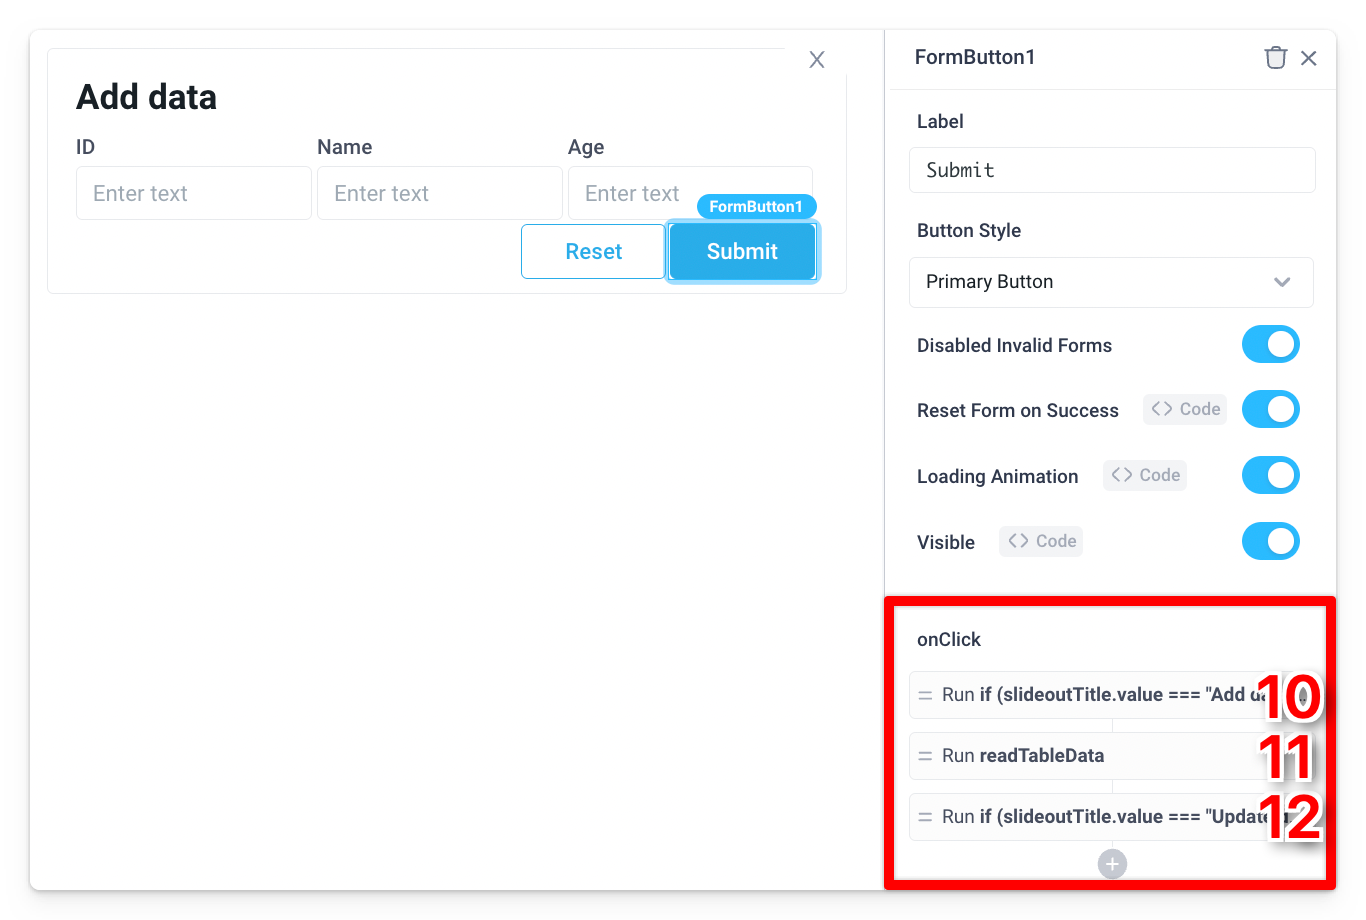
- Add an
onClickEvent Handler to the Submit button, set its action type to RunJS and paste the following script to the editor:
if (slideoutTitle.value === "Add data") {
  addData.run()
} else if (slideoutTitle.value === "Update data") {
  updateData.run()
} else {
  throw new Error("Unexpected value for slideoutTitle.value");
}
- Add a second action of type Run API to the
onClickEvent Handler and set it to run thereadTableDatabackend API - Add a third action to the same
onClickEvent Handler, set its type to RunJS, and paste the following script to the editor:
if (slideoutTitle.value === "Update data") {
editData.close()
} else if (slideoutTitle.value === "Add data") {
} else {
  throw new Error("Unexpected value for slideoutTitle.value");
}
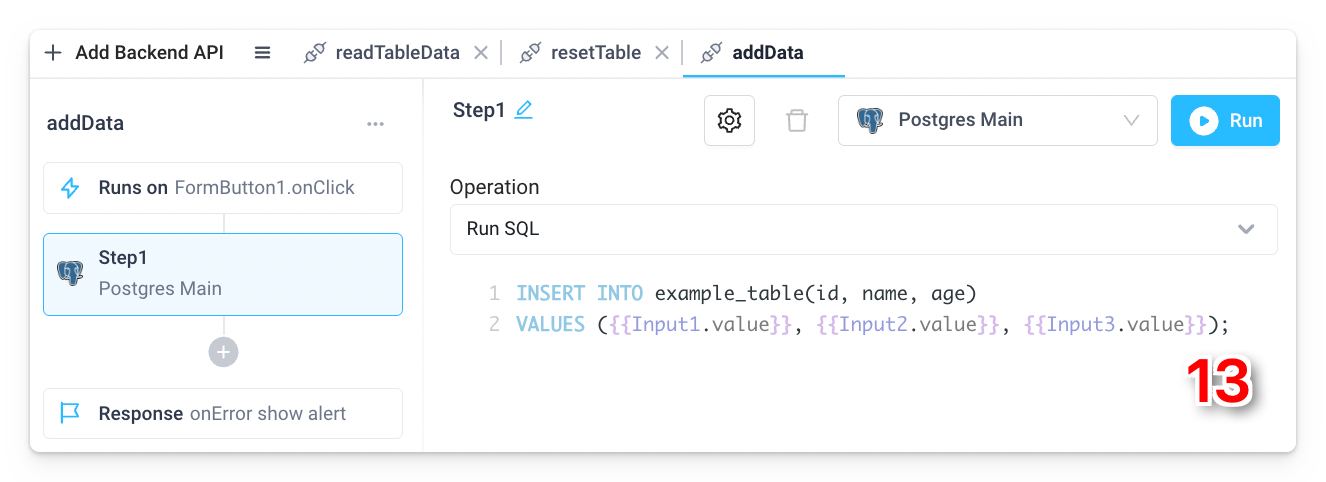
- Add a Backend API for your database integration, update the API name to
addData, and use the following SQL query:
INSERT INTO example_table(id, name, age)
VALUES ({{Input1.value}}, {{Input2.value}}, {{Input3.value}});
Update table data
info
Also, see the tutorial on how to use inline editing and bulk updating of SQL data sources.
- Add an
onRowClickedEvent Handler to the Table component, set its action type to Set Frontend Variable, pickslideoutTitleas the Frontend Variable, and set the Value toUpdate data - Add another action to the same
onRowClickedEvent Handler, set its type to Open/close Slideout, and pickeditDatafrom the list of available slideouts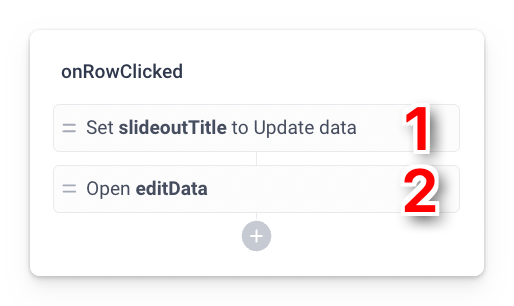
- Add a Backend API for your database integration, update the API name to
updateData, and use the following SQL query:
UPDATE example_table
SET id = '{{Input1.value}}', name = '{{Input2.value}}', age = '{{Input3.value}}'
WHERE id = '{{Table1.selectedRow.id}}' AND name = '{{Table1.selectedRow.name}}' AND age = '{{Table1.selectedRow.age}}';

Delete table data
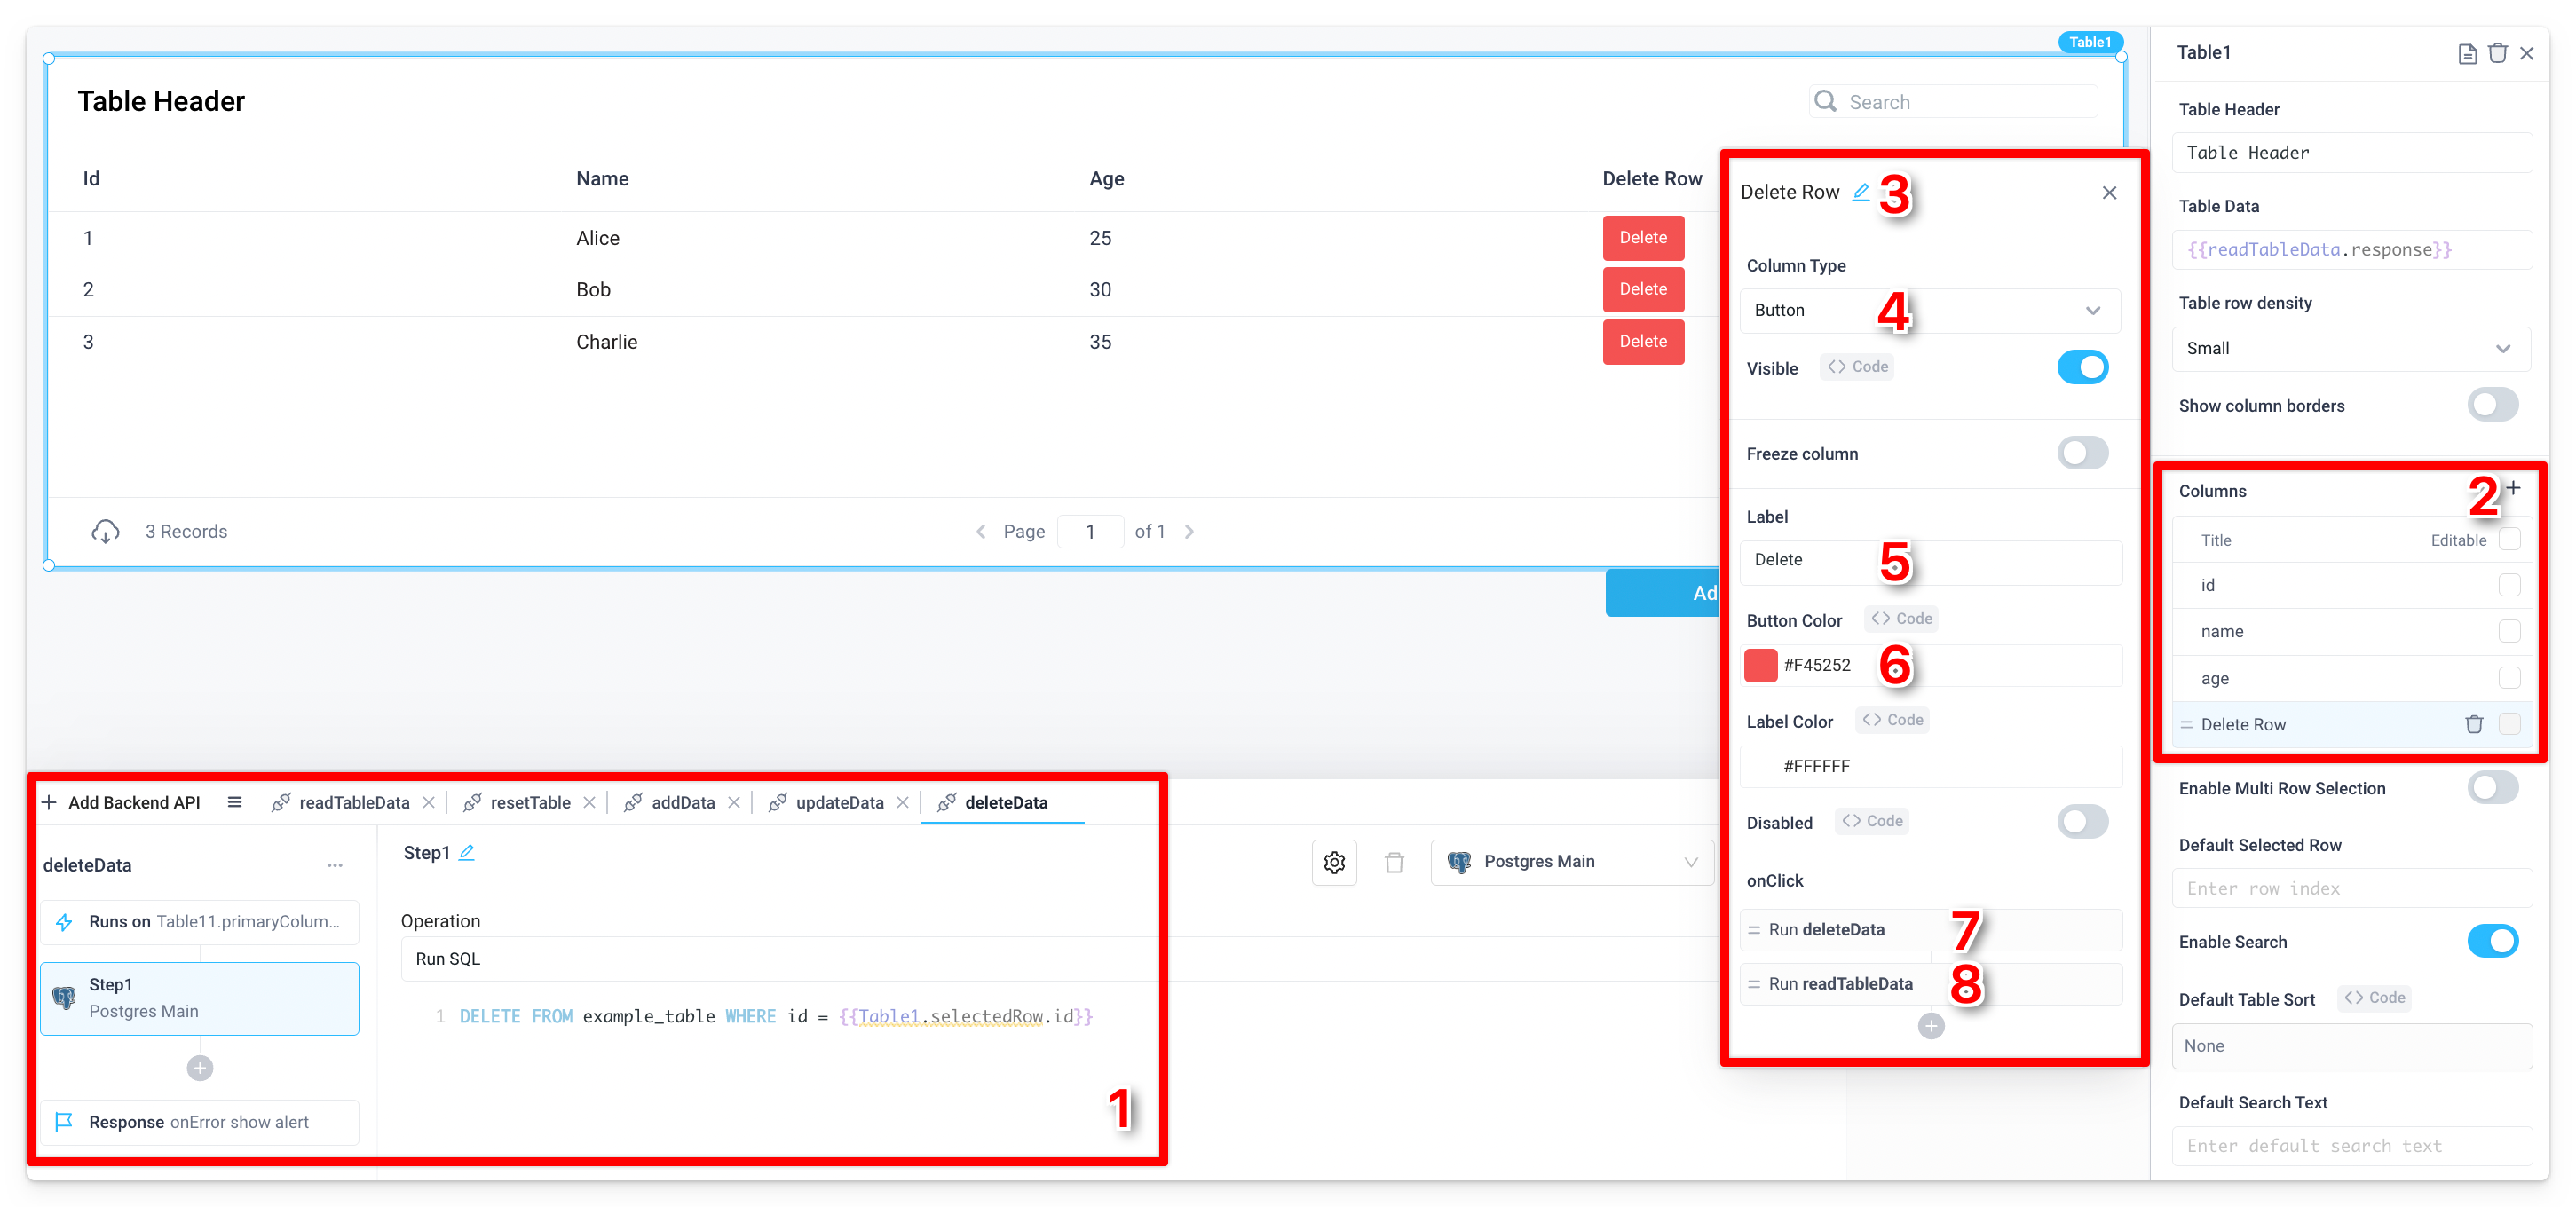
- Add a Backend API for your database integration, update the API name to
deleteData, and use the following SQL query:
DELETE FROM example_table WHERE id = {{Table1.selectedRow.id}}
- Add a new column to the Table
- Update the column's name to
Delete Row - Update the Column Type to
Button - Update the Label to
Delete - Update the Button Color to red (hex:
#F45252) - Add an
onClickEvent Handler to the Button, set the action type to Run API, and choosedeleteDatafrom the list of available backend APIs - Add another action to the same
onClickEvent Handler of type Run API, and set it to run thereadTableDatabackend API