Setting Up Application Profile Switching via a Dropdown
In this guide, we will show you how to allow users to switch which Profile is being used while in an Application. We will achieve this using a Dropdown component.
Build environments dropdown
Let's start first by creating the Dropdown selector for which enviroment profile we're in and also allow our users to switch to.
-
Drag a Dropdown component onto the canvas, update the
Labelto "Environment" or similar -
Update the
Optionsto be{{Global.profiles.available}}
-
Update the
Value Fieldto beid -
Update the
Label Fieldto bedisplayName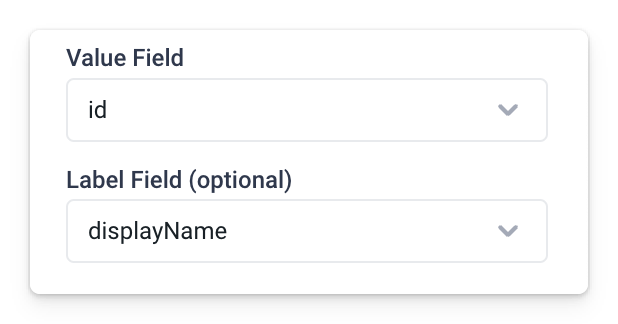
-
Update the
Default selected value string(s)to be the selected default environment{{Global.profiles.default.id}}- By default, this will be
Stagingin Edit and Preview andProductionin Deployed, but you can update it in the Left side bar Profiles panel as needed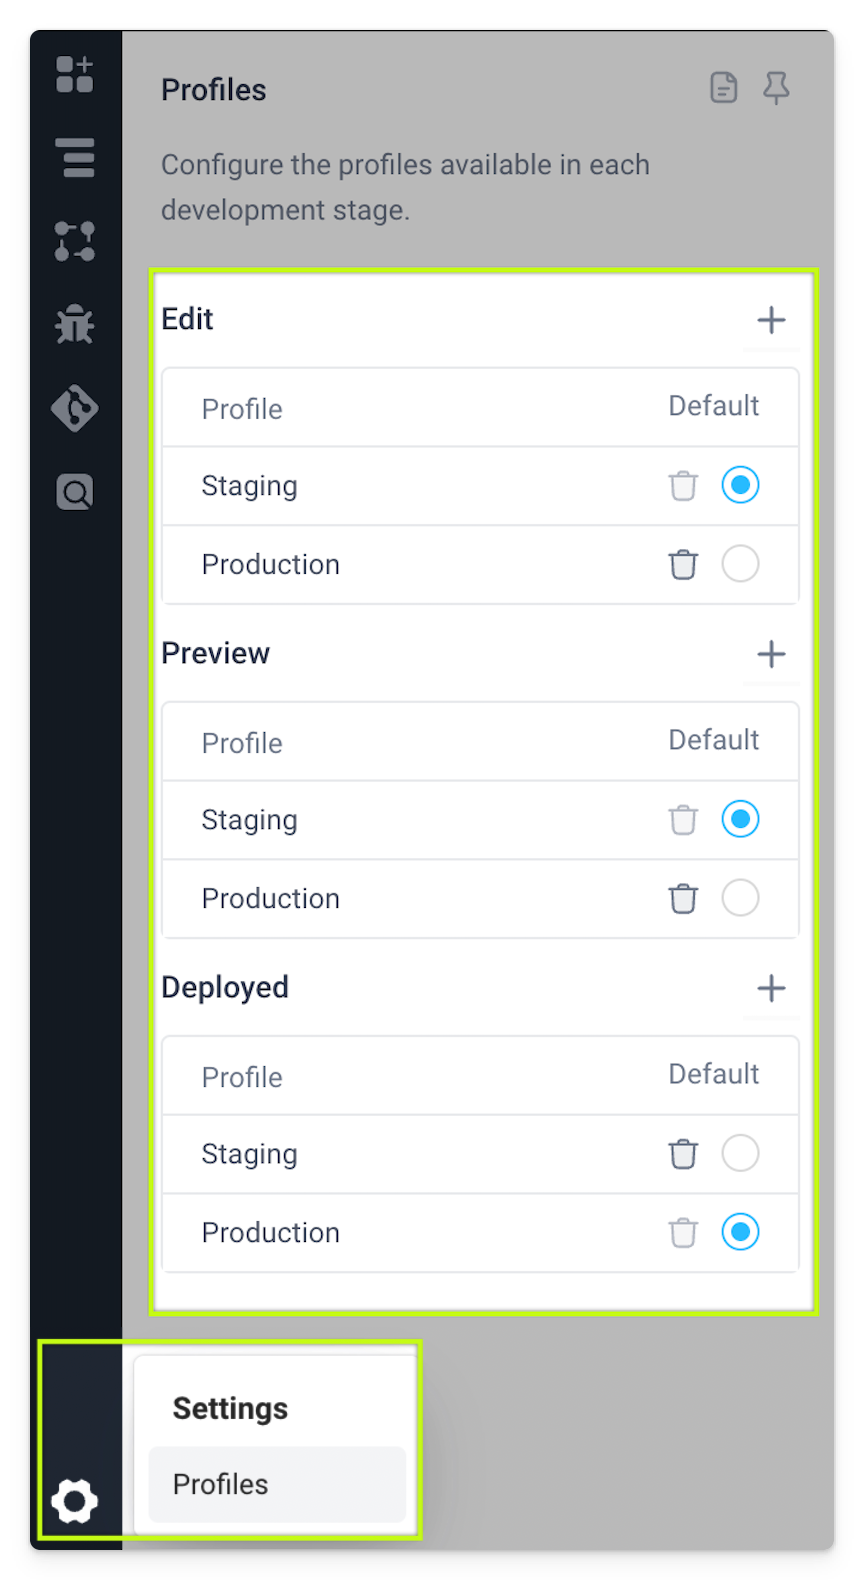
- By default, this will be
-
Add an action for the
onOptionChangeevent handler for the Dropdown component toSet Profileto{{Dropdown1.selectedOptionValue}}
Here is what it should all look like after configuring the dropdown.
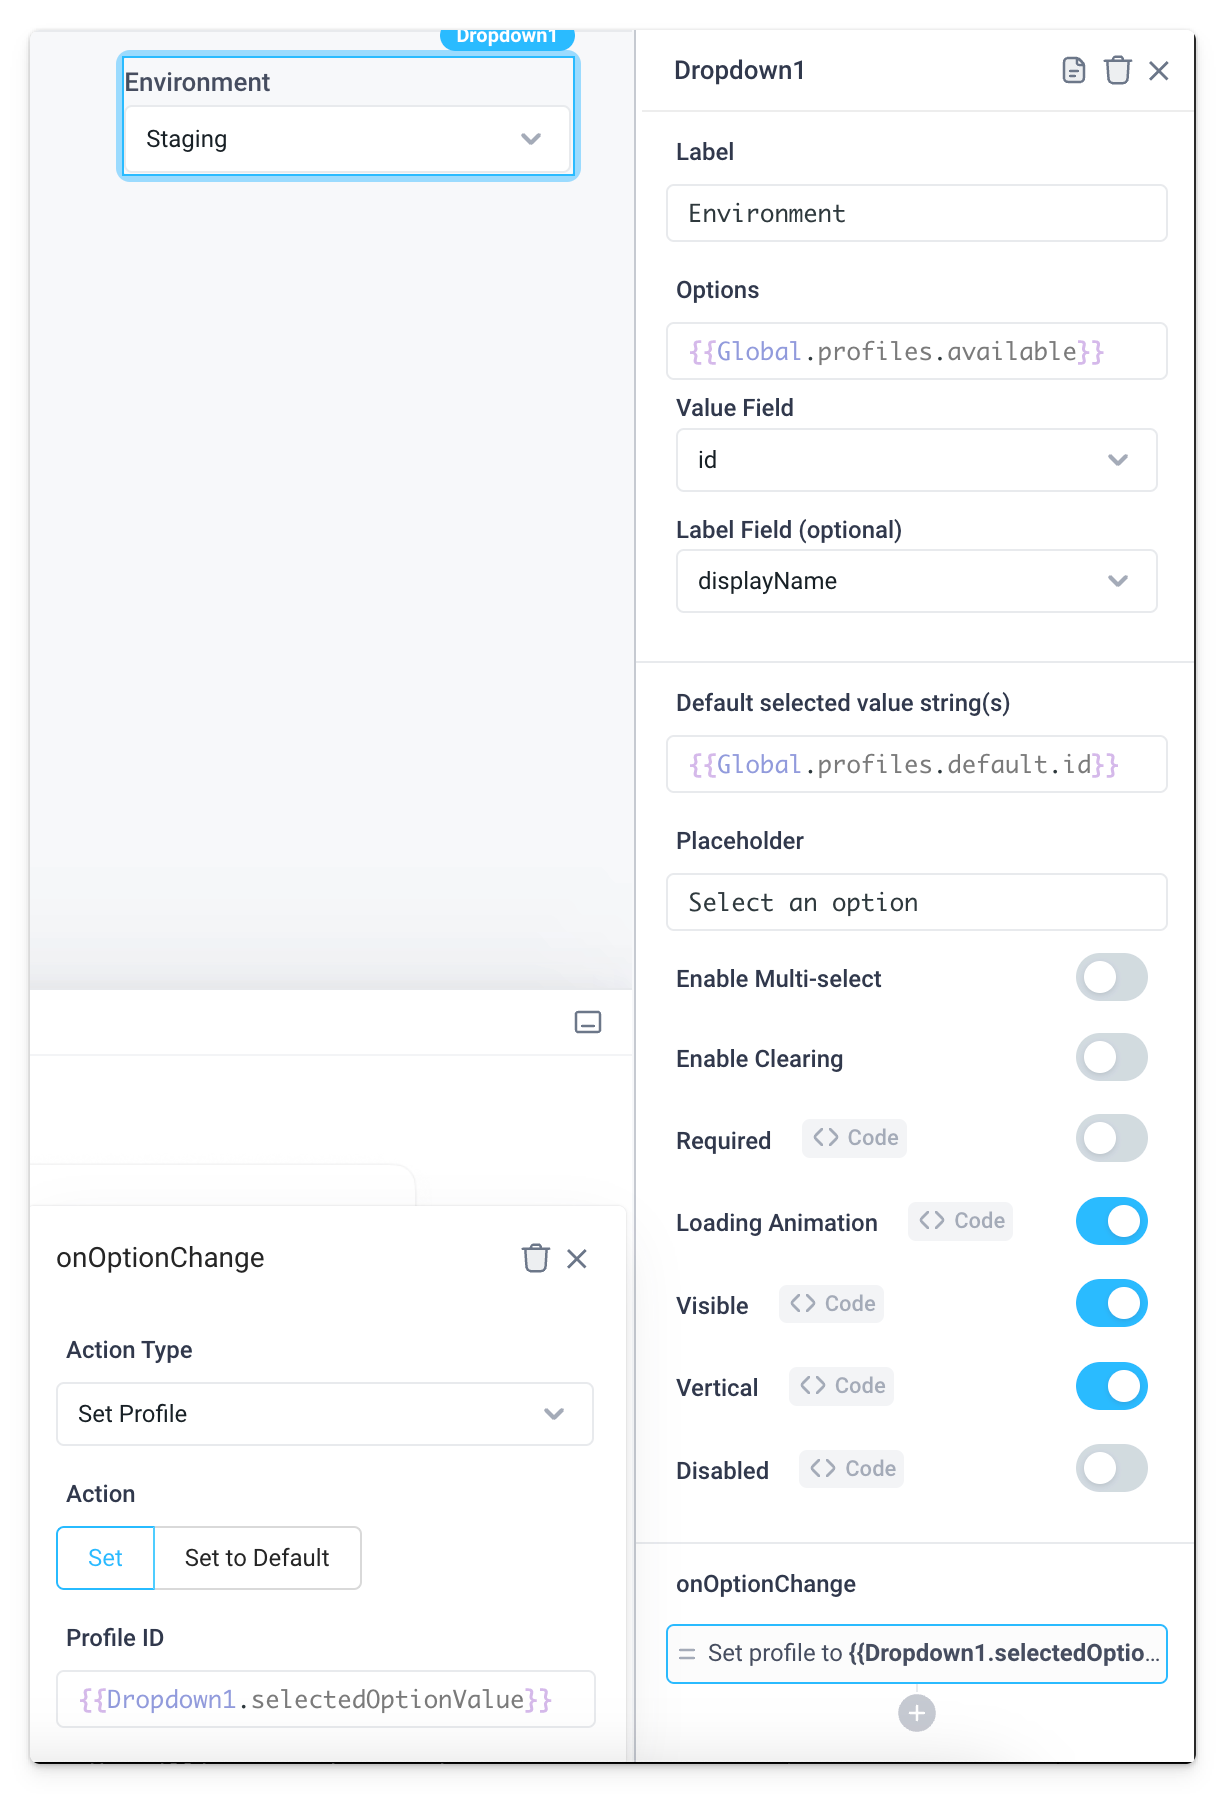
Note that you can see the current active environment in the top right corner of the application while in Edit mode, this is also a button to open the Profiles pane when clicked.
Add a new profile
If needed, we will have to add additional profiles and environments. In this example we'll add a developer enviroment.
-
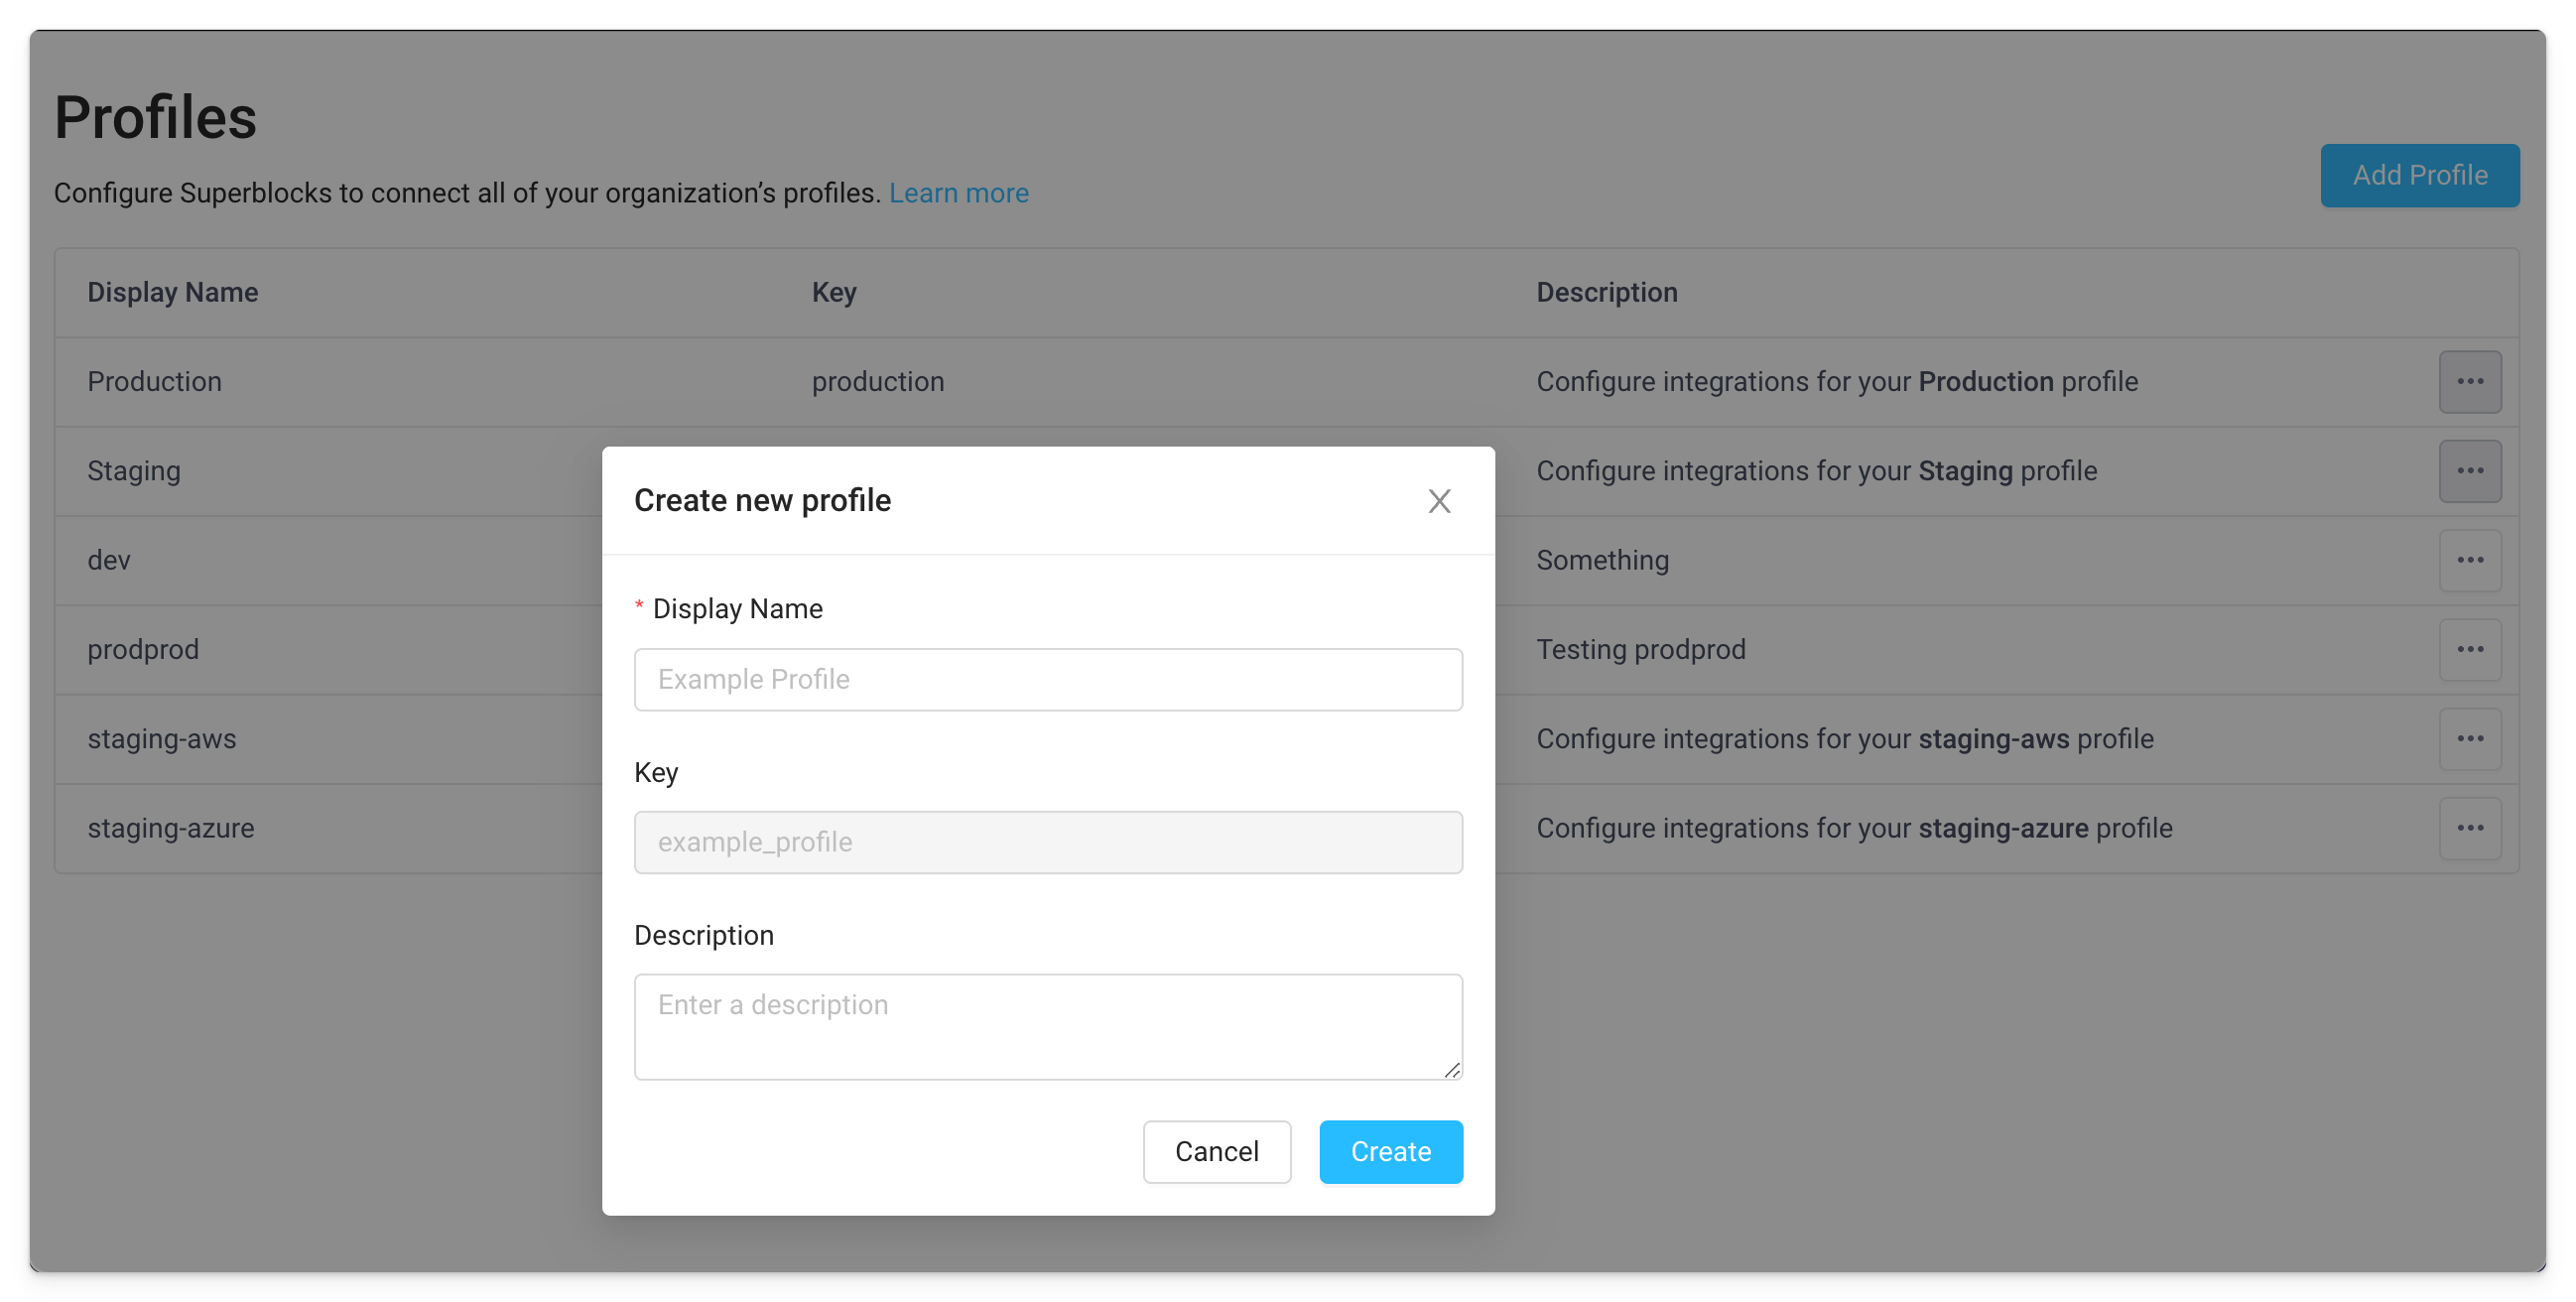
To add a new profile, go to the Profiles page in the Org settings
-
Click "Add Profile" to open the modal and fill it out accordingly
-
Once the Profile is created, a new configuration for integrations using that profile will need to be created. This can be achieved by clicking the blue
+on the integration page to create a new profile.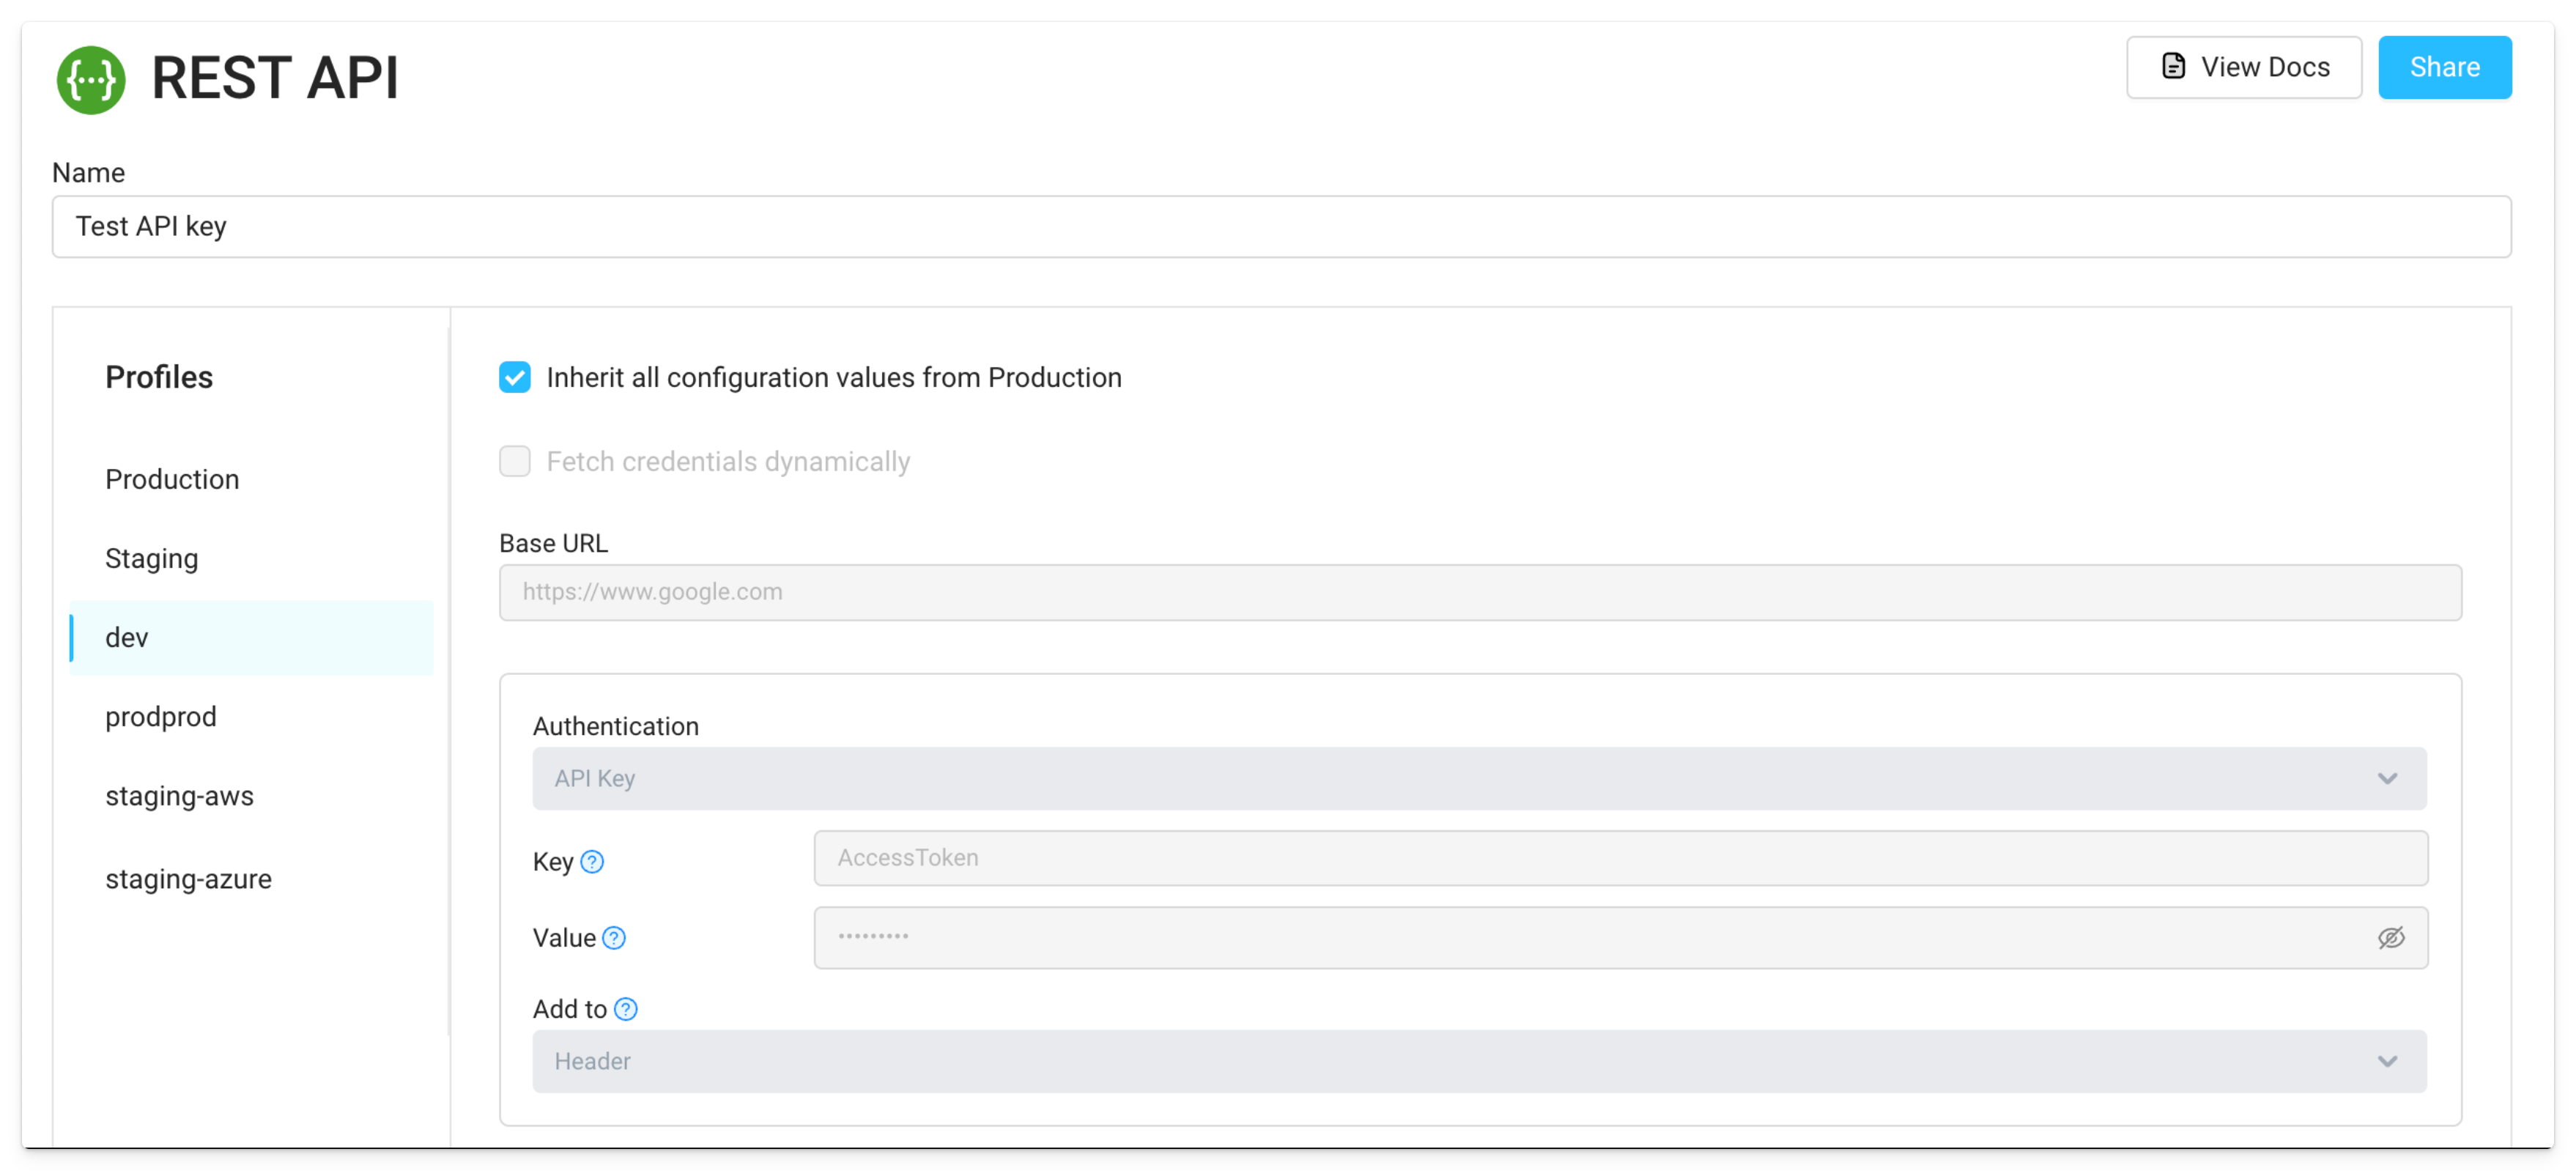 caution
Note, that all profiles will by default use the "Default" configuration. Additional configurations must be added and assigned to corresponding profiles.
After creating a QA profile, the integration still is using Default information

In order to have this integration use the QA profile, step 3 above needs to be followed to break out into a new tab and add the QA credentials.

-
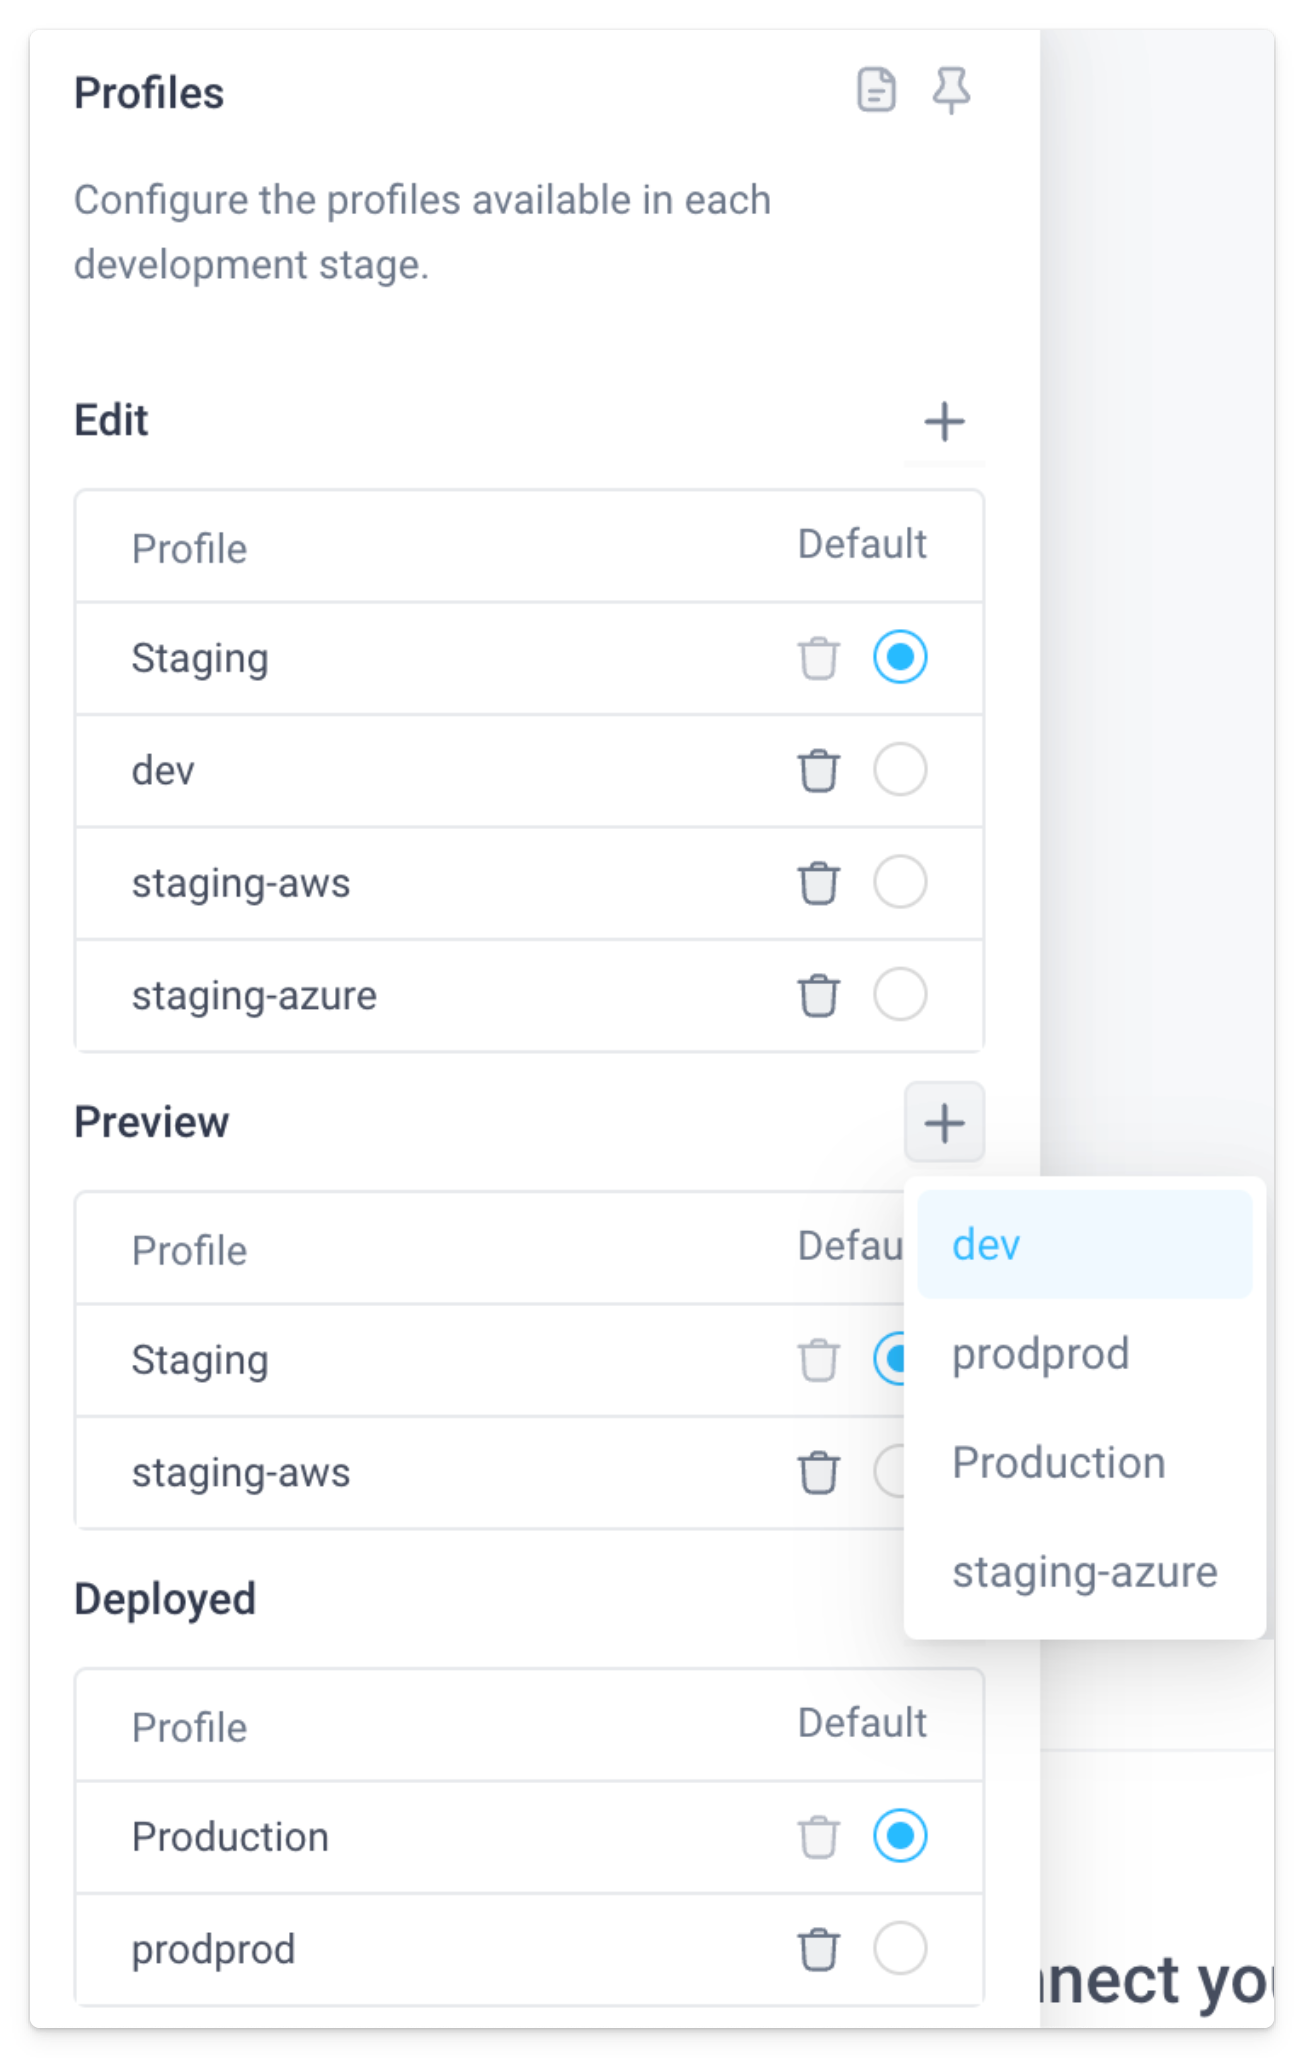
After you create new profiles, you'll need to add them to each mode of the application (Edit, Preview, Deployed) to specify which modes can use which environments.
Use RBAC to lock down which users can access which environments
Finally, we will want to limit the list of which environment which users can access.
-
Once the above sections have been completed, you can now leverage Frontend JS in the Dropdown
Optionsfield in order to dynamically update the available environments based on the user's group. See below for an example JavaScript function:{{(function() {
// role -- environments to be accessed
// Admins -- staging-azure, staging-aws, staging, production
// Support Managers -- staging-azure, staging-aws, staging
// Support -- production
// any other group -- no access
let env_access = {
'staging_azure': ['Admins', 'Support Managers'],
'staging_aws': ['Admins', 'Support Managers'],
'staging': ['Admins', 'Support Managers'],
'production': ['Admins', 'Support']
};
let user_groups = Global.user.groups;
let available_environments = Global.profiles.available.filter(item => {
let allowed_groups = env_access[item.key];
if (!allowed_groups) {
return false;
}
return allowed_groups.some(grp => user_groups.map(g => g.name).includes(grp));
});
return available_environments;
})();}}
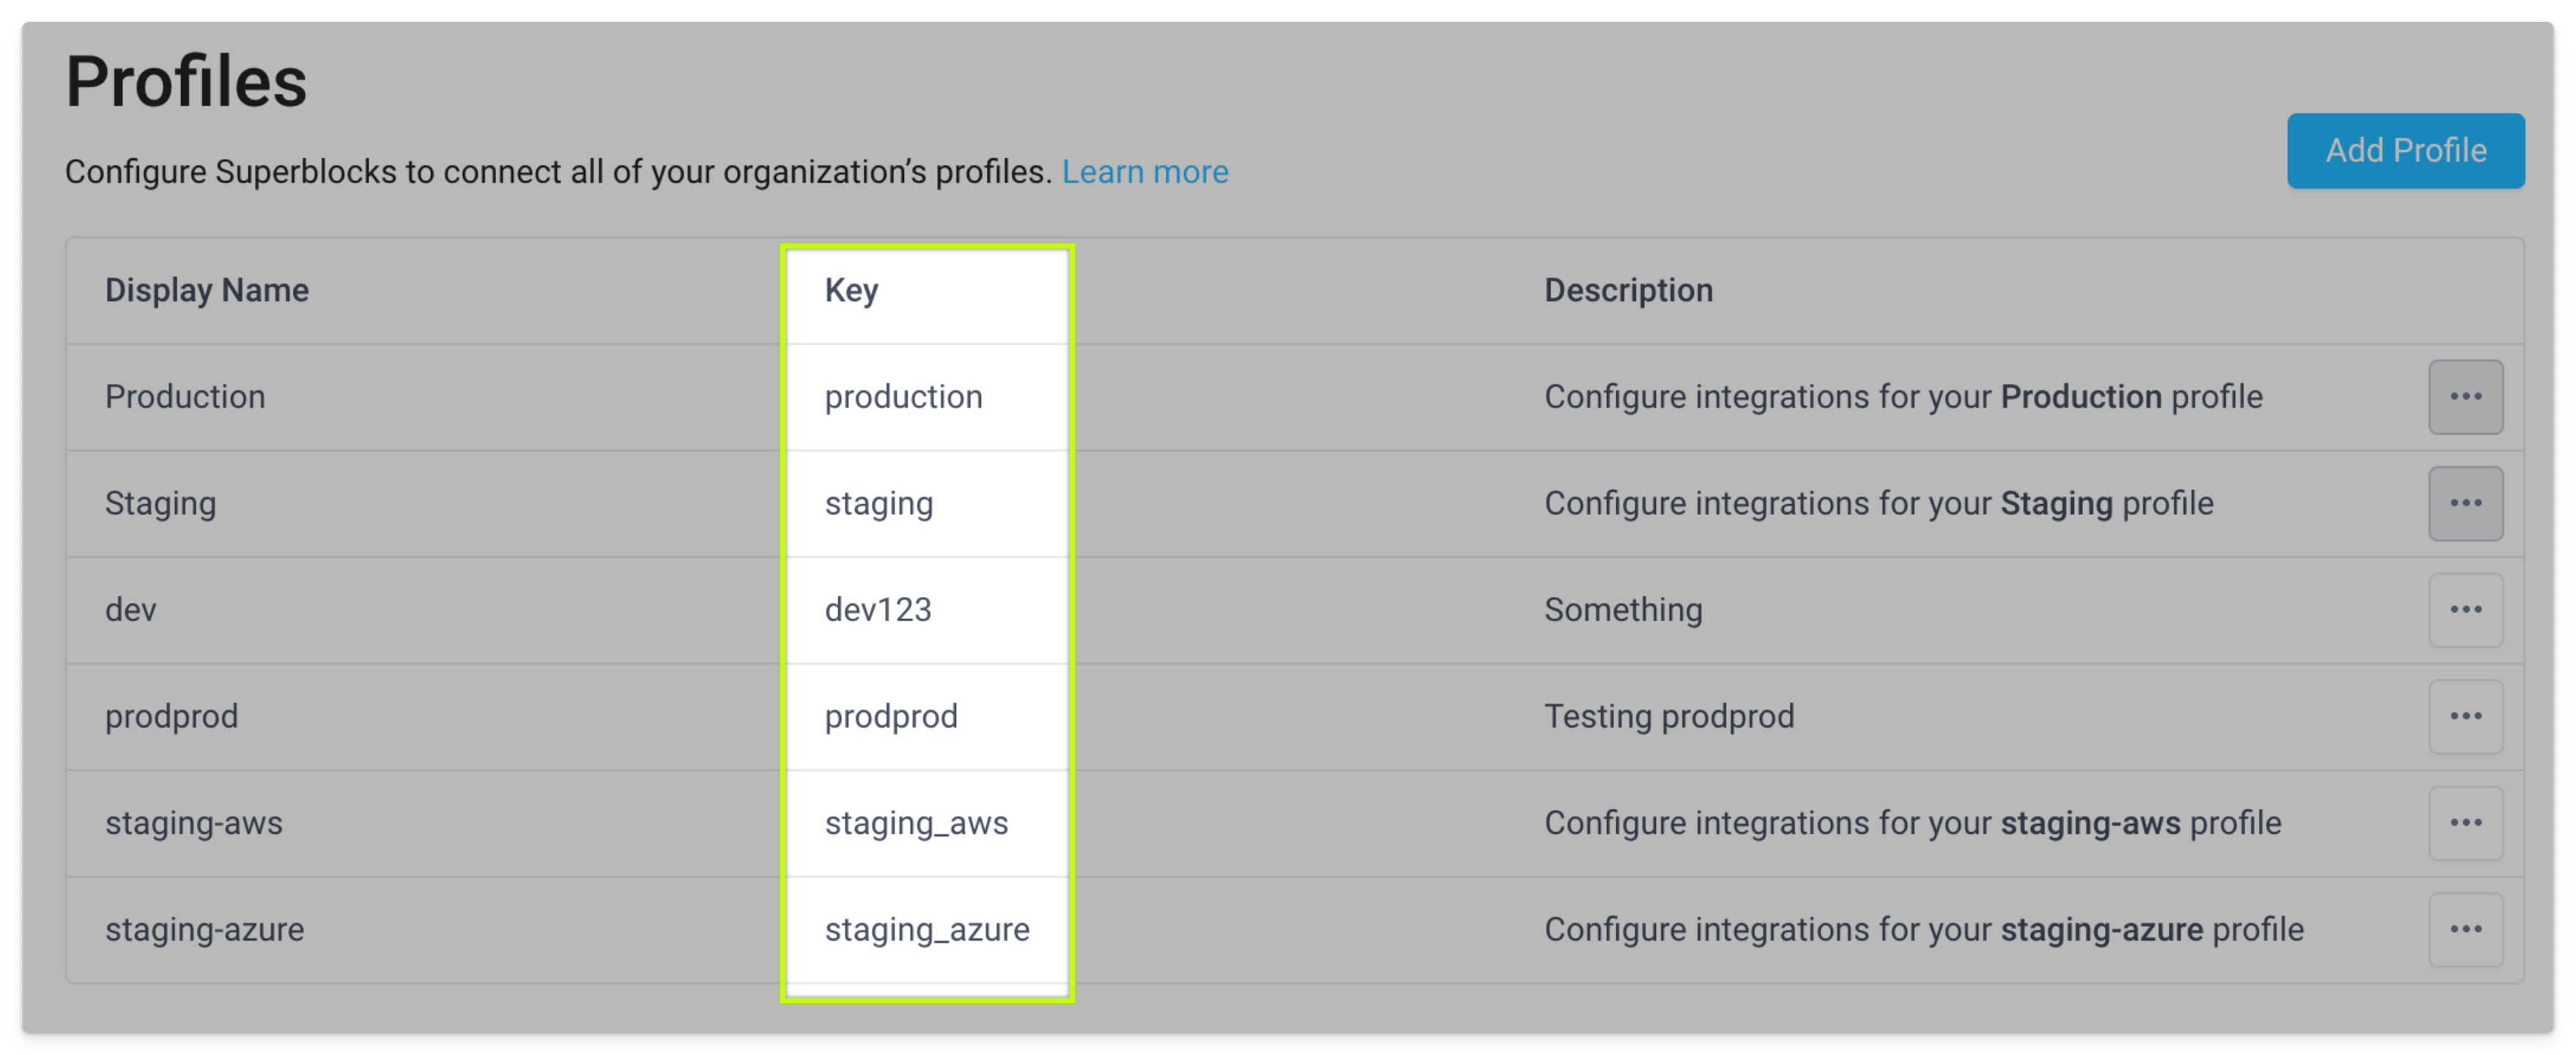
Here, you'd need to update the env_access object to be the appropriate environment keys as found in the profiles page:
