Who can use this feature?
Local development can only be used by organizations that self-host the Superblocks data plane using the Hybrid or Cloud-Prem architectures.
- Quickly make changes to REST APIs to return data needed for your app
- Access new database schemas and update queries while those schemas are in development
- Debug cross-service errors by setting breakpoints in downstream services
Architecture
When building Superblocks Apps, you can think of the architecture as being similar to that of microservices. When a Superblocks API is run, a request is sent by the user’s browser to the Agent service. The agent then connects to other services (Integrations) to get data, before returning the results back to the browser. Usually agents are deployed to central cloud environments that all developers can access. When deployed in this fashion, the agent can only access other services in that environment or on public networks (e.g. Slack’s API).
For local development however, the agent will need to access ports on the local machine, which can be accomplished by running the agent locally. With local agents running, you can then update your Integrations to include a local configuration so the agent knows how to connect to the locally running APIs/Databases.
Set up
1. Create a Localhost profile
To route API execution requests from the browser to a locally hosted agent, we’ll use the Superblocks Profile feature. Using this feature we can define a new Localhost profile. When this profile is selected in the Editor, Backend API requests will be sent from the developer’s browser to the local agent to excute. To create the profile:- Click your avatar in the upper-left corner of the home page and click Organization Settings
- Click Profiles
- Click Add Profile
- Name the new profile Localhost and click Create
Note that this profile will be used by all developers on your account. When the application editor is set to use this profile, API requests will only run if an agent is running at
localhost:8000 on the developer’s machine.2. Deploy the agent locally
Now that you have a profile defined for local development, you’re ready to deploy an agent to your local machine. To do so:- Create an Agent key on the Access Tokens page
- Run the following command, replacing
{AGENT_KEY}with the token you just generated
It is encouraged that all developers run the agent on the same port. To make this simple and scalable, it’s good practice to create a shared
.env file/start up script that developers can use when configuring their machine to run the agent.3. Configure integrations to connect to local datasources
With the agent running, Integrations can now connect to locally hosted services. To configure an integration to connect to a local service:- Go to the Integrations page and select the integrations developers can connect to locally
- Click on the ellipsis menu followed by Manage
- Click the + icon to add a new configuration and select Localhost as the profile
- Fill out the configuration form with the values needed to connect to the local server/database and click Save
Instead of setting host addresses to
localhost be sure to set host.docker.internalPer-developer configuration
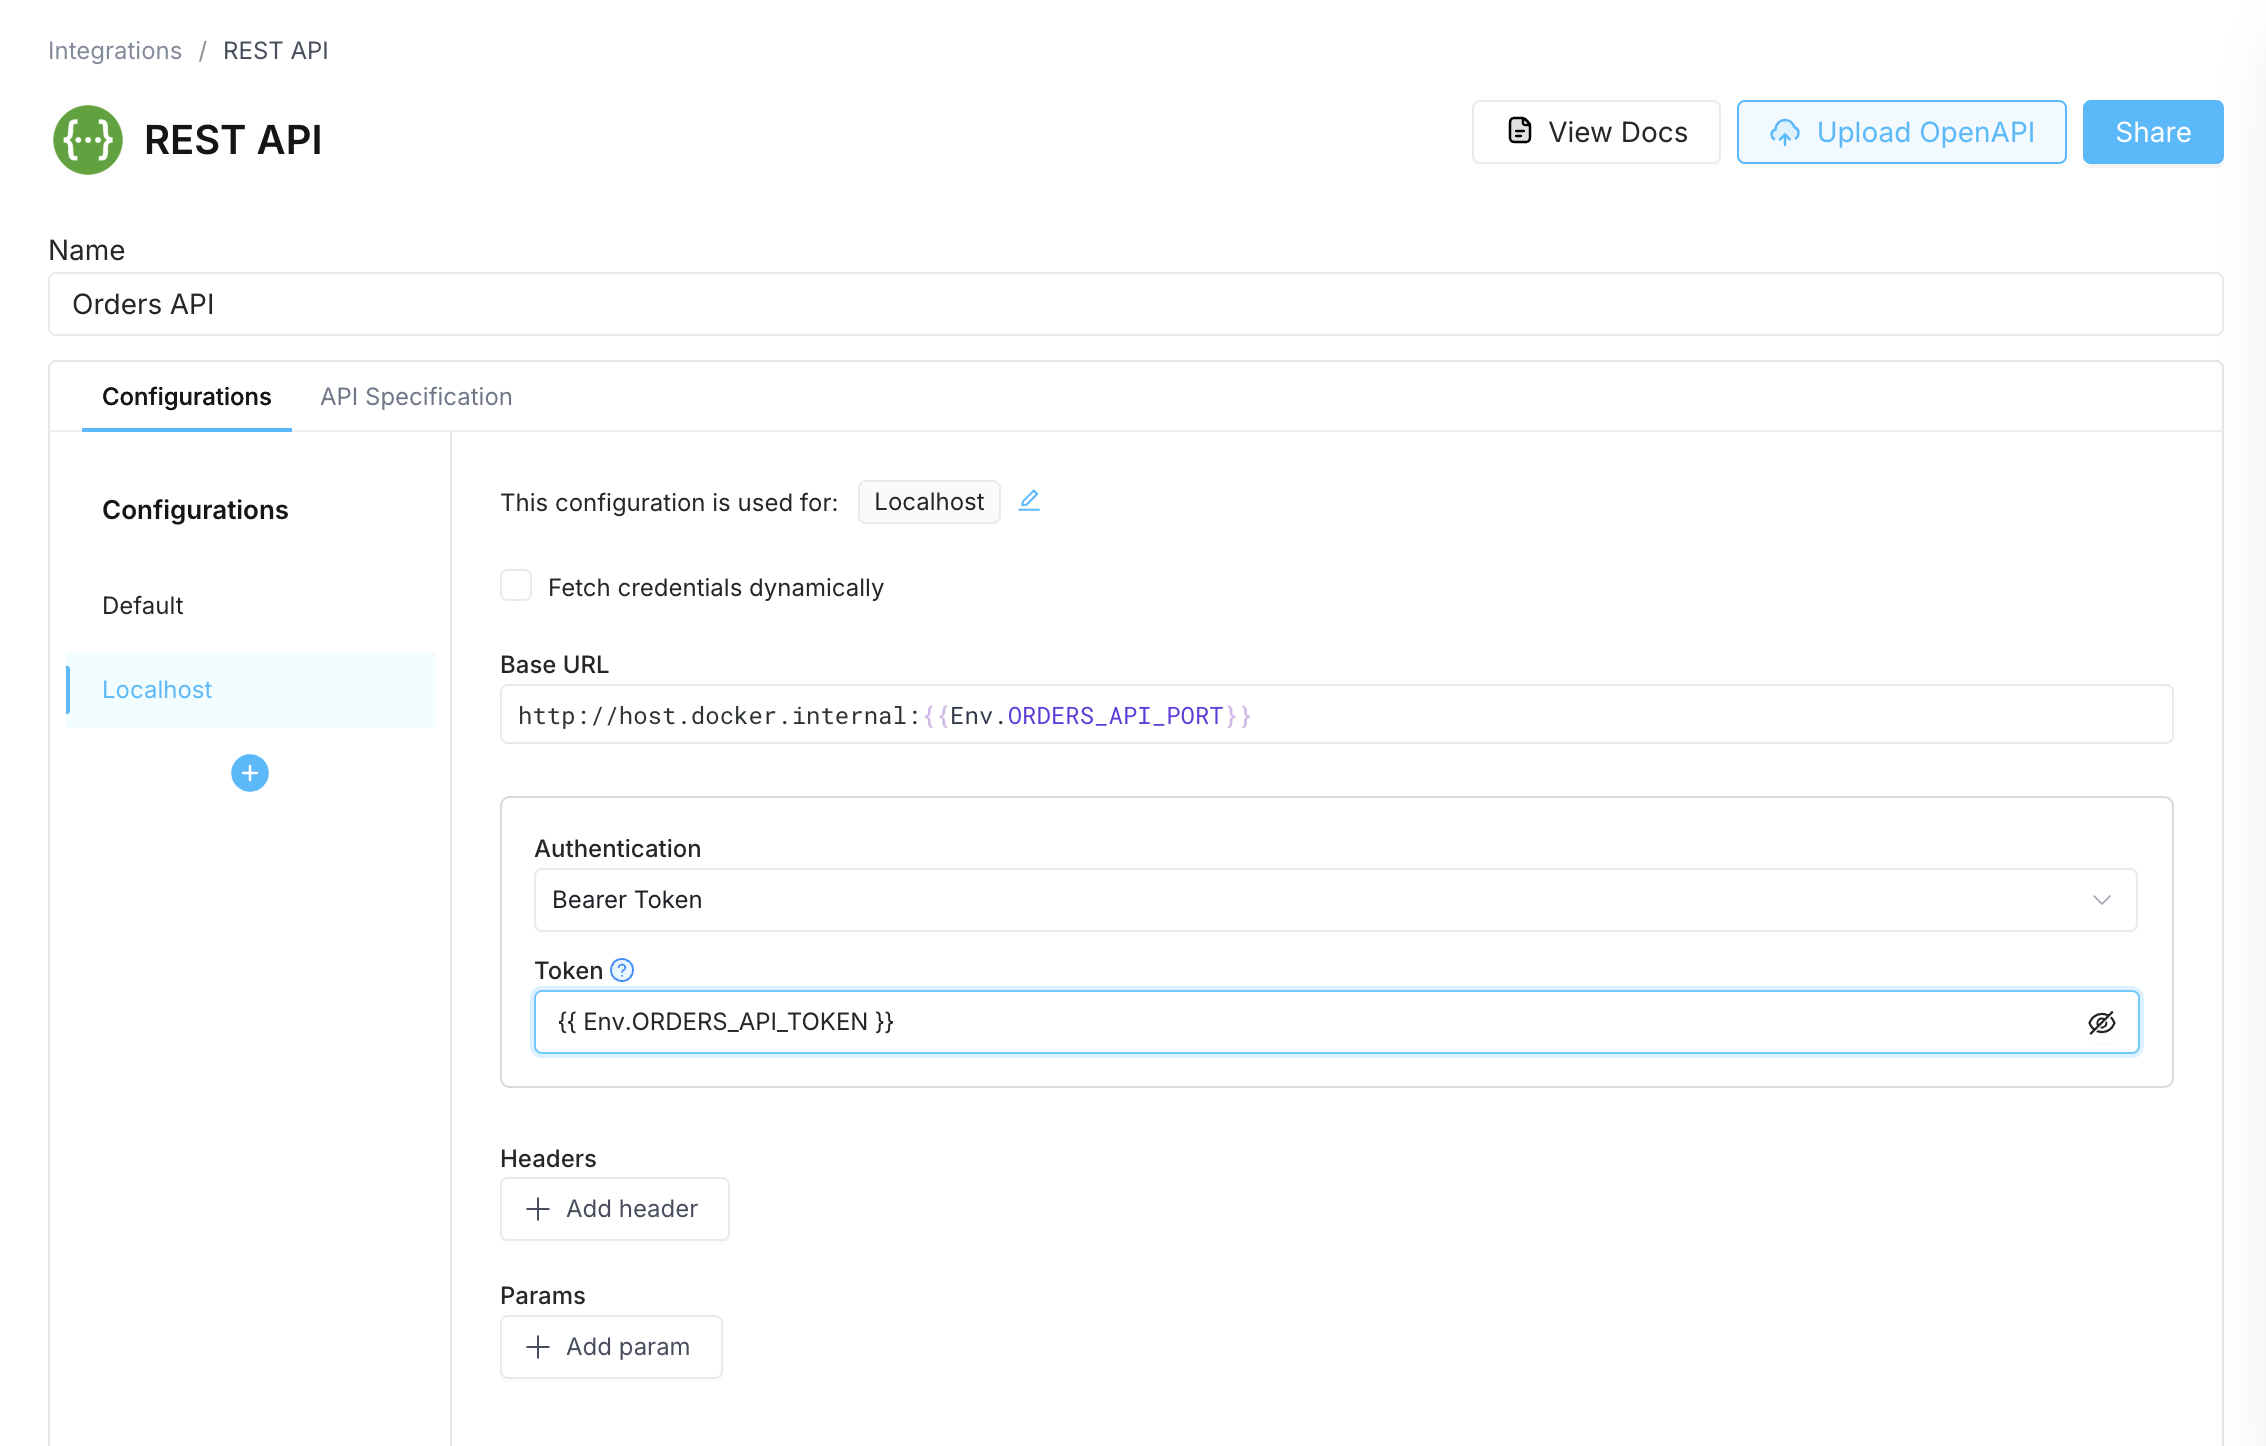
Not sure what ports your developers will run local servers/databases on? No problem. You can use Environment Variables to define the host/port/base URL/etc to use when connecting. For example, the following Integration uses an environment variable calledORDERS_API_PORT to define the localhost port where the server is running.
 When defining variables in this way, each developer can set the environment variable to the port they use on their machine.
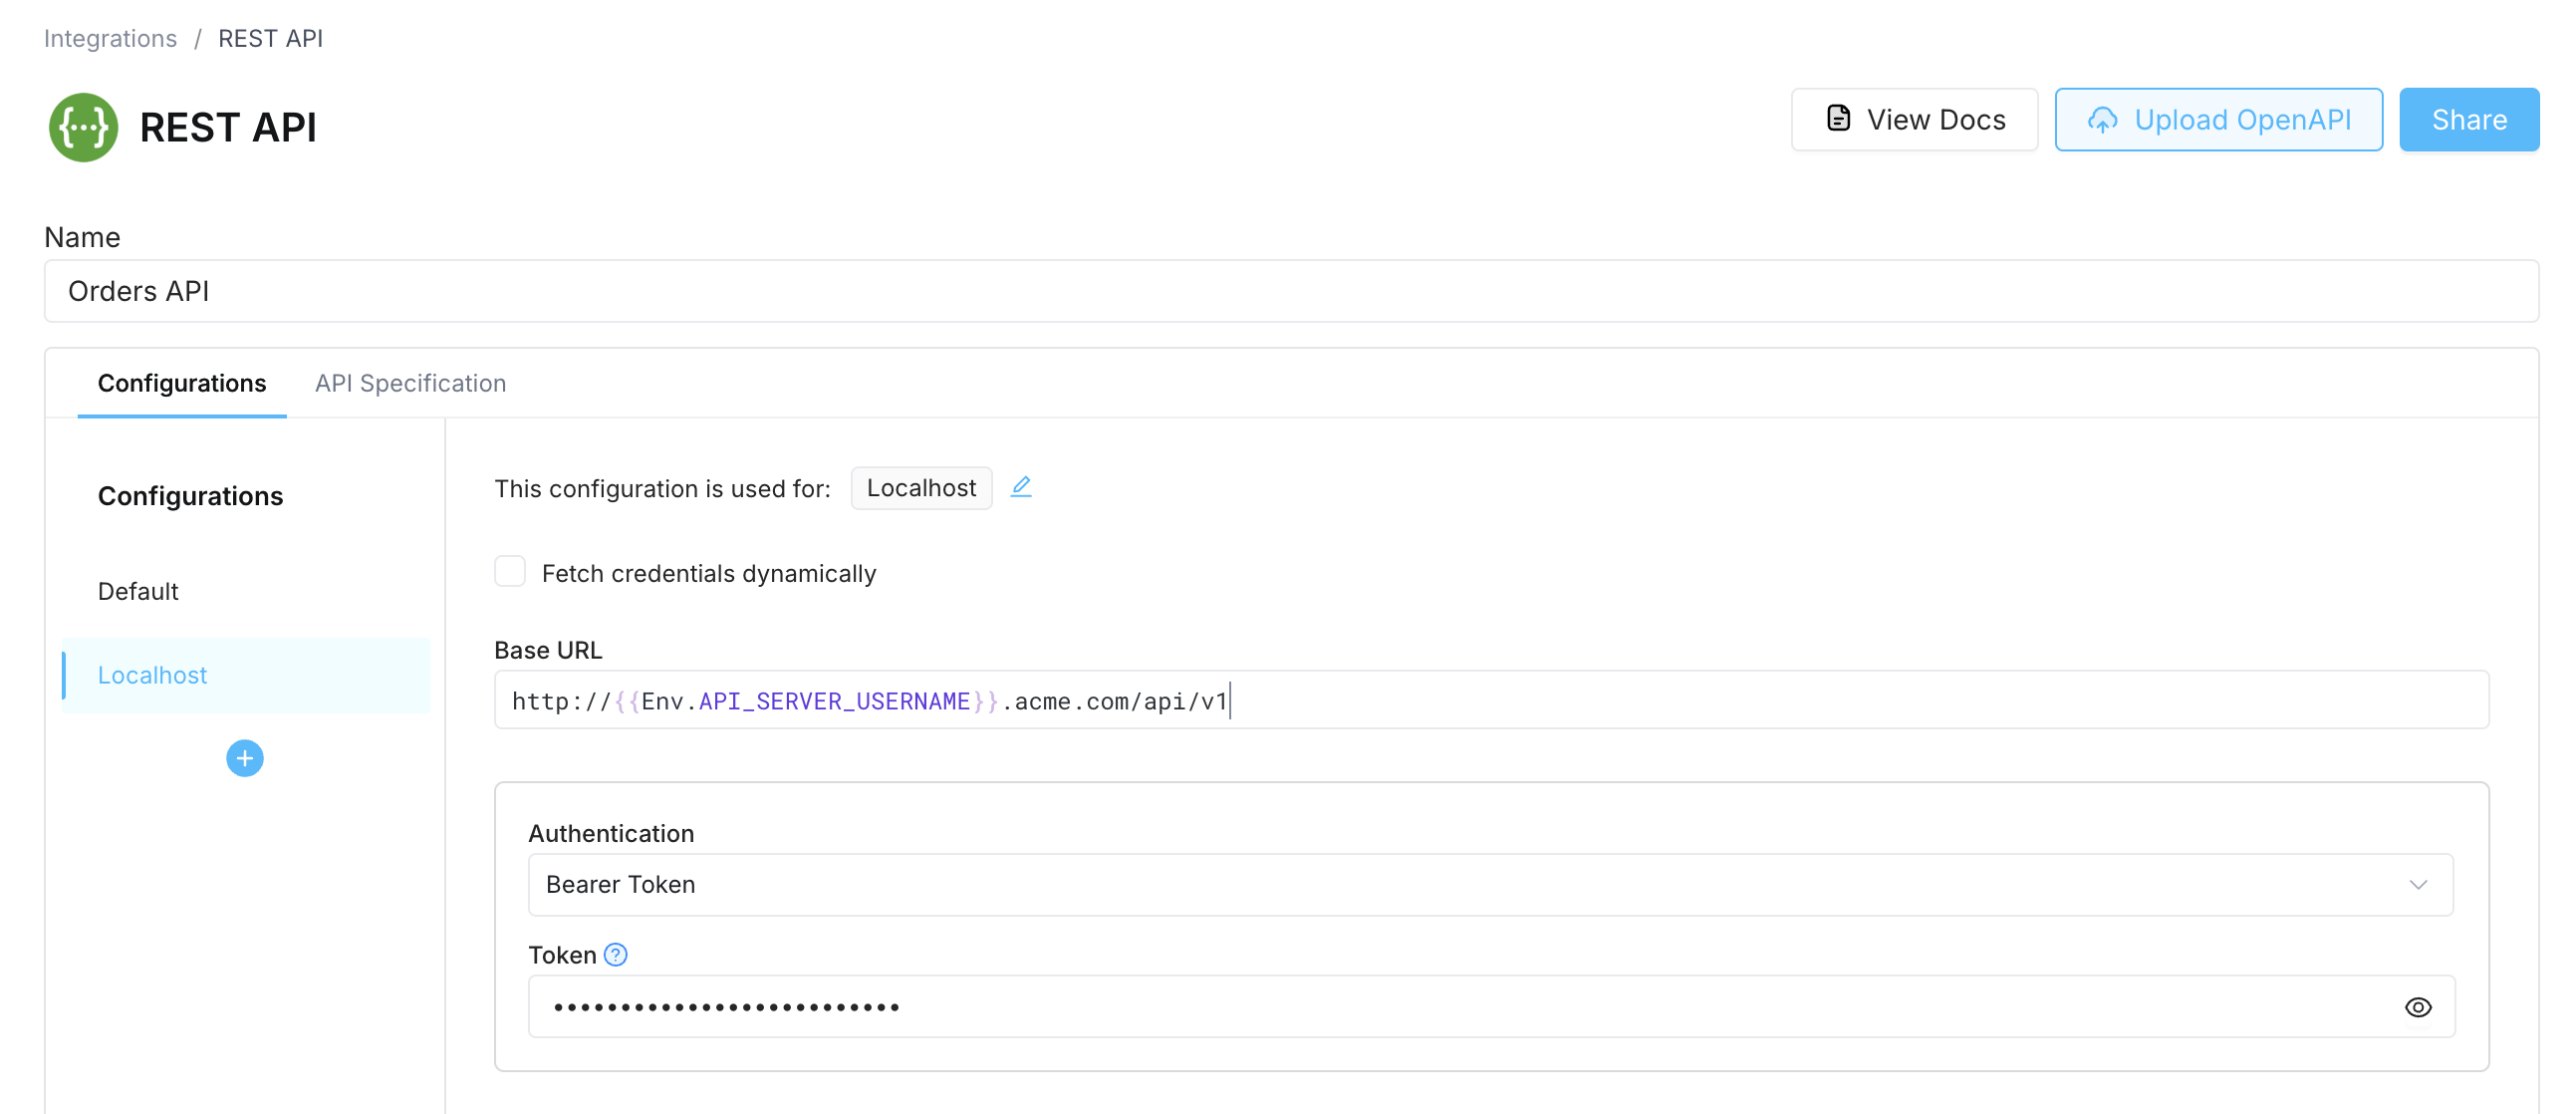
You can also use this if each of your developers has their own Cloud environment. Let’s say for example that each developer has an API server running at
 https://{username}.acme.com/api/v1. You can create an SUPERBLOCKS_AGENT_APP_ENV_API_SERVER_USERNAME variable that each developer will set so that the API’s base URL will update dynamically based on the developer executing the API.

4. Use localhost in the editor
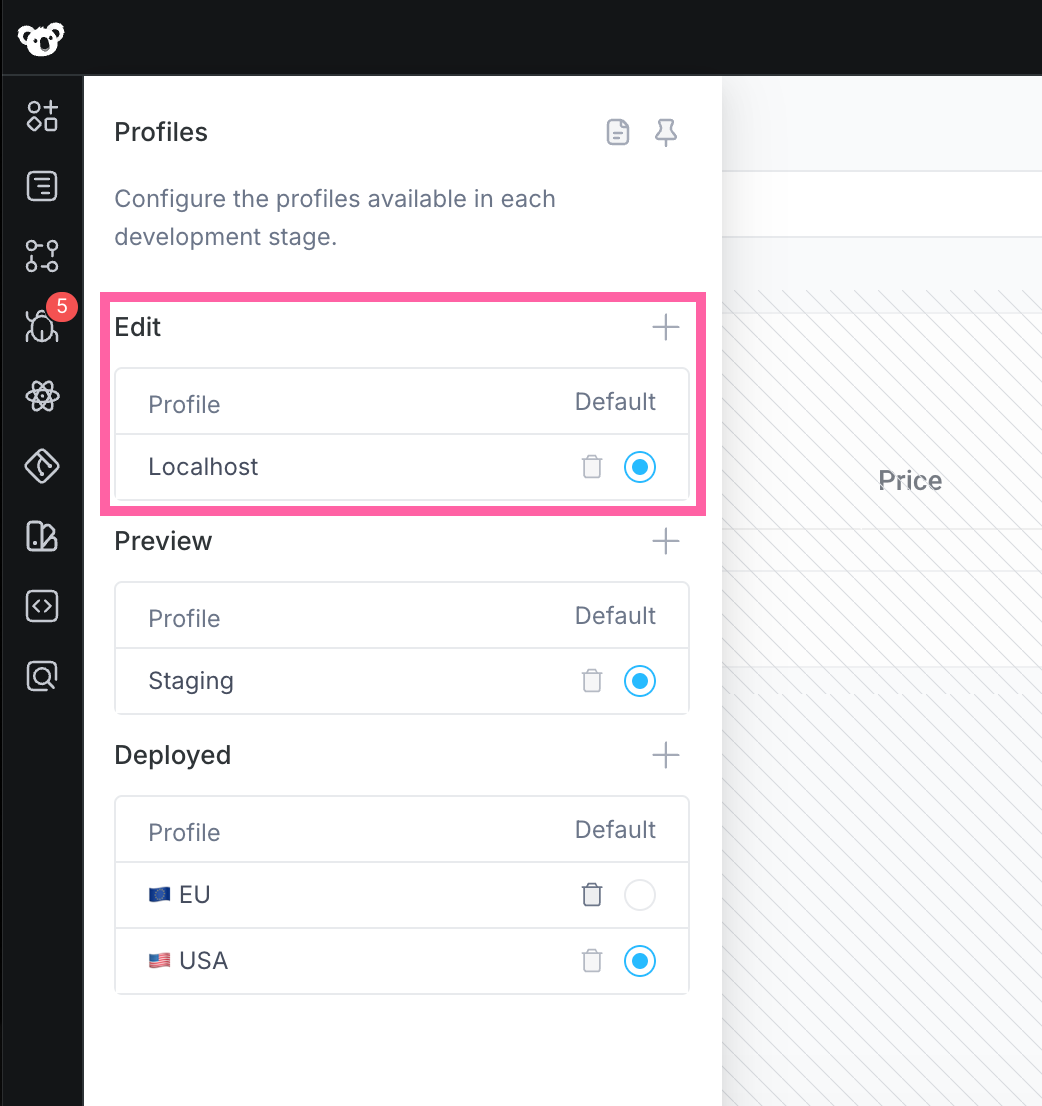
With an agent running and integrations defined, you’re ready to start building. To have Superblocks route API requests to your local agent, just set the default Profile in Edit mode to Localhost.
Localhost and Superblocks SDLC
When creating apps DIY, a typical deployment lifecycle has the following steps:- Make and preview changes on the developer’s computer
- Create a PR and review the changes on a remote test server
- Merge changes and deploy them to remote production server
- Edit: Where developers make and test changes
- Preview: Where users can review changes before they’re deployed
- Deployed: Where end-users access your application
staging, qa, or some other Cloud environment that all reviewers can access.
