Clark AI Prompting Guide
Understanding Prompting in Superblocks
Introduction
Prompting is your primary interface for communicating with Clark through written instructions. Think of it like giving instructions to a skilled developer who can see your screen and build components in real-time but needs clear direction to understand exactly what you want. Clark operates using large language models (LLMs), which means the precision and quality of your prompts directly correlate with the effectiveness of the results you receive.
The fundamental principle: Great prompts = Great Outputs.
Why Prompt Engineering Matters
Effective prompting is the difference between getting basic responses and unlocking Clark's full potential for complex problem-solving. Understanding how to communicate with Clark enables users across all technical backgrounds to achieve significantly better results.
For Developers:
- Generate sophisticated components following specific architectural patterns and design principles
- Debug complex issues using targeted, systematic problem-solving methodologies
- Automate repetitive development tasks through precise, reusable instruction sets
For Non-Technical Users:
- Construct advanced workflows and business processes without requiring coding expertise
- Generate database queries and API integrations using conversational language
- Convert high-level business requirements into functional, deployable applications
Clark has the ability to deliver production-ready, enterprise-grade solutions and this guide will demonstrate how to do that most effectively.
One-Shot vs Iterative Prompting
Use One-Shot When:
- Requirements fit in 2-3 sentences with a single clear outcome
- You have a well-defined task with clear specifications
- Building simple components with straightforward functionality
Use Iterative When:
- Requirements need explanation or have multiple possible approaches
- You're not sure exactly what the end result should look like
- Working on complex features or exploratory development
- You need flexibility to refine and adjust as you build
Best Practice: Start with one-shot for simple, well-defined tasks, then switch to iterative when requirements become unclear or complex. You can also combine both approaches - use one-shot for initial creation, then iterative for improvements and refinements.
Example: Building a Data Table with Filtering
Scenario: We work for Dunder Mifflin paper company and need to build an internal application to manage inventory and sales. The below image is the application we need to build:
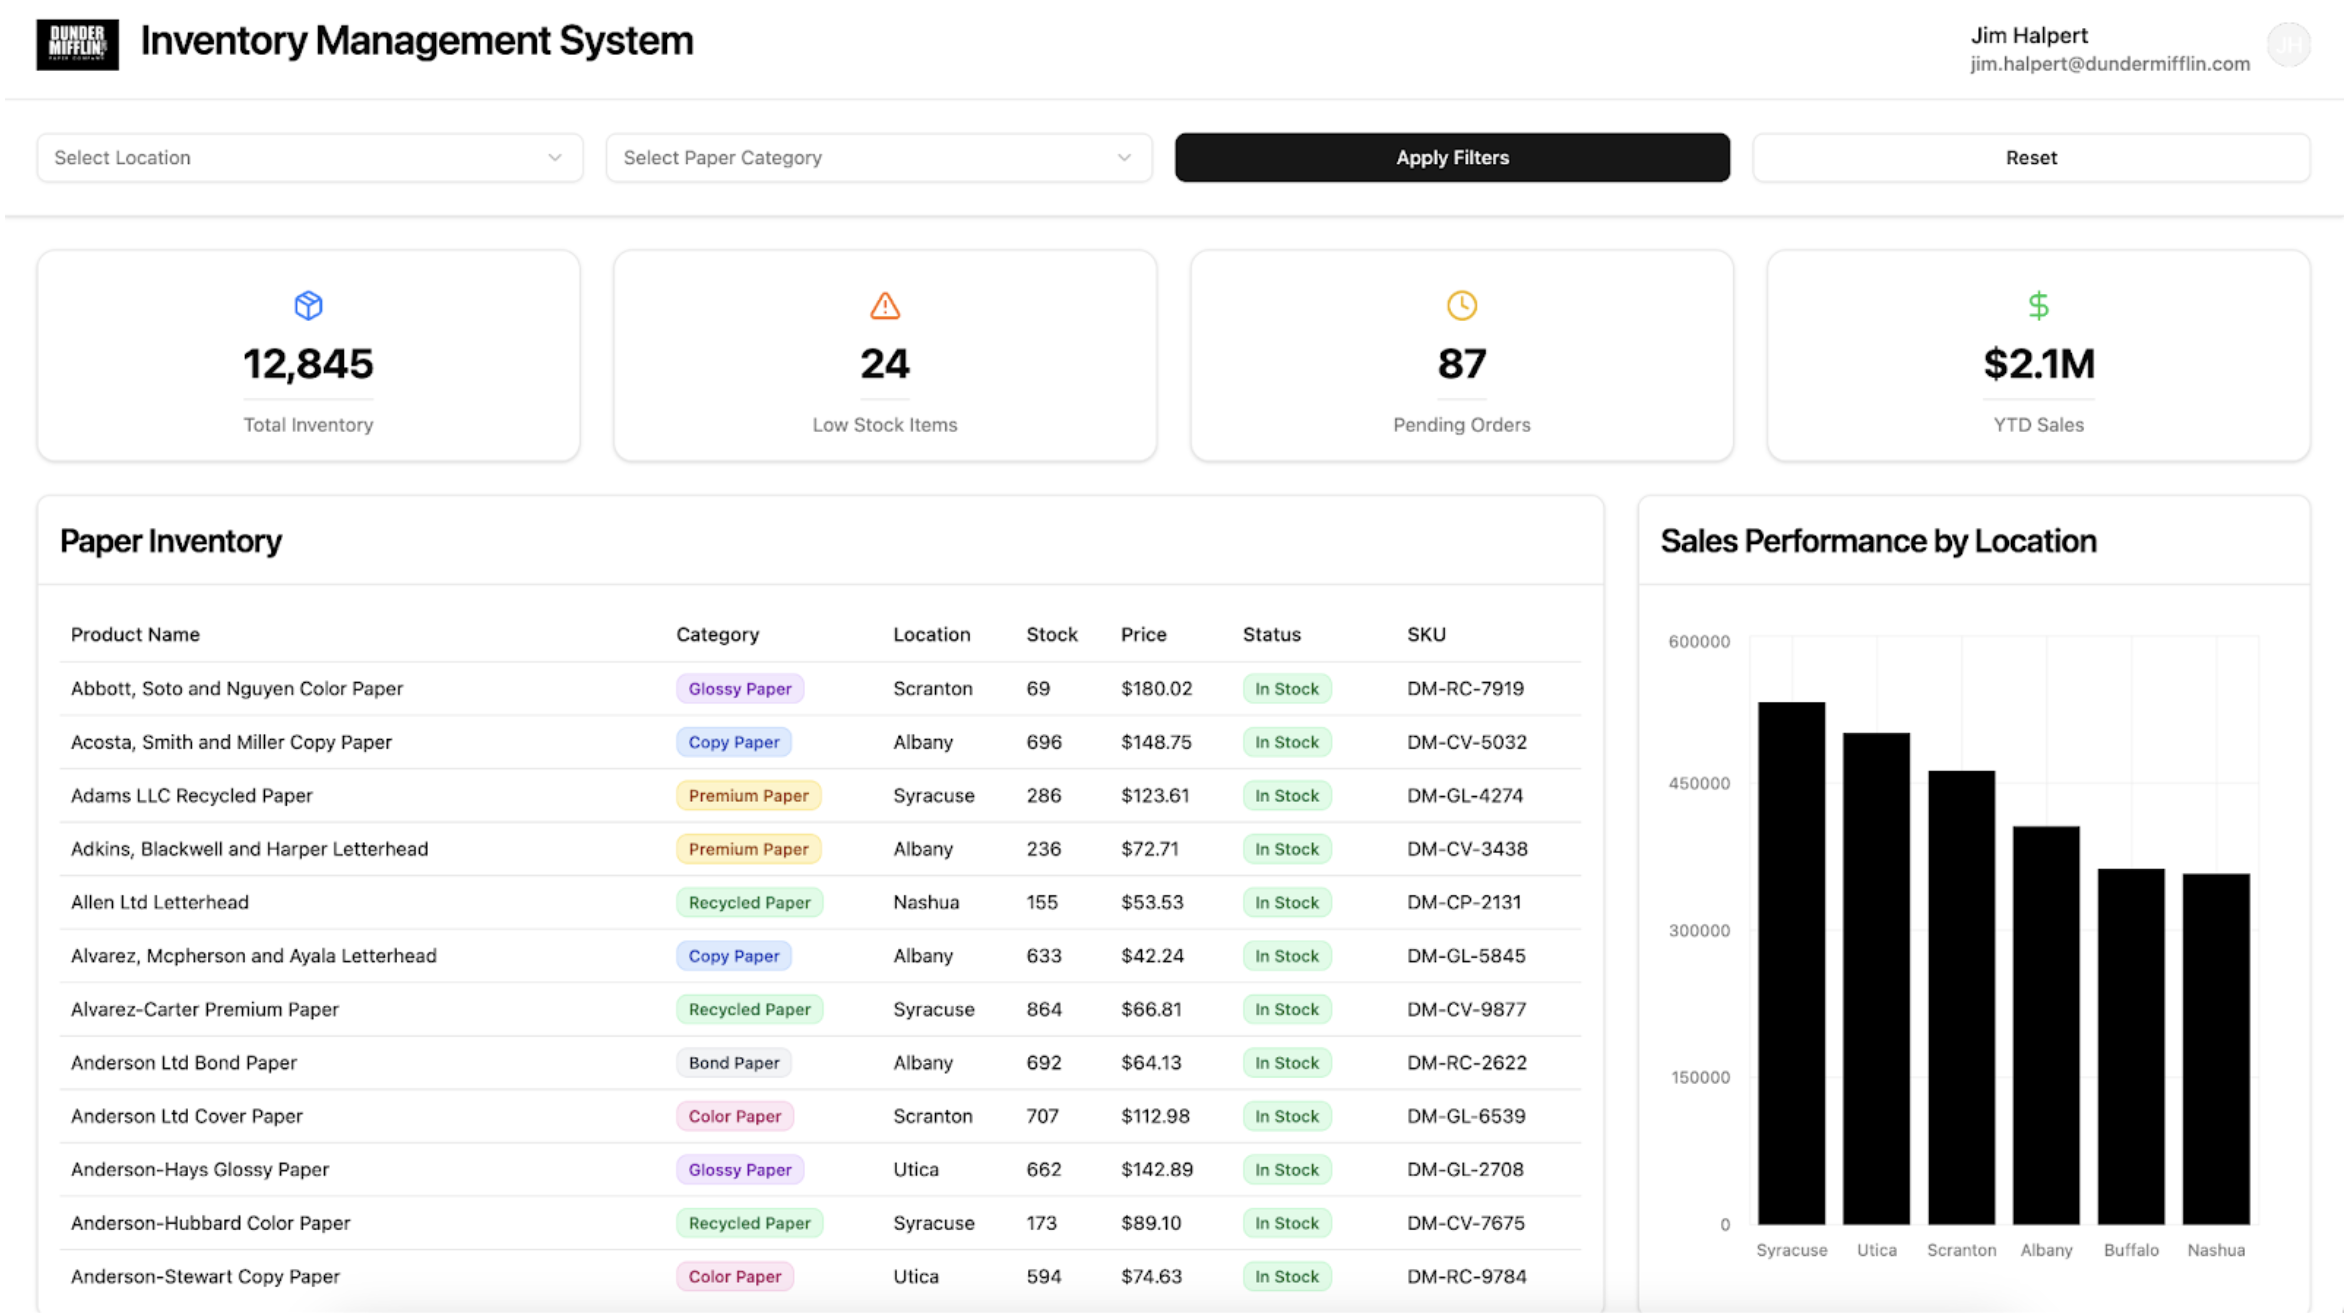
One-Shot Approach
Ask Clark to build the complete data table component all at once, including the header, filter bar, table display and filtering logic in a single comprehensive prompt. This works well when you have a clear vision of the final component and understand exactly how all the pieces should work together.
Iterative Approach
Break the component down into logical building blocks:
Step 1 - Header Section & Filter (UI only)
Break the application into pieces starting with the header and filter bar. Write the prompt to focus only on the UI.
Sample prompt:
Create the Header Section at the top of the application.
  - Include a logo at the top left
  - Next to the company logo include the application name
  - Add user profile component in top right to identify who is currently logged into the app. Include the full name and email address

Underneath the header section, create a filter section with all of the components aligned horizontally:
   - Add dropdowns for location and paper category filtering. Set their width to "Fill Parent"
   - Add "Apply Filters" and "Reset" buttons and set their width to "Fill Parent"
Step 2 - Metric Cards UI (UI only)
Add a simple prompt describing the metric card UI beneath the results in Step 1.
Sample prompt:
Underneath the filter section, create a section with 4 metrics cards.
   - Display the metric card components horizontally
   - In the metrics cards display stats for 'Total Inventory', 'Low Stock Items', 'Pending Orders' and 'YTD Sales'
Step 3 - Data Table & Chart UI (UI only)
Create the main content area with a split layout containing a table and a chart. This will fill the rest of the page. Continue iterating on the UI as needed.
Sample prompt:
Underneath the metric card section, create the main dashboard body:
   - Have the left panel reflect an inventory table (70% width)
   - The right panel to show an analytics chart (30% width)
   - Set the height for both panels to "Fill Parent"
Step 4 - Add Data to the table
Add data to each component using the integrations connected to your Superblocks instance. To add extra context, use the '@' symbol to tag the specific integration you'd like to pull data from.
Sample prompt:
Using the @DunderMifflin integration, create an API to fetch all inventory data and populate the table.
Step 5 - Add logic
Once data is connected, start tying different components together and adding logic to your application. The below example adds filter logic to the table and actions on a button click.
Sample prompt:
When users click "Apply Filters" or select dropdown options, run the API with applied filters. If a filter is 'all', pass along all values.
Why This Iterative Approach Works Better
- Progressive Complexity: Each step builds naturally on the previous one, making it easier to spot issues early and adjust the approach.
- Easier Debugging: When problems arise, you know exactly which piece isn't working rather than debugging a complex component with multiple interconnected systems.
- Flexibility: You can change direction between steps if you realize a different filtering approach would work better after seeing the table in action.
- Better Testing: You can test each component piece individually to ensure it works correctly before adding the next layer of complexity.
- Frontend-First Development: Clark builds the visual interface first, allowing you to see and understand how components fit together. Once the layout and user experience are solid, the underlying logic becomes easier to implement correctly.
Tips and Tricks
Adding images to prompts
Detailed prompts yield better results and images take this even further. Include a screenshot or wireframe to convey layout, hierarchy and component states. To an LLM, a picture really is worth a thousand words. When you add an image, briefly specify what to focus on (e.g., filters, metrics, table columns) so Clark extracts the right details.
Click the image icon when prompting to upload an image.
Targeting specific components and APIs
Targeting specific components, APIs and data sources in your prompt significantly improves Clark’s accuracy. When making iterative changes, target relevant items as often as possible. Use the methods below.
Tagging the frontend
Add UI components to your prompt in either of these ways:
- Hover over a component and click the Target button.
- Or click the Target button in the chat sidebar to enable target mode, then click components to add them.
Tagging a backend API
Add a backend API to your prompt by opening the API, clicking the three-dot menu, then selecting "Add to chat."

Tagging a data source
Add a data source by opening the integration, clicking the three-dot menu, then selecting "Add to chat." You can also reference it directly with @IntegrationName (e.g., @DunderMifflin).

Discarding Clark outputs
Discarding a generation can feel counterintuitive but it often saves time. When Clark’s output misses your intent — due to missing detail or a model hallucination — use the Discard button to revert to the previous state. This gives you a clean baseline and a clearer path to add the right context for a more accurate next iteration.
Note: A hallucination is confident sounding output that’s actually incorrect. When generating an application or API, this will result in an output different from what the prompt asked for.
Using Rollbacks and Commits
Rollbacks let you restore the app to any previous generation. Clark automatically creates a rollback after each generation. Open the History/Rollbacks panel, choose a version and confirm to restore.
Commits can be added after milestones during the building journey. This establishes clear progress in development and can be rolled back to if needed.
