> ## Documentation Index
> Fetch the complete documentation index at: https://docs.superblocks.com/llms.txt
> Use this file to discover all available pages before exploring further.
# Local development
> Connect to local development servers while developing in the Superblocks editor
export const Alert = ({type, title, children}) => {
const getIcon = () => {
switch (type) {
case 'info':
return "data:image/svg+xml,%3Csvg xmlns='http://www.w3.org/2000/svg' width='20' height='20' viewBox='0 0 20 20' fill='none'%3E%3Cpath d='M10 0C4.477 0 0 4.477 0 10s4.477 10 10 10 10-4.477 10-10S15.523 0 10 0zm0 15c-.552 0-1-.448-1-1s.448-1 1-1 1 .448 1 1-.448 1-1 1zm1-3H9V6h2v6z' fill='%230099FF'/%3E%3C/svg%3E";
case 'success':
return "data:image/svg+xml,%3Csvg width='20' height='20' viewBox='0 0 20 20' fill='none' xmlns='http://www.w3.org/2000/svg'%3E%3Cpath fill-rule='evenodd' clip-rule='evenodd' d='M10 0C4.477 0 0 4.477 0 10s4.477 10 10 10 10-4.477 10-10S15.523 0 10 0zm4.293 6.293L9 11.586 5.707 8.293c-.391-.391-1.024-.391-1.414 0s-.391 1.024 0 1.414l4 4c.391.391 1.024.391 1.414 0l6-6c.391-.391.391-1.024 0-1.414s-1.024-.391-1.414 0z' fill='%230CC26D'/%3E%3C/svg%3E";
case 'warning':
return "data:image/svg+xml;charset=utf-8;base64,PHN2ZyB4bWxucz0naHR0cDovL3d3dy53My5vcmcvMjAwMC9zdmcnIHhtbDpzcGFjZT0ncHJlc2VydmUnIHdpZHRoPScxMDgwJyBoZWlnaHQ9JzEwODAnPjxyZWN0IHdpZHRoPScxMDAlJyBoZWlnaHQ9JzEwMCUnIGZpbGw9J3RyYW5zcGFyZW50Jy8+PHBhdGggZD0nTTEzLjc5NCAxMC43NSA4LjMgMS4yNWExLjUgMS41IDAgMCAwLTIuNiAwbC01LjQ5NCA5LjVBMS40OTQgMS40OTQgMCAwIDAgMS41IDEzaDExYTEuNDkzIDEuNDkzIDAgMCAwIDEuMjk0LTIuMjVNNi41IDUuNWEuNS41IDAgMCAxIDEgMFY4YS41LjUgMCAwIDEtMSAwek03IDExYS43NS43NSAwIDEgMSAwLTEuNS43NS43NSAwIDAgMSAwIDEuNScgc3R5bGU9J3N0cm9rZTpub25lO3N0cm9rZS13aWR0aDoxO3N0cm9rZS1kYXNoYXJyYXk6bm9uZTtzdHJva2UtbGluZWNhcDpidXR0O3N0cm9rZS1kYXNob2Zmc2V0OjA7c3Ryb2tlLWxpbmVqb2luOm1pdGVyO3N0cm9rZS1taXRlcmxpbWl0OjQ7ZmlsbDojZmY5ZjM1O2ZpbGwtcnVsZTpub256ZXJvO29wYWNpdHk6MScgdHJhbnNmb3JtPSd0cmFuc2xhdGUoLjAyIDE5LjMwNSlzY2FsZSg3Ny4xNCknLz48L3N2Zz4=";
case 'danger':
return "data:image/svg+xml,%3Csvg width='20' height='20' viewBox='0 0 20 20' fill='none' xmlns='http://www.w3.org/2000/svg'%3E%3Cpath d='M10 0C4.477 0 0 4.477 0 10s4.477 10 10 10 10-4.477 10-10S15.523 0 10 0zm5.707 4.293L10 9.586 4.293 4.293c-.391-.391-1.024-.391-1.414 0s-.391 1.024 0 1.414L8.586 11l-5.707 5.293c-.391.391-.391 1.024 0 1.414s1.024.391 1.414 0L10 12.414l5.707 5.293c.391.391 1.024.391 1.414 0s.391-1.024 0-1.414L11.414 11l5.707-5.293c.391-.391.391-1.024 0-1.414s-1.024-.391-1.414 0z' fill='%23F45252'/%3E%3C/svg%3E";
case 'note':
return "data:image/svg+xml,%3Csvg xmlns='http://www.w3.org/2000/svg' width='20' height='20' viewBox='0 0 20 20' fill='none'%3E%3Cpath d='M10 0C4.477 0 0 4.477 0 10s4.477 10 10 10 10-4.477 10-10S15.523 0 10 0zm0 15c-.552 0-1-.448-1-1s.448-1 1-1 1 .448 1 1-.448 1-1 1zm1-3H9V6h2v6z' fill='%230099FF'/%3E%3C/svg%3E";
default:
return "";
}
};
return
{title &&
{title}
}
{children}
;
};
Who can use this feature?
Local development can only be used by organizations that self-host the Superblocks data plane using the Hybrid or Cloud-Prem architectures.
When building applications, it can be useful to access databases or APIs that are running locally to help speed up development and testing. This lets you:
* Quickly make changes to REST APIs to return data needed for your app
* Access new database schemas and update queries while those schemas are in development
* Debug cross-service errors by setting breakpoints in downstream services
Superblocks makes accessing datasources in any environment (including on your local machine) as easy as clicking a button, by using [data tags](/development-lifecycle/build/data-tags).
This guide provides a brief overview of [how Superblocks executes APIs](#architecture), [how to configure your organization](#set-up) so your team can access locally hosted services while developing, and where local development fits into [Superblocks SDLC](#localhost-and-superblocks-sdlc).
## Architecture
When building Superblocks Apps, you can think of the architecture as being similar to that of microservices. When a Superblocks API is run, a request is sent by the user's browser to the [Agent service](/enterprise/hybrid-architecture/overview). The agent then connects to other services (Integrations) to get data, before returning the results back to the browser.

Usually agents are deployed to central cloud environments that all developers can access. When deployed in this fashion, the agent can only access other services in that environment or on public networks (e.g. Slack's API).
For local development however, the agent will need to access ports on the local machine, which can be accomplished by running the agent locally. With local agents running, you can then update your Integrations to include a local configuration so the agent knows how to connect to the locally running APIs/Databases.
## Set up
### 1. Create a Localhost data tag
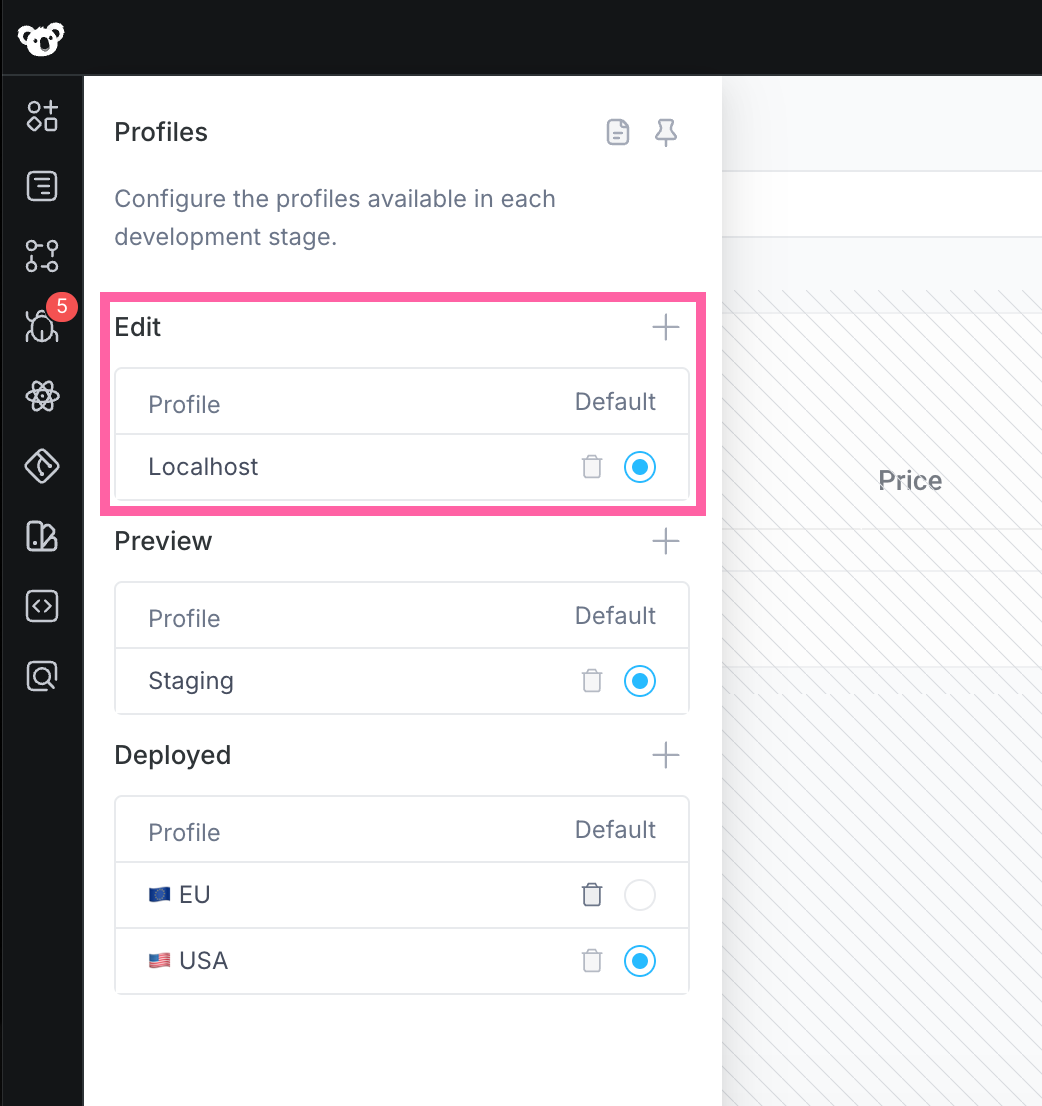
To route API execution requests from the browser to a locally hosted agent, we'll use data tags. Define a new **Localhost** data tag and assign it to the **Edit** environment. When this data tag is selected in the Editor, Backend API requests will be sent from the developer's browser to the local agent to execute.
To create the data tag:
1. Click your avatar in the upper-left corner of the home page and click **Organization Settings**
2. Click [**Environments**](https://app.superblocks.com/environments)
3. Click **Add Data Tag**
4. Name the new data tag **Localhost**, assign it to the **Edit** environment, and click **Create**
Note that this data tag will be used by all developers on your account. When the application editor is set to use this data tag, API requests will only run if an agent is running at localhost:8000 on the developer's machine.
### 2. Deploy the agent locally
Now that you have a data tag defined for local development, you're ready to deploy an agent to your local machine. To do so:
1. Create an **Agent key** on the [Access Tokens](/admin/org-administration/auth/access-tokens#create-an-access-token) page
2. Run the following command, replacing `{AGENT_KEY}` with the token you just generated
```bash theme={null}
curl -s https://charts.superblocks.com/agent/compose.yaml | \
SUPERBLOCKS_AGENT_KEY="{AGENT_KEY}" \
SUPERBLOCKS_AGENT_HOST_URL="http://localhost:8080" \
SUPERBLOCKS_AGENT_TAGS="profile:localhost" \
SUPERBLOCKS_DOCKER_AGENT_TAG="latest" \
SUPERBLOCKS_AGENT_DATA_DOMAIN="app.superblocks.com" \
docker compose -p superblocks -f - up
```
Note: Each developer that's contributing to an Application using the Localhost data tag will need to follow these instructions to run an agent on their machine.
It is encouraged that all developers run the agent on the same port. To make this simple and scalable, it's good practice to create a shared .env file/start up script that developers can use when configuring their machine to run the agent.
### 3. Configure integrations to connect to local datasources
With the agent running, Integrations can now connect to locally hosted services. To configure an integration to connect to a local service:
1. Go to the [**Integrations**](https://app.superblocks.com/integrations) page and select the integrations developers can connect to locally
2. Click on the ellipsis menu followed by **Manage**
3. Click the **+** icon to add a new configuration and select **Localhost** as the data tag
4. Fill out the configuration form with the values needed to connect to the local server/database and click **Save**
Instead of setting host addresses to localhost be sure to set host.docker.internal
#### Per-developer configuration
Not sure what ports your developers will run local servers/databases on? No problem. You can use [Environment Variables](/enterprise/hybrid-architecture/extend/storing-environment-variables) to define the host/port/base URL/etc to use when connecting.
For example, the following Integration uses an environment variable called `ORDERS_API_PORT` to define the localhost port where the server is running.
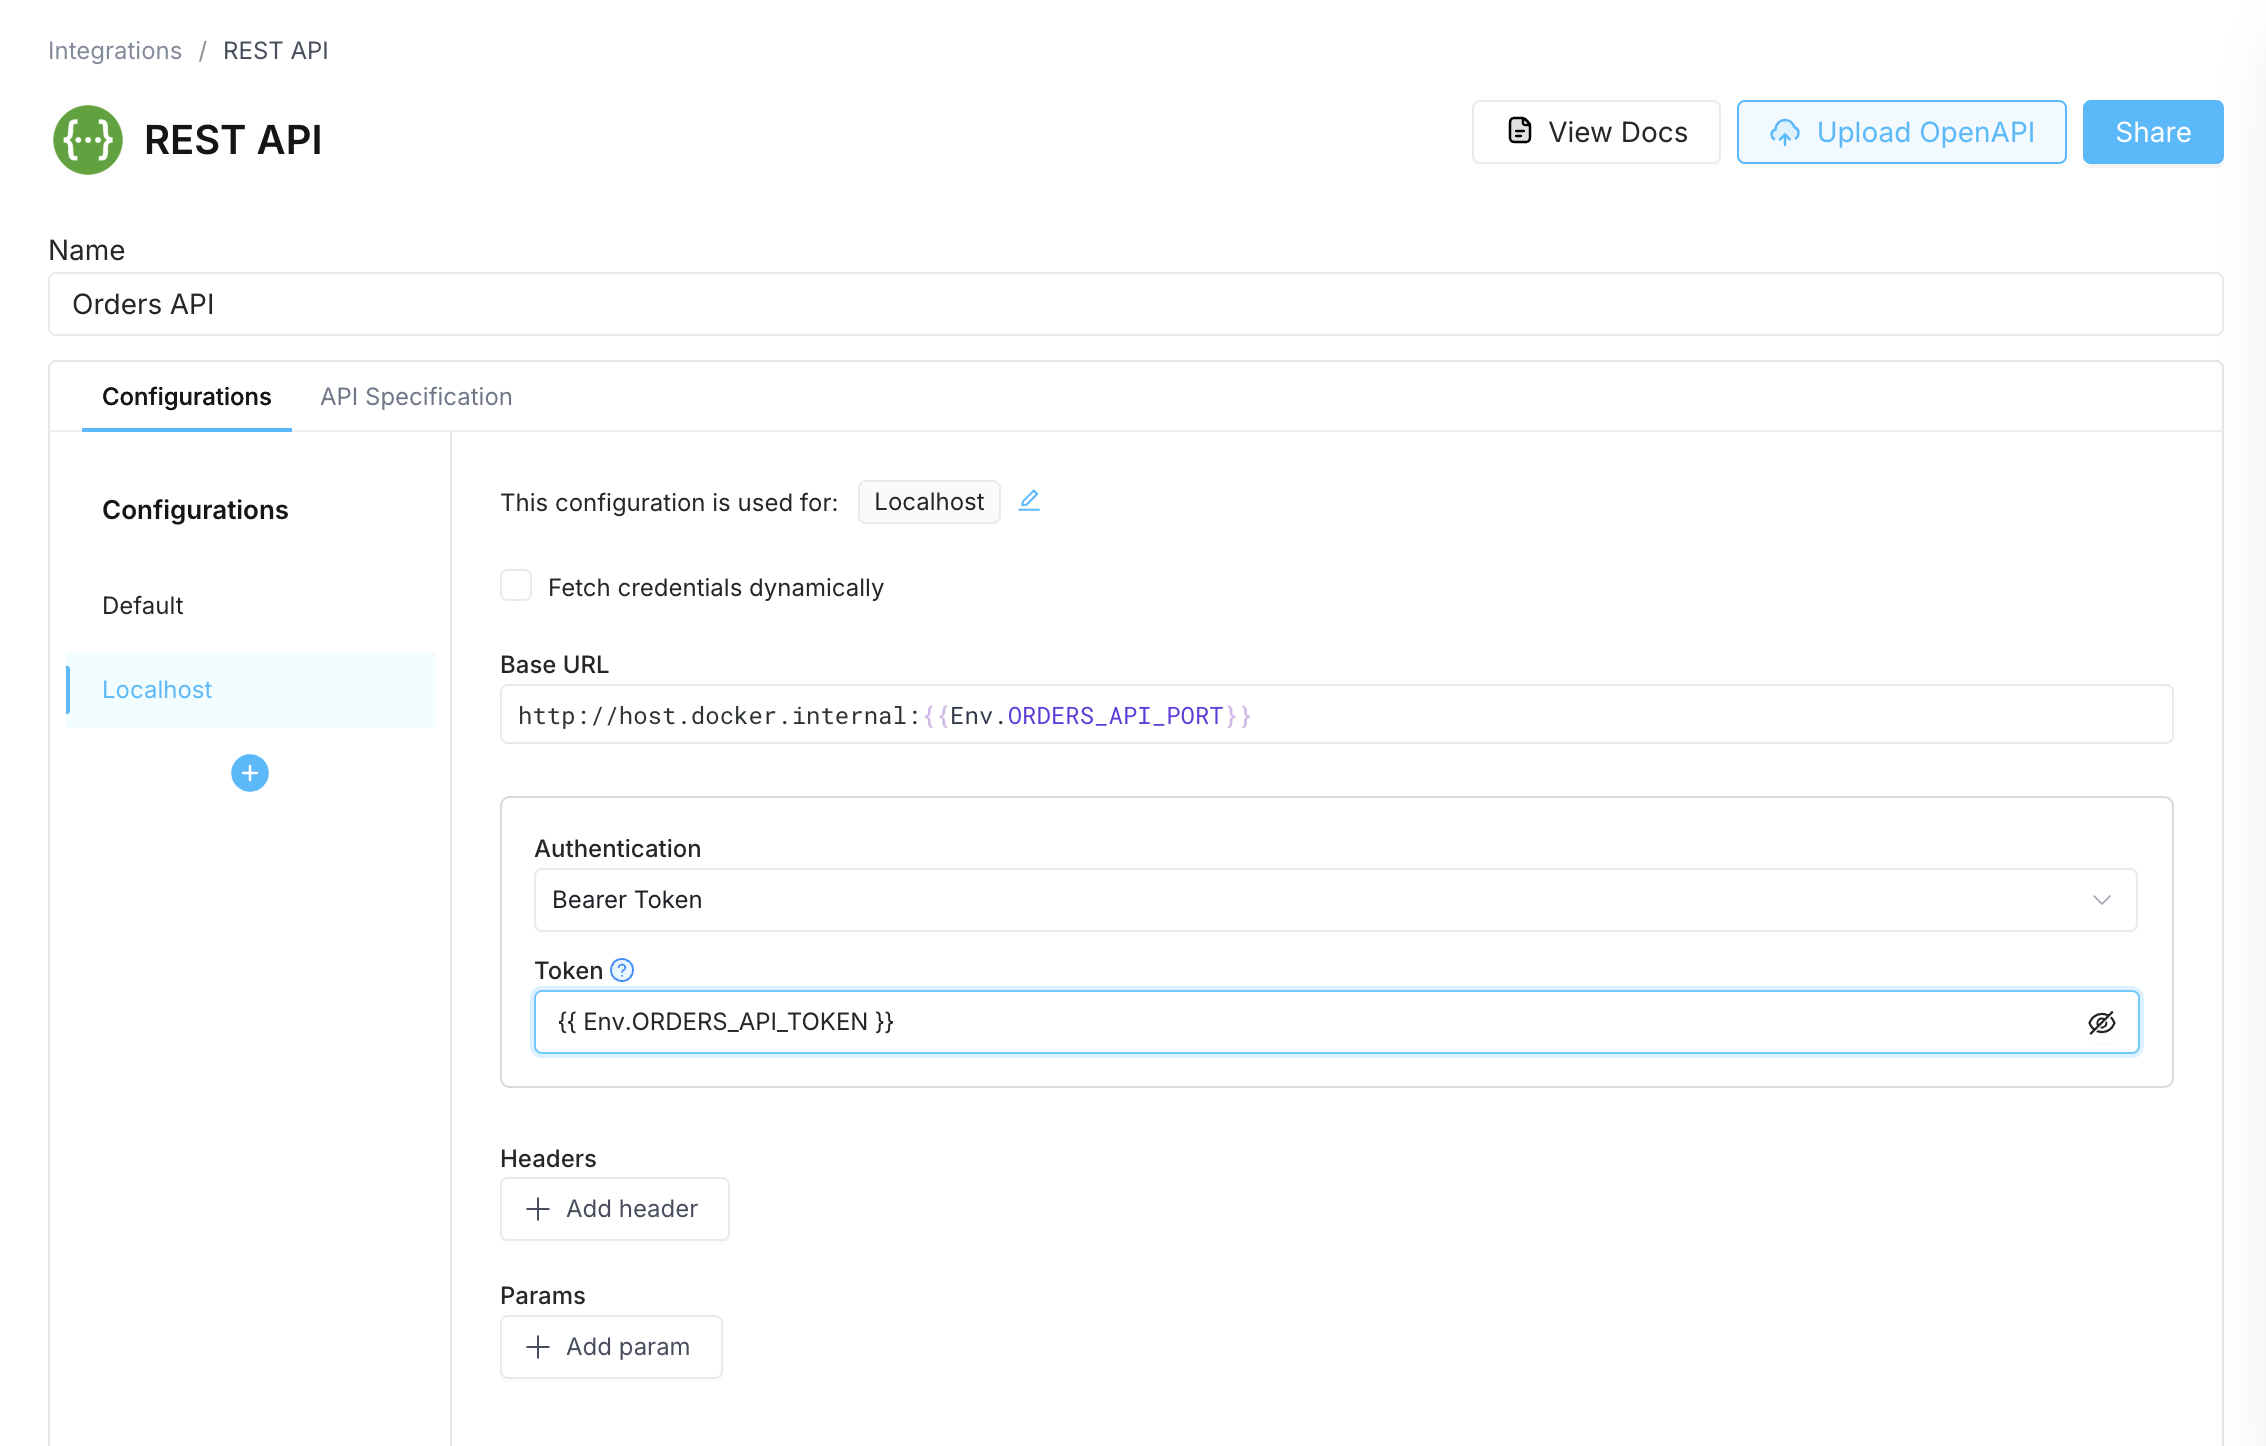
When defining variables in this way, each developer can set the environment variable to the port they use on their machine.
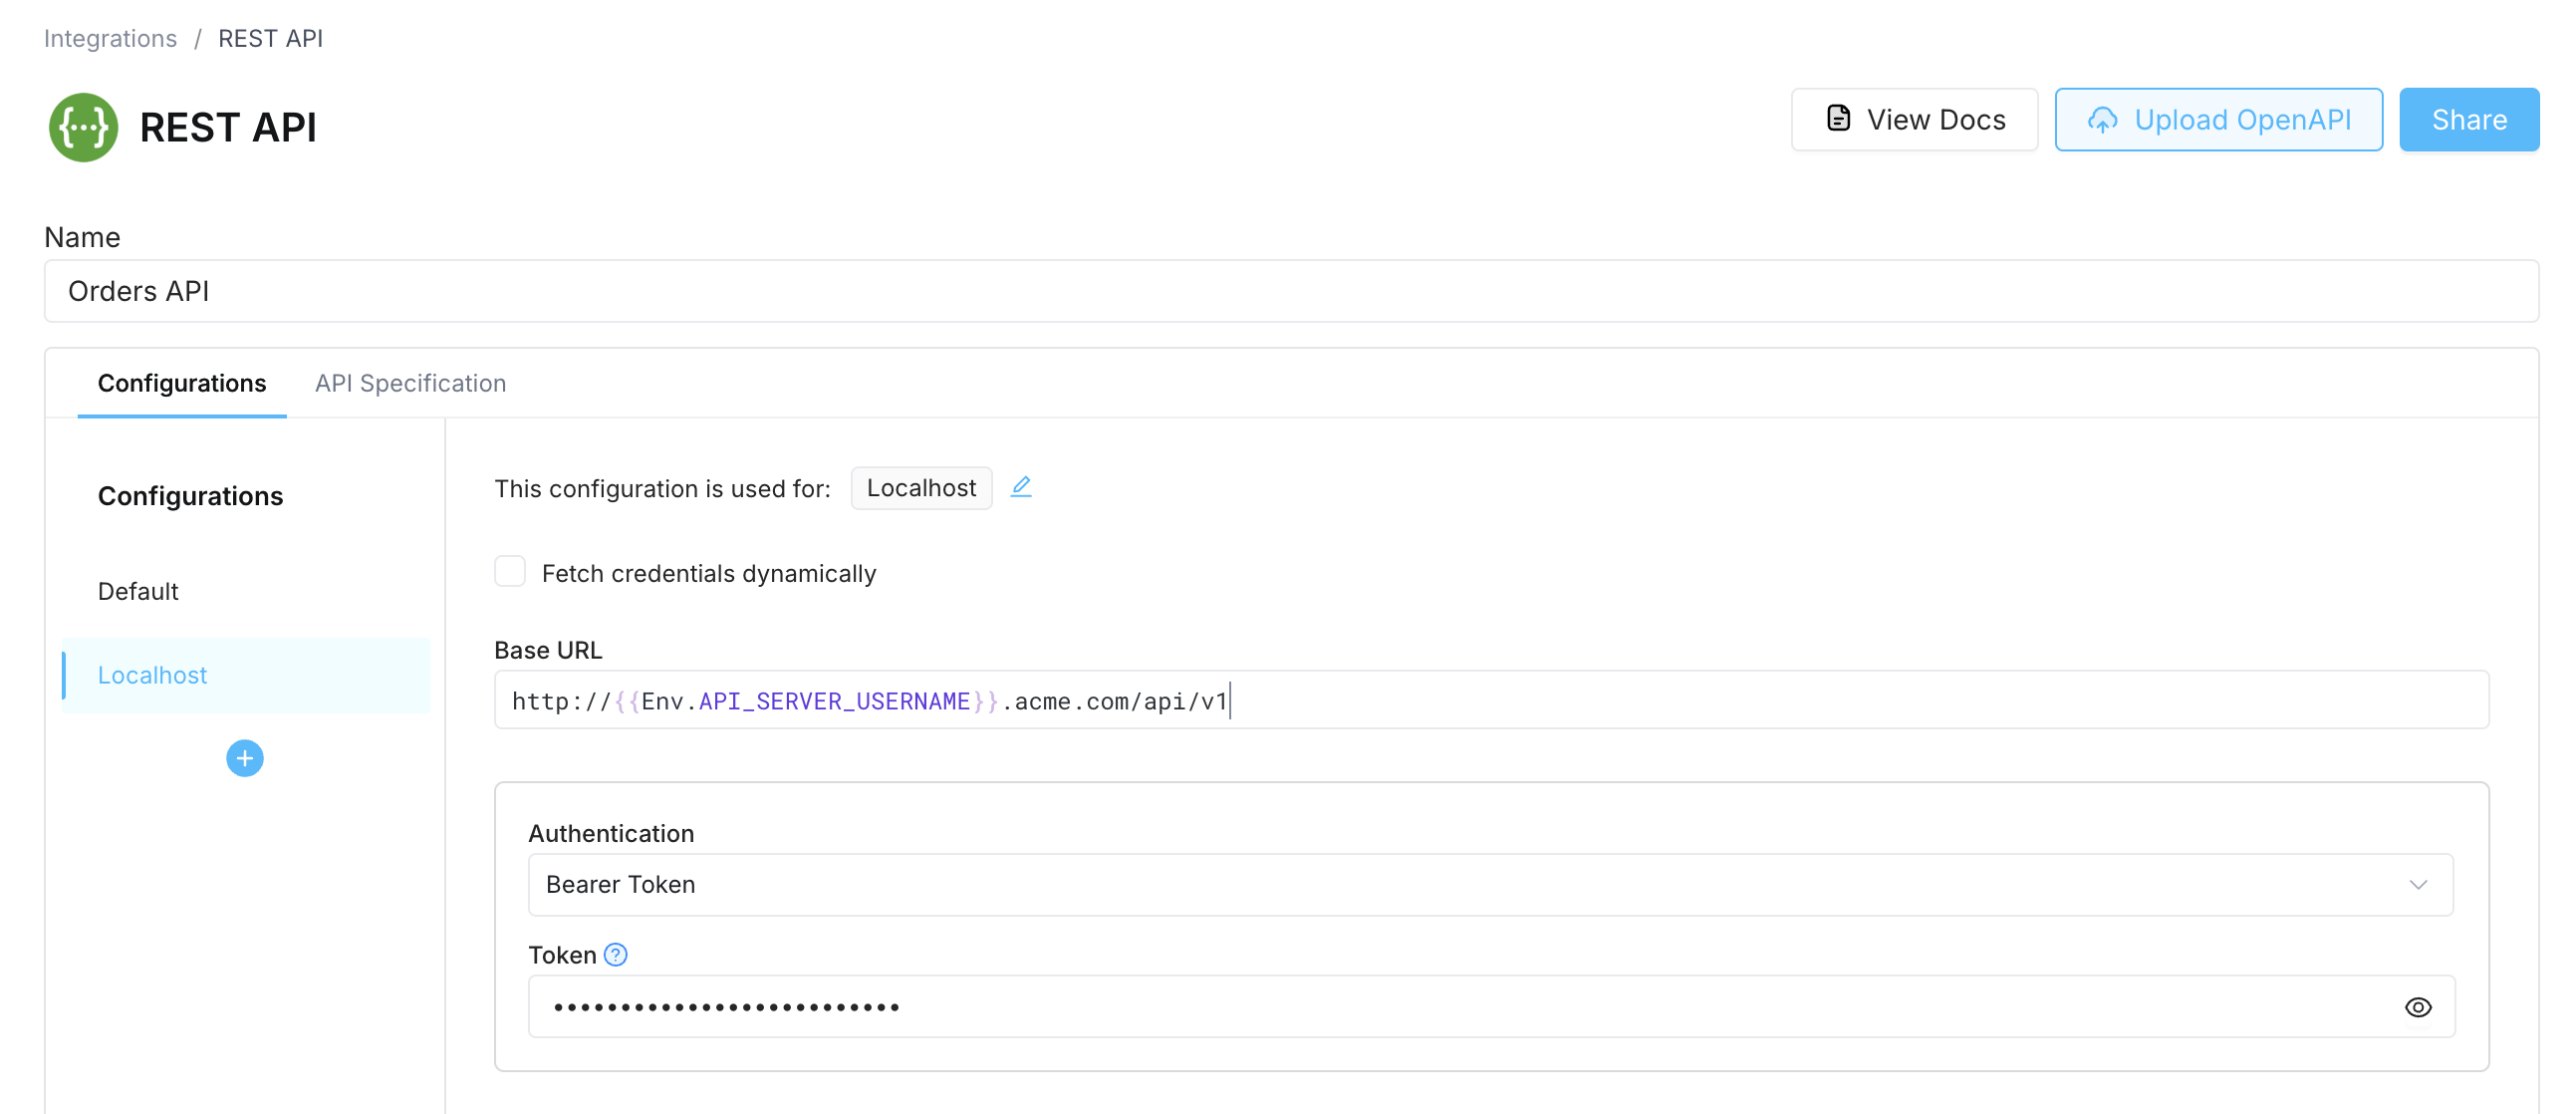
You can also use this if each of your developers has their own Cloud environment. Let's say for example that each developer has an API server running at `https://{username}.acme.com/api/v1`. You can create an `SUPERBLOCKS_AGENT_APP_ENV_API_SERVER_USERNAME` variable that each developer will set so that the API's base URL will update dynamically based on the developer executing the API.
### 4. Use localhost in the editor
With an agent running and integrations defined, you're ready to start building. To have Superblocks route API requests to your local agent, just set the default data tag in Edit mode to **Localhost**.
## Localhost and Superblocks SDLC
When creating apps DIY, a typical deployment lifecycle has the following steps:
* Make and preview changes on the developer's computer
* Create a PR and review the changes on a remote test server
* Merge changes and deploy them to a remote production server
In Superblocks, you have a similar lifecycle using three built-in Development Environments:
* **Edit**: Where developers make and test changes
* **Preview**: Where users can review changes before they're deployed
* **Deployed**: Where end-users access your application
Each environment can be connected to one or more [data tags](/development-lifecycle/build/data-tags) so you can access databases and APIs that correspond to the phase of development being done in Superblocks.
Local services should generally only be accessed in the **Edit** environment since they are developer specific.
Once you're ready for someone else to review your changes, [create a commit](/development-lifecycle/version-control/superblocks-sdlc#commit). Each commit generates a unique URL called a [Commit Preview](/development-lifecycle/version-control/superblocks-sdlc#commit-previews) that you can share with your team to review. These URLs use the **Preview** environment, which should be set to access a data tag like `staging`, `qa`, or some other Cloud environment that all reviewers can access.